|
Markino
|
 |
« Reply #225 on: July 08, 2014, 12:49:37 PM » |
|
Hello guys, I realized some little update on the LaGG, propeller and spinner. I have made them by coaxial brass pipes to have a propeller really spins. 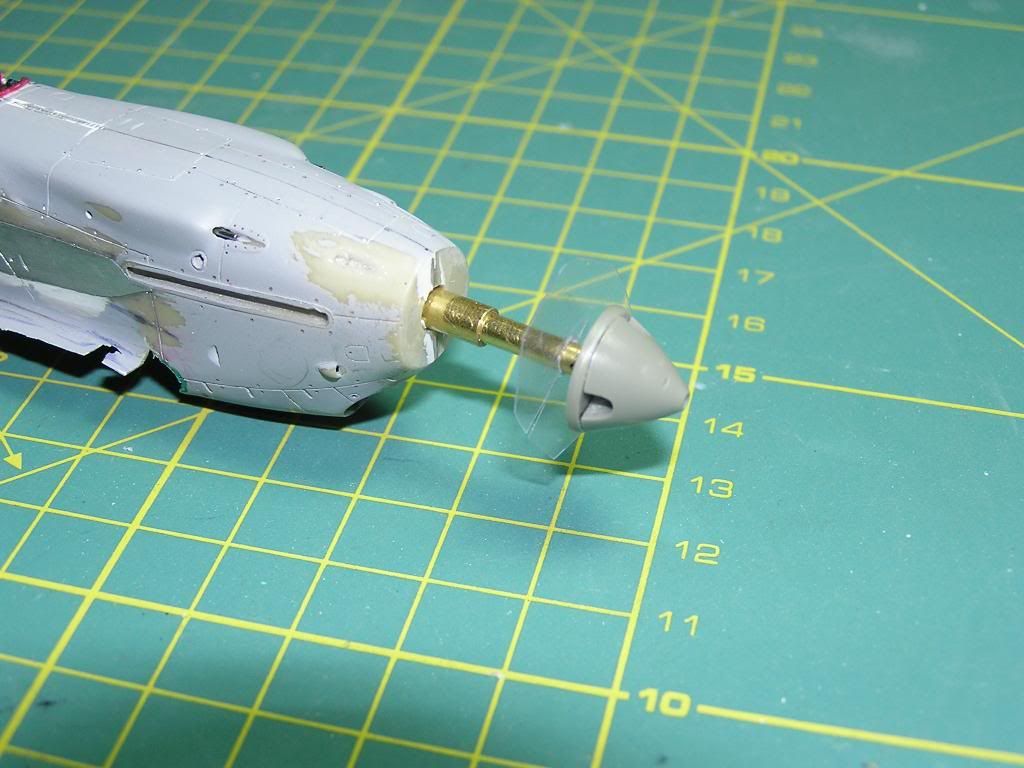 The transparent disk, made by acetate give a gap between fuselage and propeller. When it will get out the propeller will have a little gap to spin. Spinner, shaft and propeller blades. 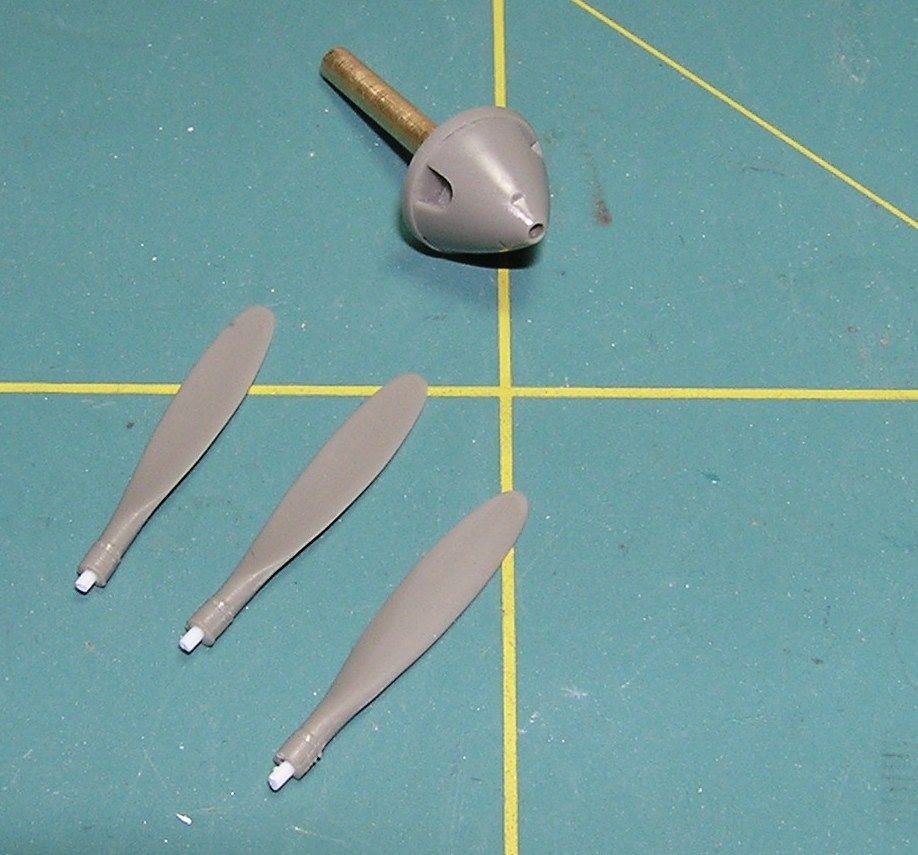 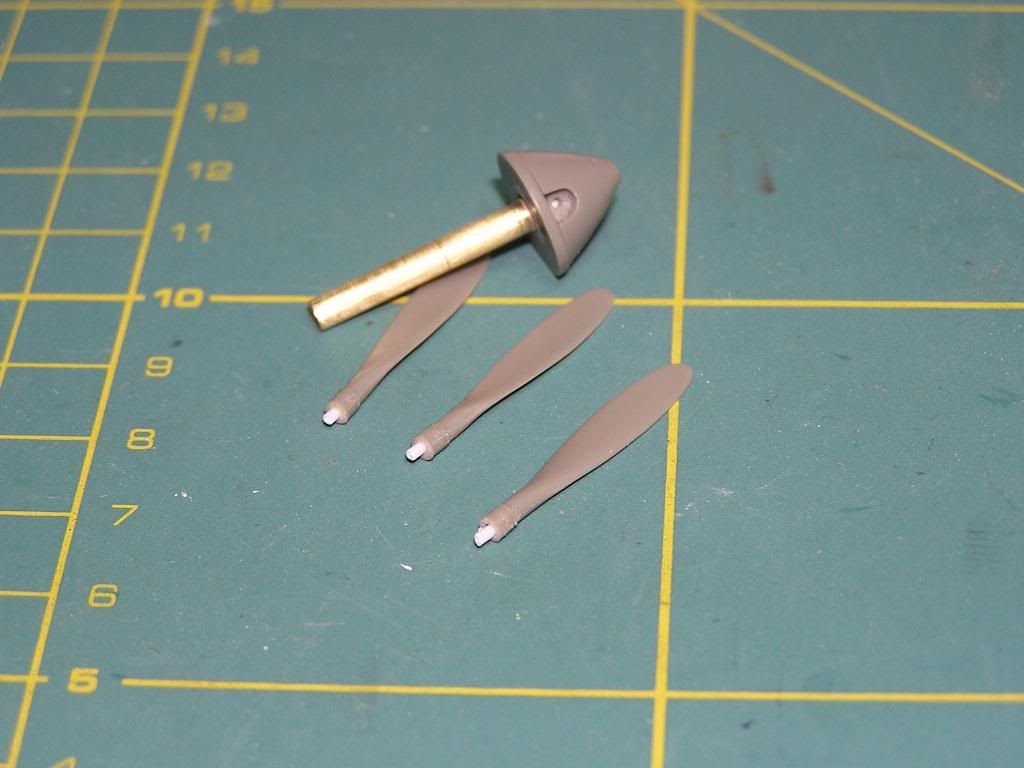 Some dry tests to verify before set all. 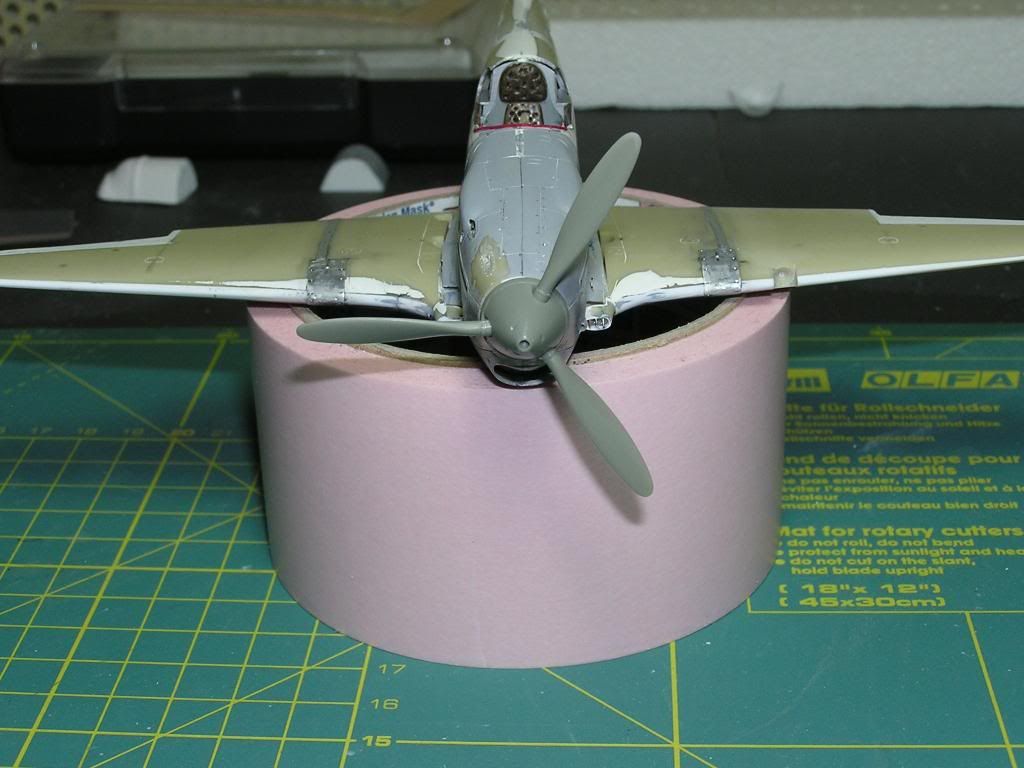  Before set the propeller I must to rebuild the little mouth in front of oil cooler, then I can assemble the propeller; unfortunately I wrong the first attempt to rebuild it and I made it too wide.... After I will ready to assemble the wing and the fuselage. Stay tuned for next updates...  . Ciao!! Marco |
|
|
|
« Last Edit: July 08, 2014, 12:52:21 PM by Markino »
|
 Logged
|
"If you want to get what you want
you need to get rid of the need."
|
|
|
|
Markino
|
|
« Reply #226 on: September 10, 2014, 06:05:45 PM » |
|
Hi guys, work has continued and now the eternal LaGG also has a pair of wings that give it a certain aeronautic appearance, not bad for the subject ... The template used to put to measure the wing with the fuselage: 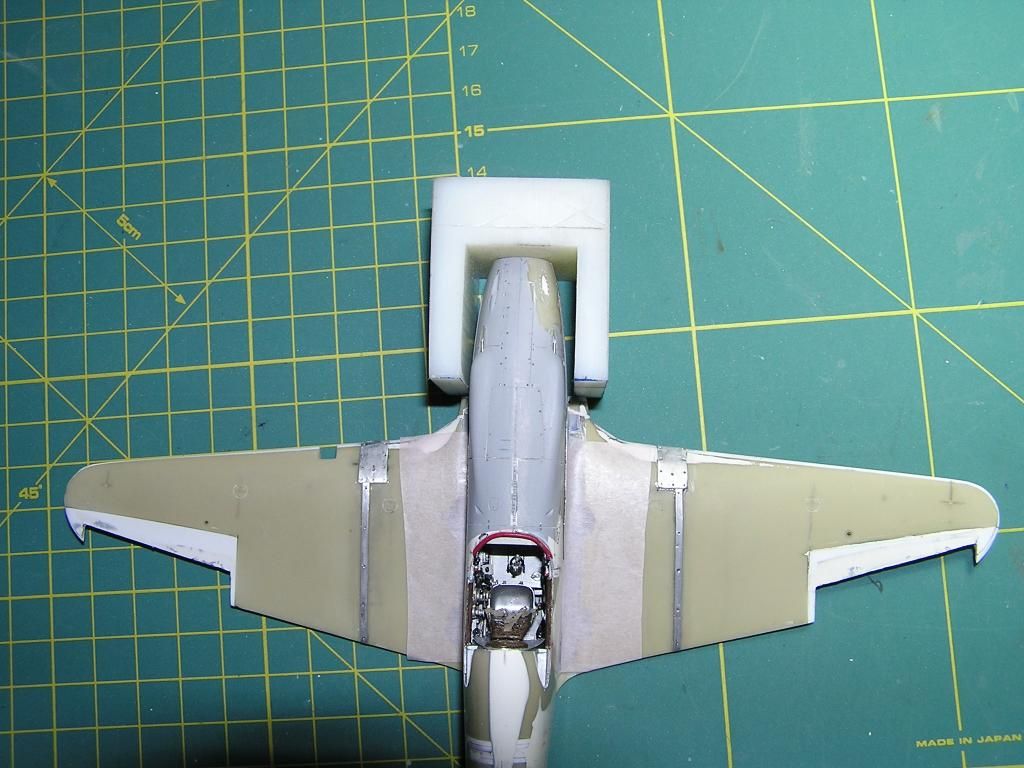  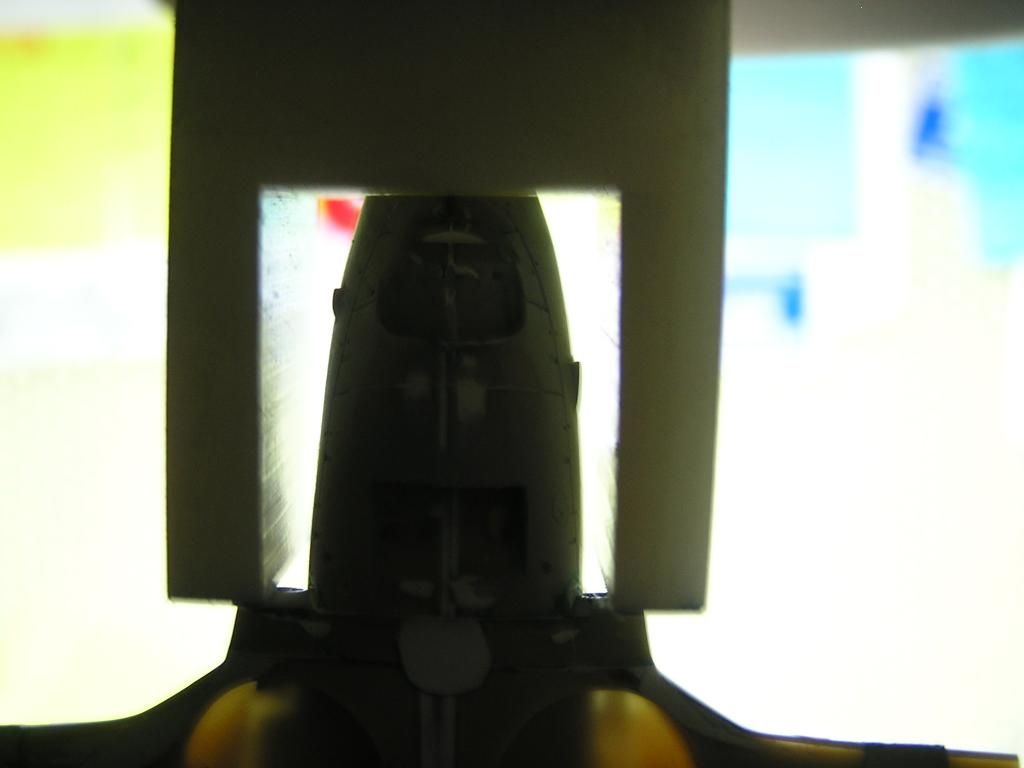 Main wing glued: 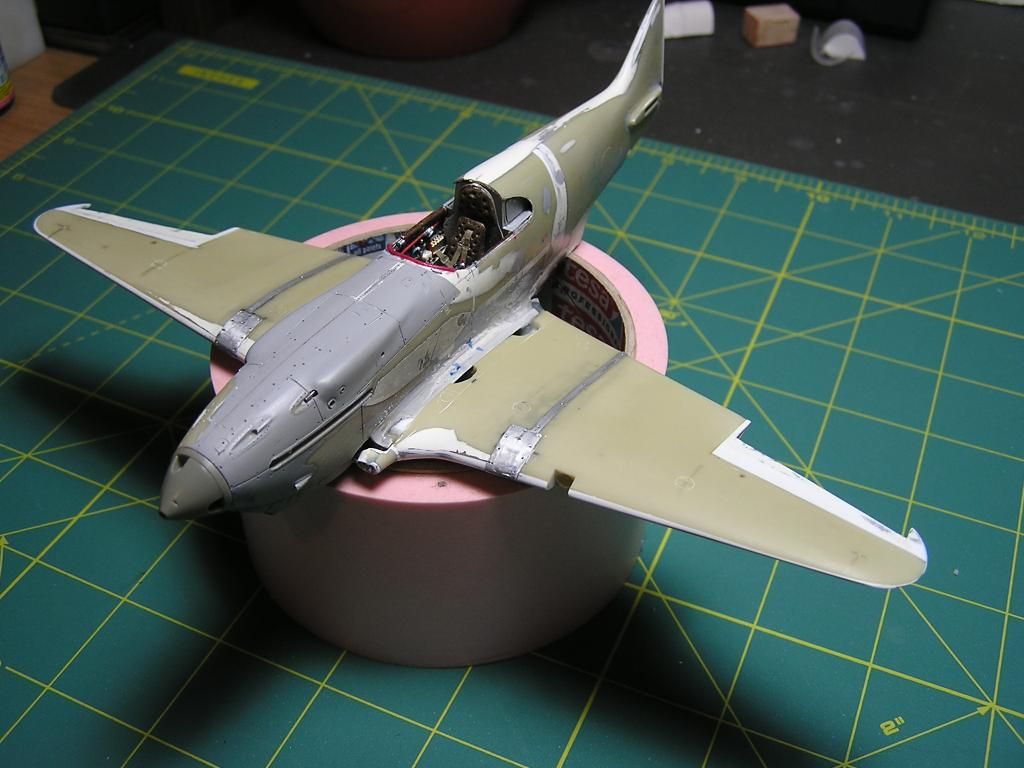 Puttied wing, with sanded carburetor air intakes in right form: 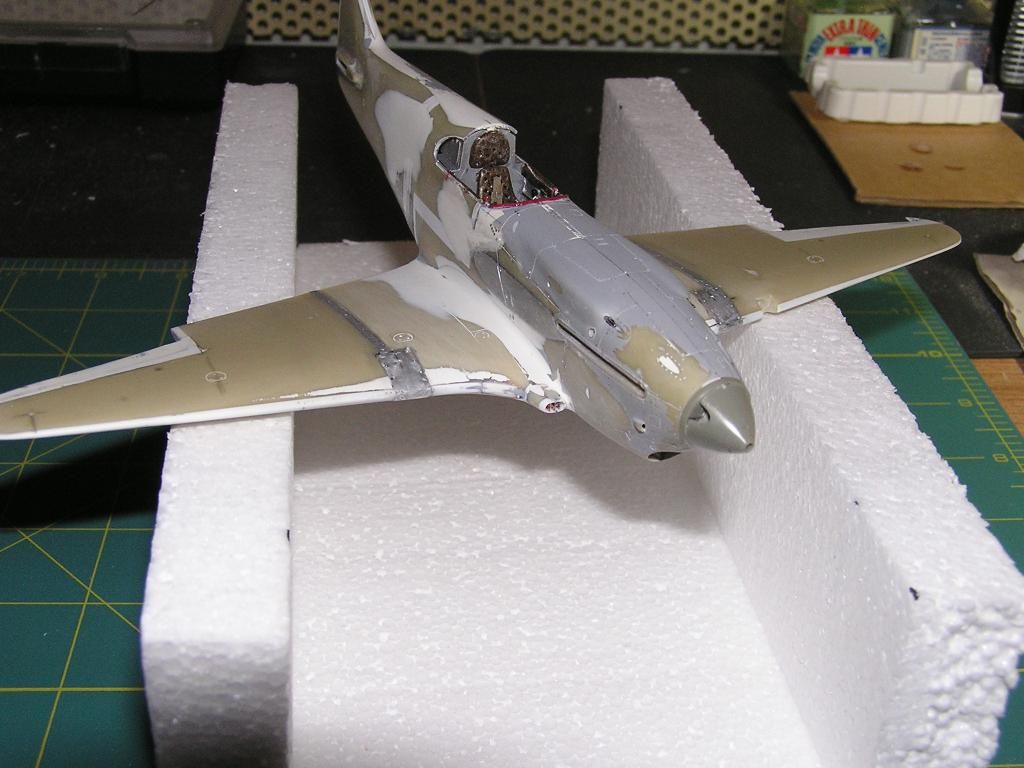 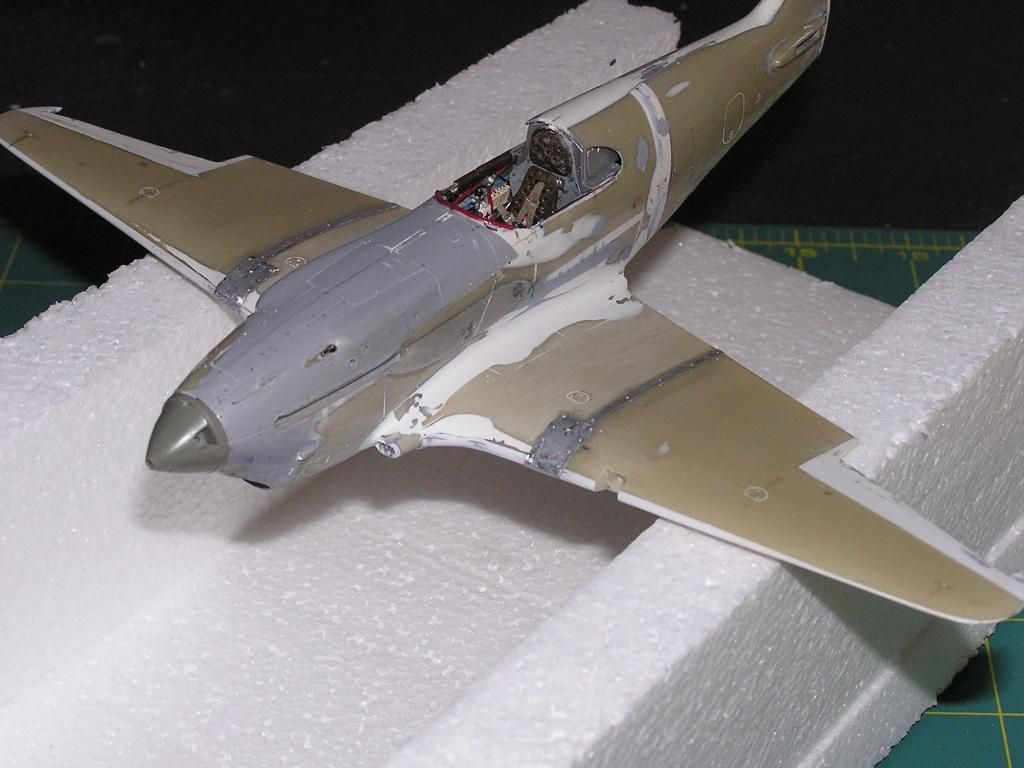 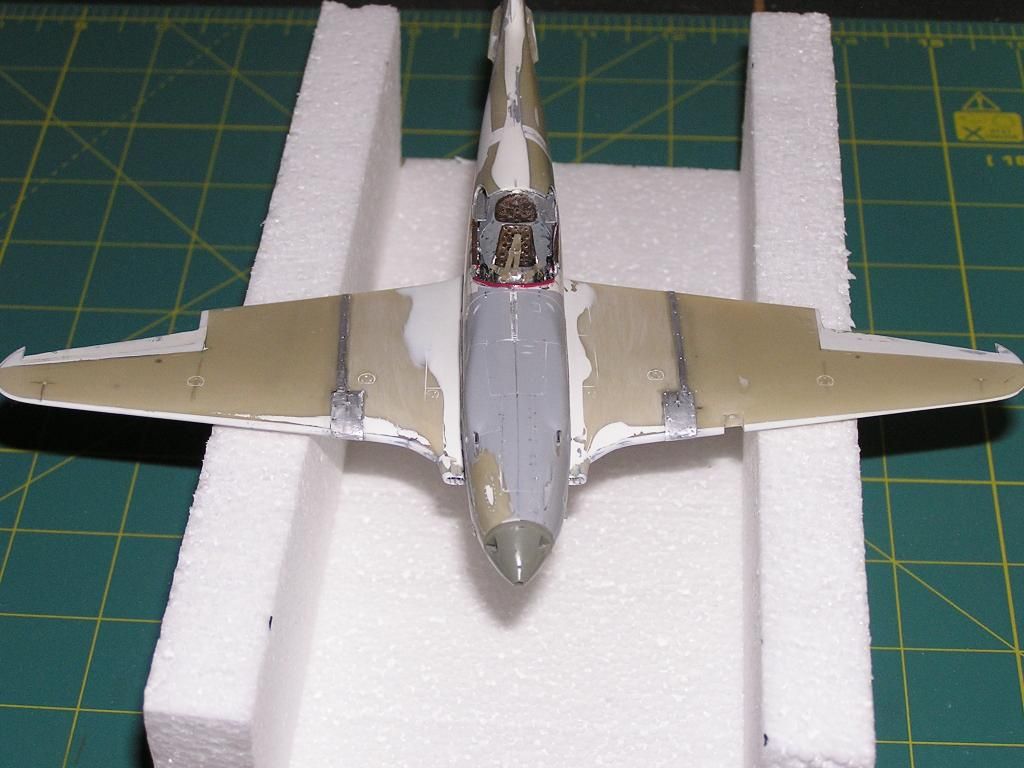 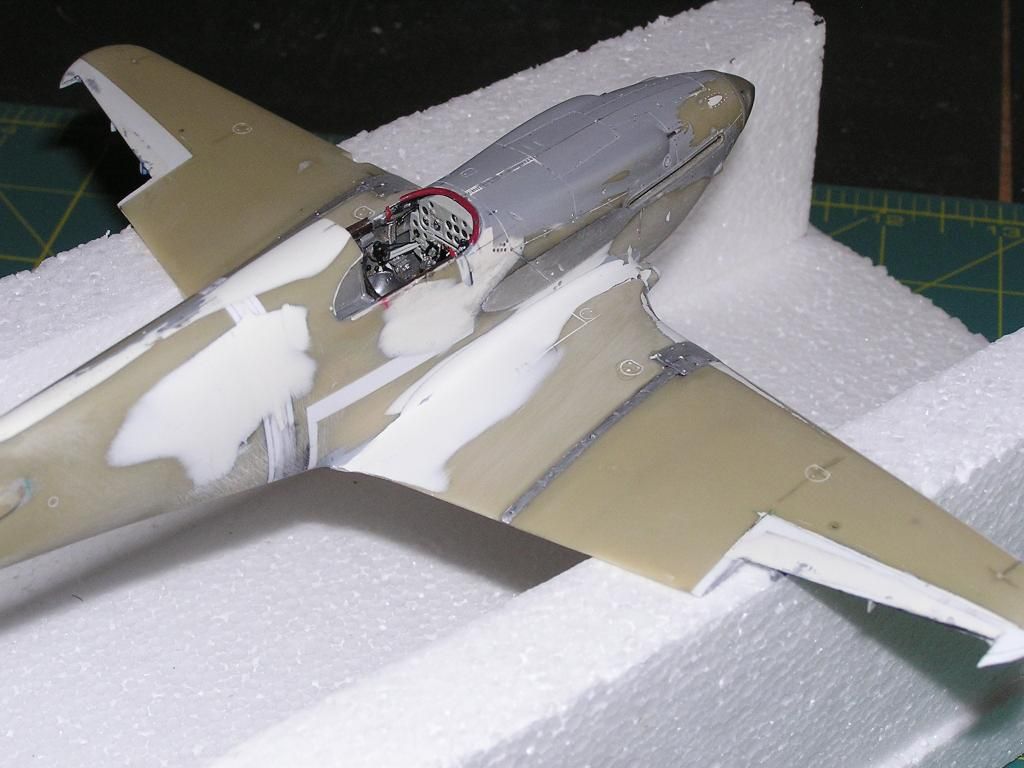 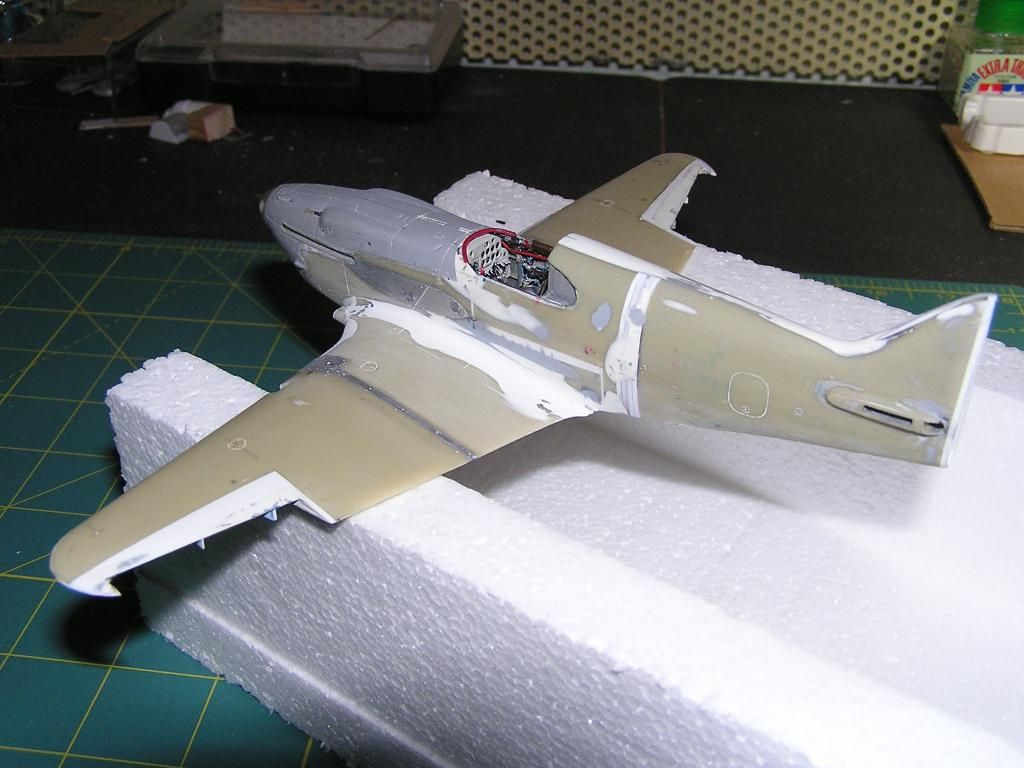 The belly side of the wing, with the water cooler duct almost finished: 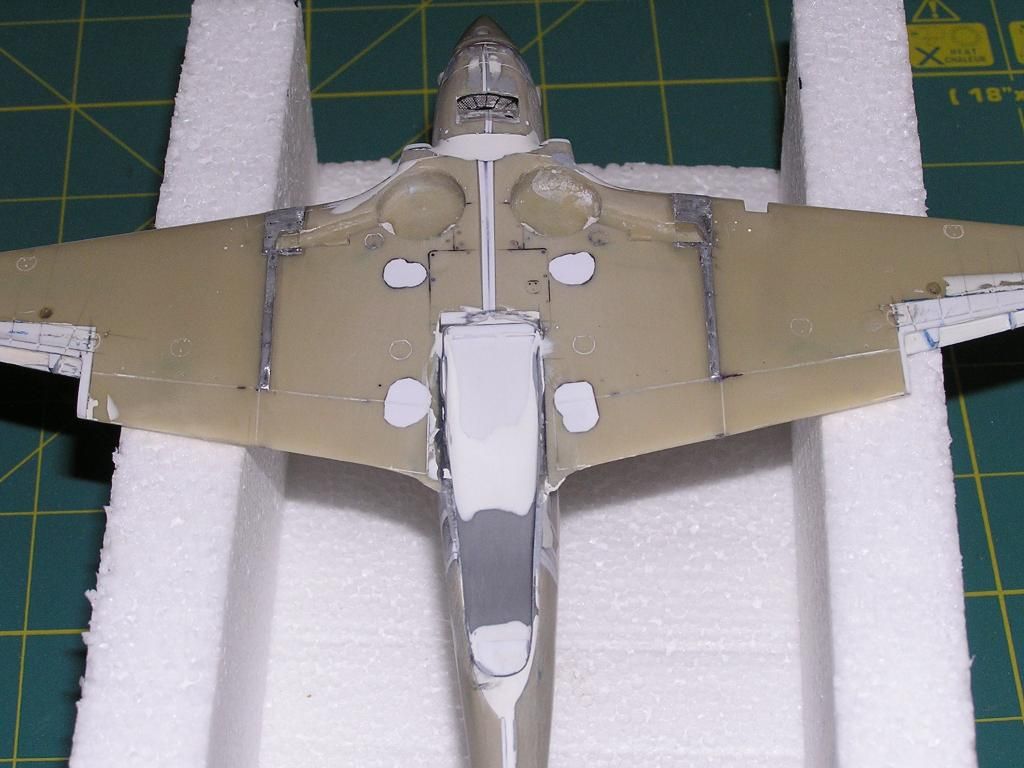 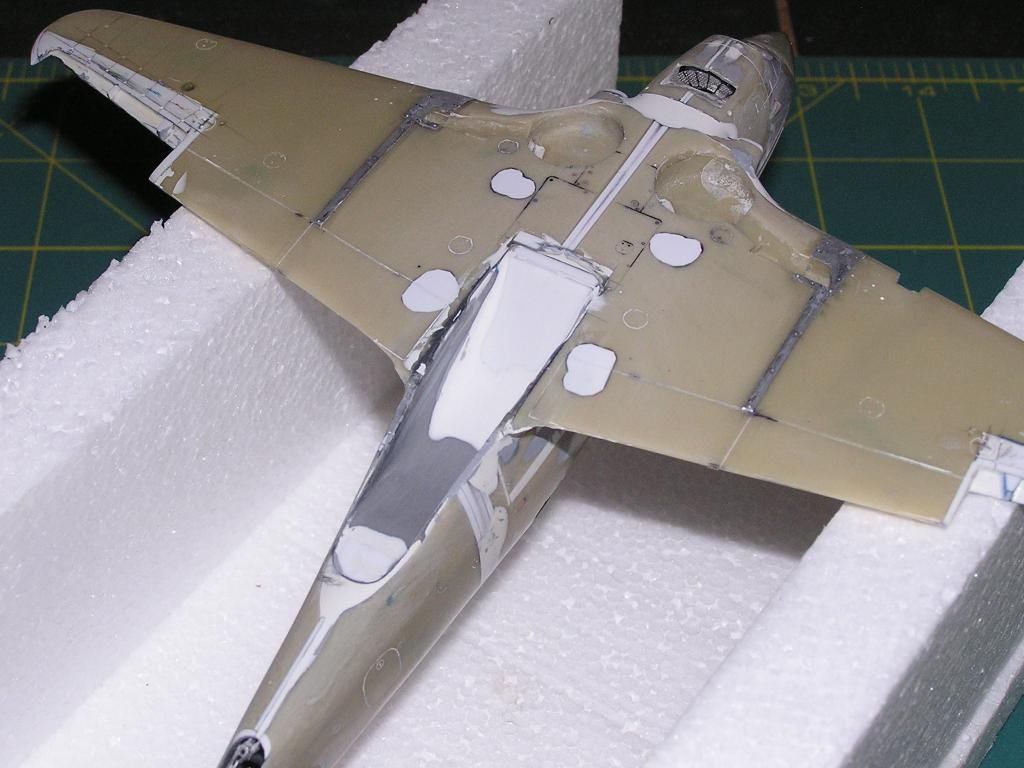 Some dry tests of the water cooler: 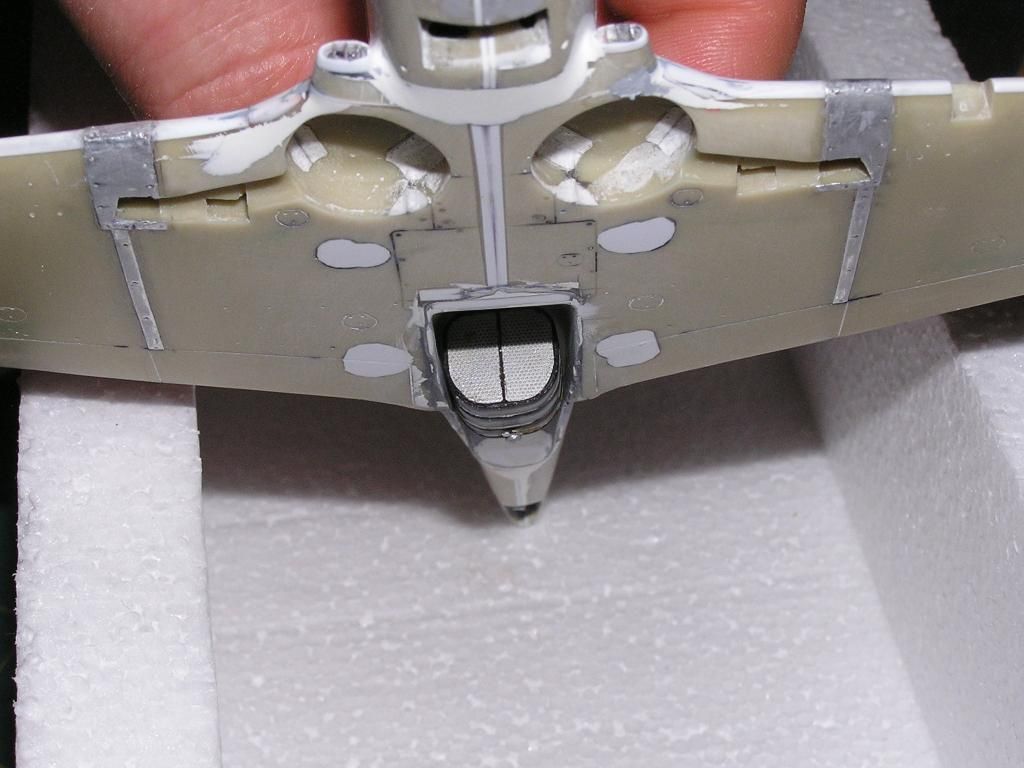 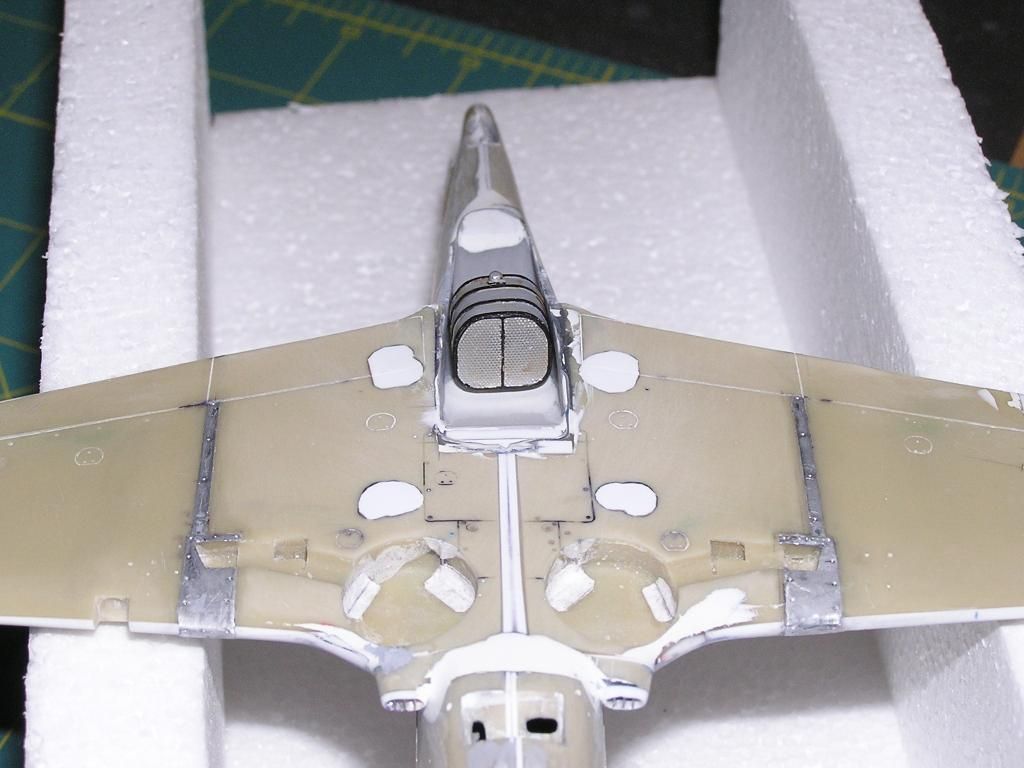 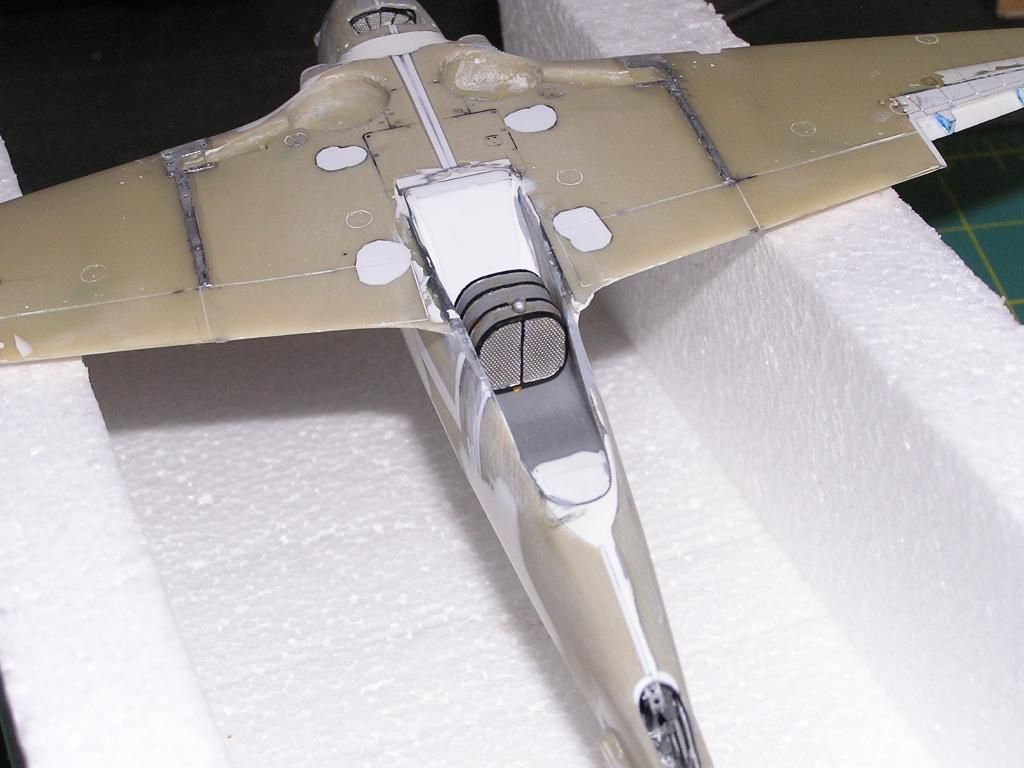 That's all for now, see you soon with further developments. Stay tuned! Comments and suggestions are always welcome. Ciao! Marco |
|
|
|
|
Logged
|
"If you want to get what you want
you need to get rid of the need."
|
|
|
|
Massimo Tessitori
|
|
« Reply #227 on: September 10, 2014, 08:35:11 PM » |
|
Ciao Marco,
I'm very impressed for the work put on this model. I would say that this is not a good publicity for the kit. I hope to see the model finished now that the most of the hard work is done.
What have you chosen for the painting?
Regards
Massimo
|
|
|
|
|
Logged
|
|
|
|
|
learstang
|
|
« Reply #228 on: September 11, 2014, 07:13:33 AM » |
|
Great work, Marco - the water cooler looks good!
Regards,
Jason
|
|
|
|
|
Logged
|
"I'll sleep when I'm dead."
- Warren William Zevon
|
|
|
|
66misos
|
|
« Reply #229 on: September 11, 2014, 12:10:15 PM » |
|
Hi Marco,
your attention given to "hardware" is really impressive. I am really curious for the finished kit.
Regards,
66misos
|
|
|
|
|
Logged
|
|
|
|
|
Markino
|
|
« Reply #230 on: September 11, 2014, 07:21:02 PM » |
|
Hello guys, thanks for the comments and for the encouragement  ! Slowly but inexorably the LaGG go on. Next step is the external part of the water cooler duct, as done for the internal one several pages before... @Massimo: after the debate on the Kostylev's red 35 I turn my interest for the white 44 of the IAP 44. Surely I will stress you about this livery... . I would say that this is not a good publicity for the kit Yes Massimo, this is the worst kit I ever built.... But the worst thing is the reviews I was read about this kit, found on internet and made by users of emblazoned modelers sites. This kit, and several other by the same producer, was reviewed as the ultimate kit about russians fighters. This kit are dinky only but not accurate about dimensions and shapes.... Everyone decides where and how to spend money... My money are end for this kind of kit... Obviously all comments above are very very IMHO. Stay tuned! Ciao!! Marco |
|
|
|
« Last Edit: September 11, 2014, 07:40:21 PM by Markino »
|
Logged
|
"If you want to get what you want
you need to get rid of the need."
|
|
|
|
Markino
|
|
« Reply #231 on: November 15, 2014, 11:42:08 AM » |
|
Hello guys, here some new upgrade for the LaGG. I realized the water cooler duct by vacuum technique, as for the past internal part of the part. I realized a wood master: 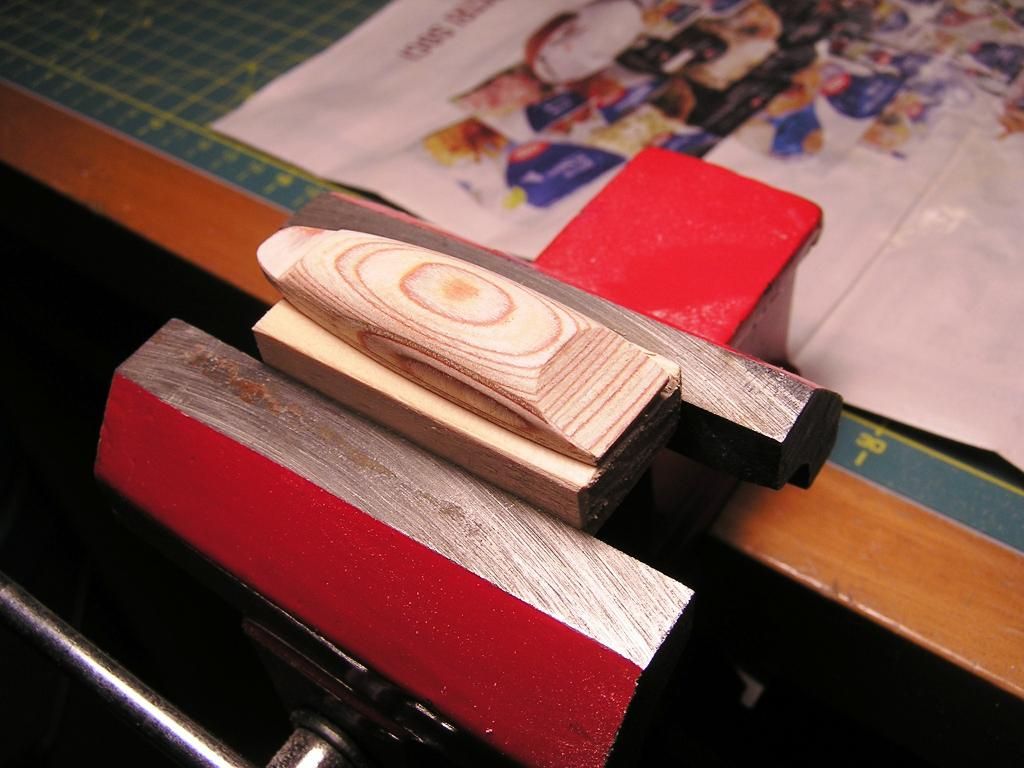 Then I check it whit a dedicated template: 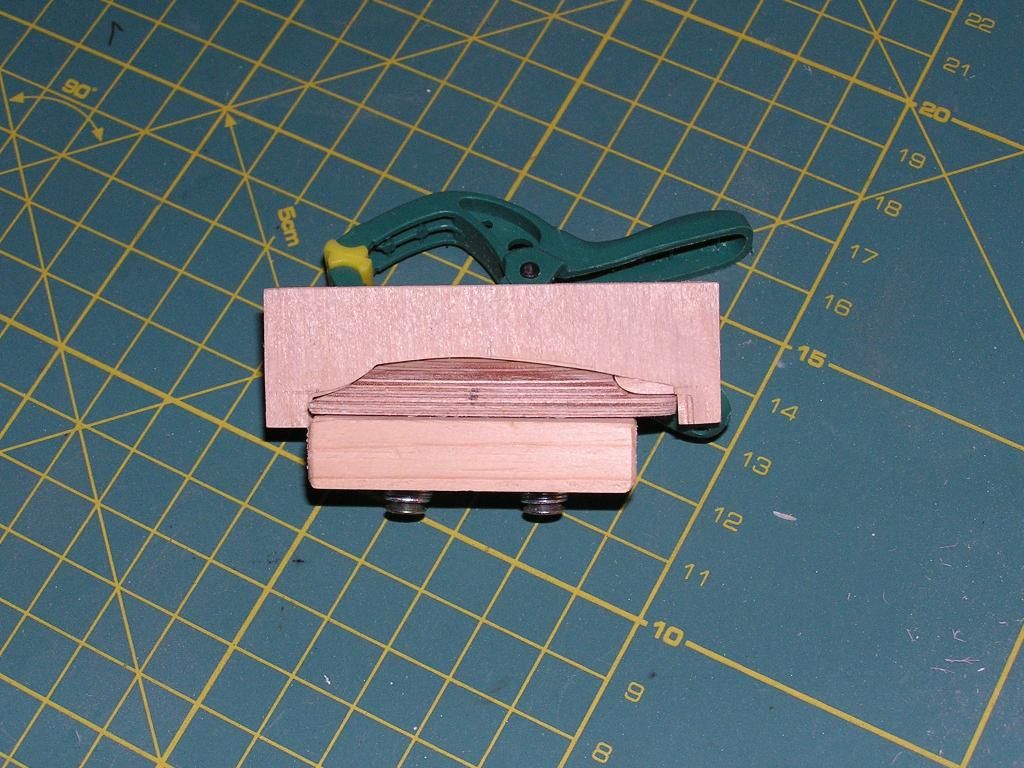 The vacuum result and the items used: 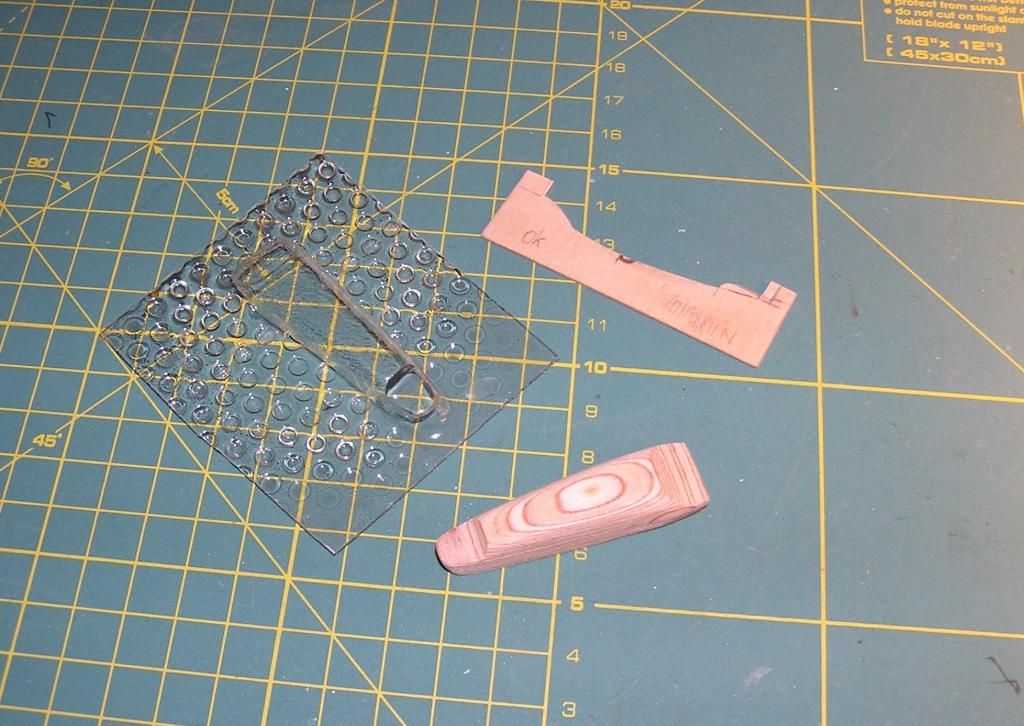 Some dry tests with new vacuum duct, water cooler and plane to determine the right position of all parts: 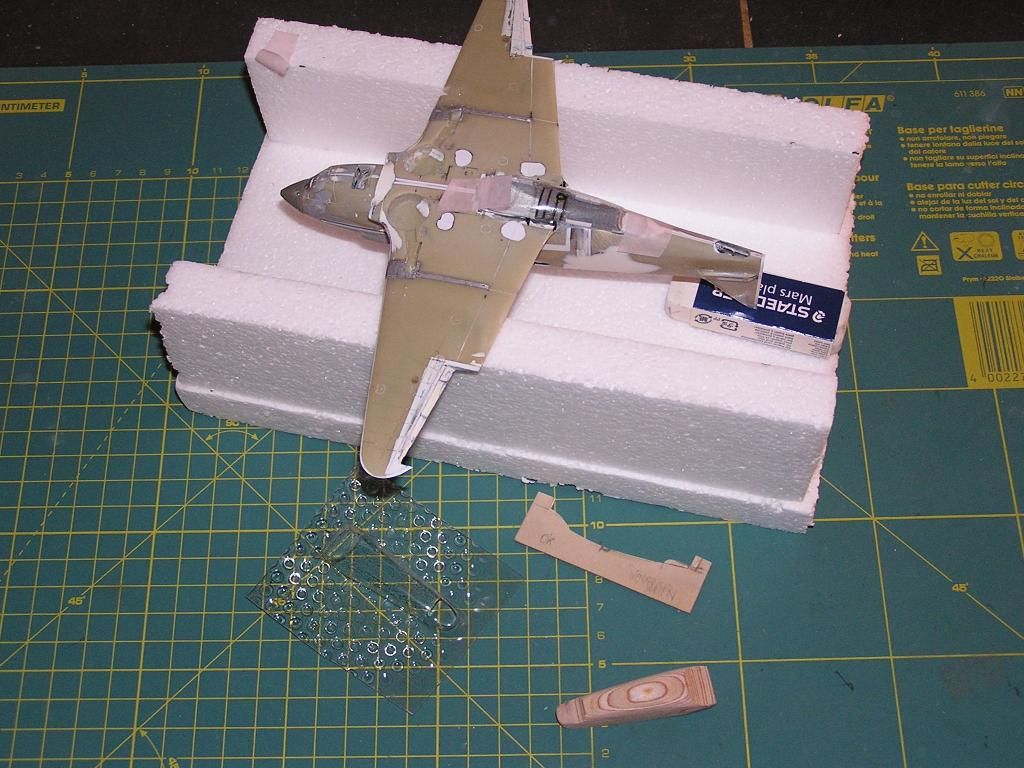 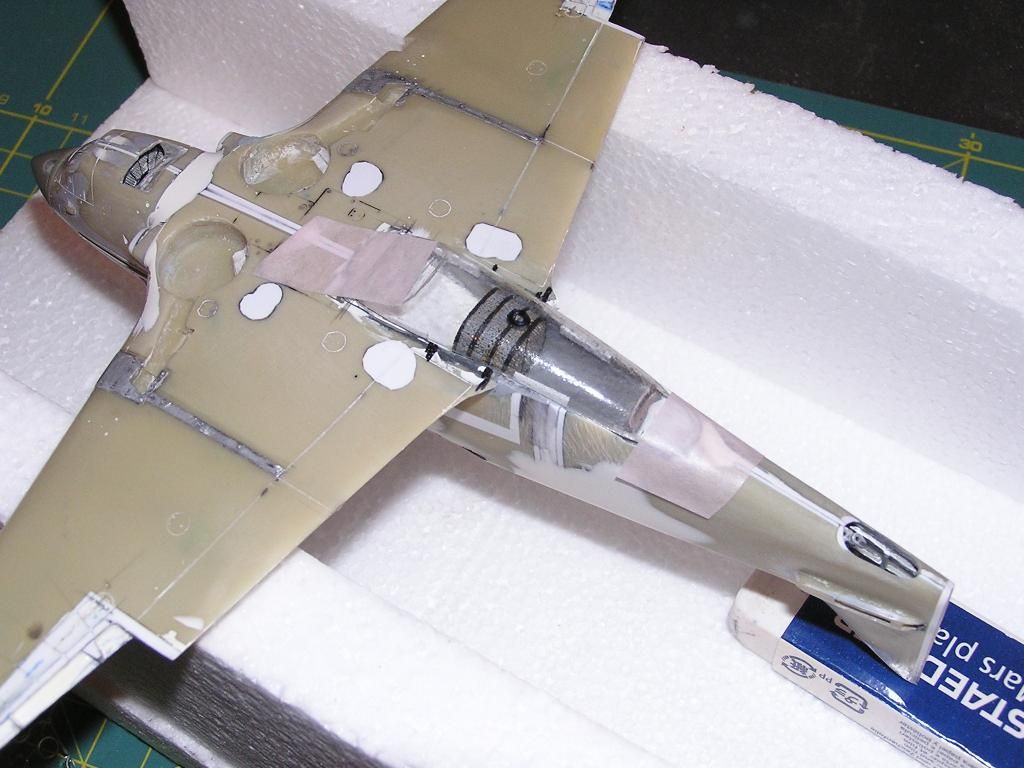 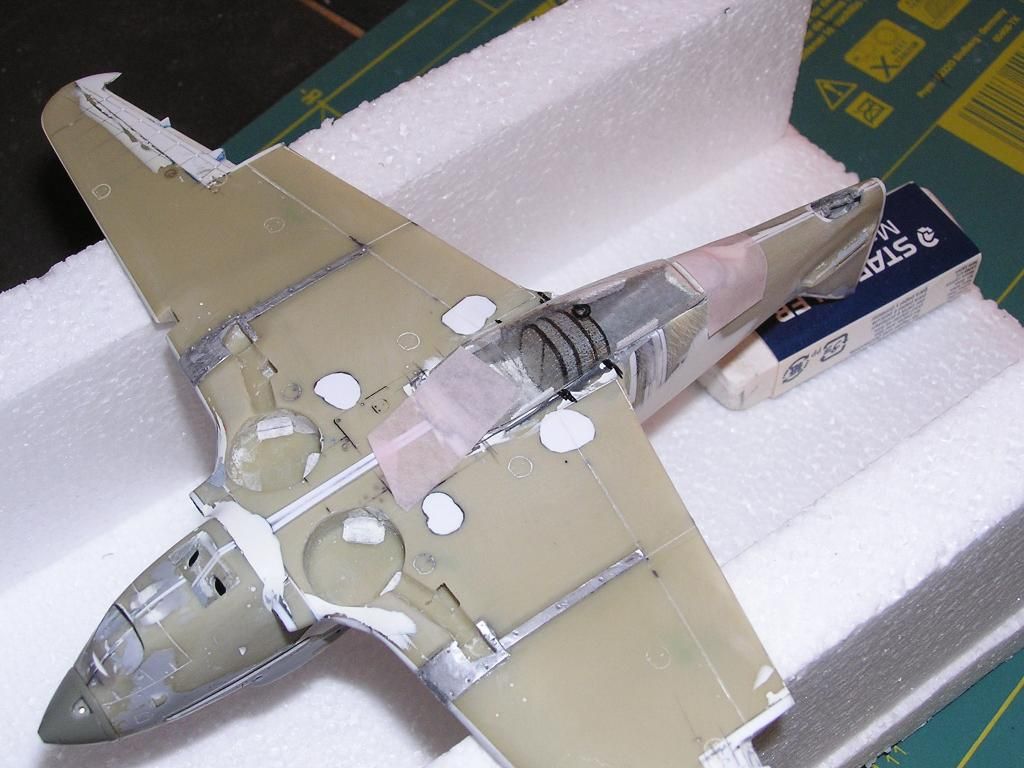 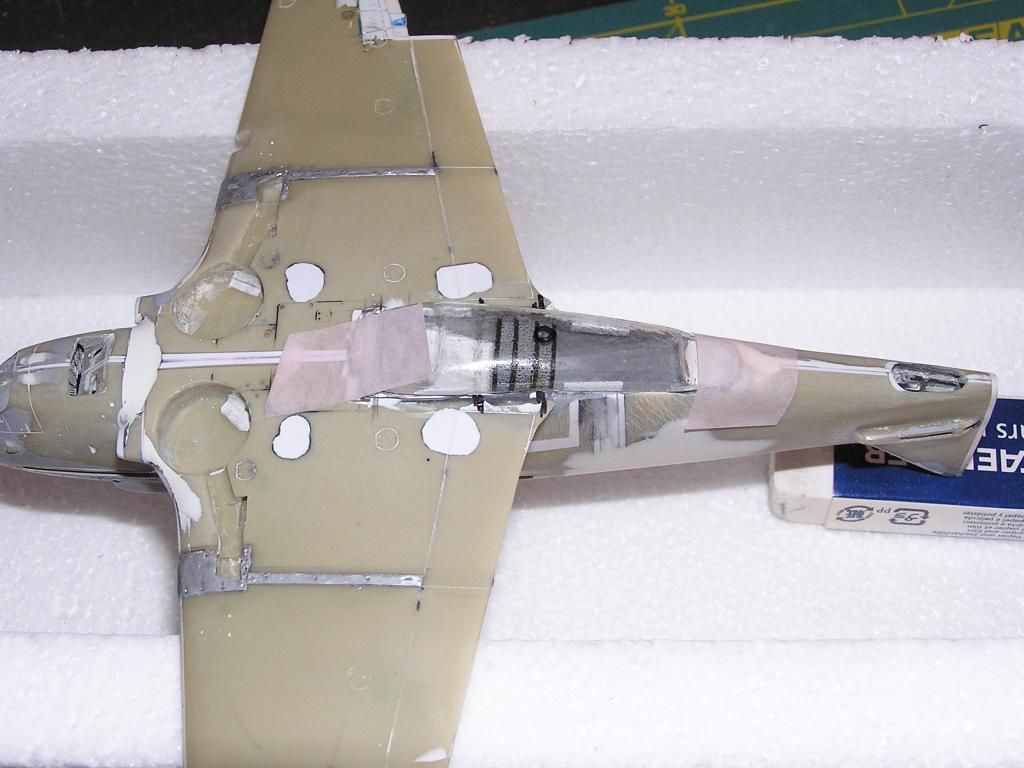 Now I must to decide what internal color for the water cooler duct. I need your help to do that. What your opinion about internal color? Silver as internal cockpit or AII blue as for undersurfaces? Thanks for all your help! Ciao! Marco |
|
|
|
|
Logged
|
"If you want to get what you want
you need to get rid of the need."
|
|
|
|
Massimo Tessitori
|
|
« Reply #232 on: November 15, 2014, 12:37:45 PM » |
|
Hi Marco,
great work. But what type of clear plasic is it? Won't it give difficulties in gluing and sanding?
I suppose that the inside of the air intake is medium grey, A-14. Probably the first part of the duct is light blue, up to where an airbrush can reach.
Regards
Massimo
|
|
|
|
|
Logged
|
|
|
|
|
Markino
|
|
« Reply #233 on: November 15, 2014, 03:58:13 PM » |
|
Hi Massimo, many thanks for your reply and medium grey A-14 suggestion. I forgot the use of A-14 for metal parts...
I don't know the exact name of the plastic (maybe PVC), I bought it in a Brico market. It was sold in square meters and it was very cheap; it is used to cover greenhouse, it is very useful for vacuum technique and is possible to glue it by two-component adhesive. The classic styrene it is too expansive for these purposes. To produce a good piece I mold 3 or 4 times and for each molded I need almost an entire A4 sheet. Evergreen sheets are too expansive in comparison to PVC.
Ciao!
Marco
|
|
|
|
|
Logged
|
"If you want to get what you want
you need to get rid of the need."
|
|
|
|
Massimo Tessitori
|
|
« Reply #234 on: November 16, 2014, 11:08:20 AM » |
|
Hi Marco,
PVC is a very stable plastic, but beware the toxic fumes, should it go on fire. They would contain Cl2 and COCl2.
By the way, having the gear and experience to make vacuform pieces, couldn't you make some pieces and accessories of general interest, if someone offers a master?
Regards
Massimo
|
|
|
|
|
Logged
|
|
|
|
|
Markino
|
|
« Reply #235 on: November 17, 2014, 10:15:57 PM » |
|
Hi Massimo, yes, I know PVC hazardous, I use a gas mask with filters for fumes and powders. For vacuum-formed pieces I can to do that. My vacuum machine work area is 125x100 mm. I suggest master not have heavy undercuts. Otherwise I must to cut the vacuum part to remove the master. Usually I use PVC with thickness of 0,7 mm and 0,4 mm. Keep in mind the thickness will reduce after vacuum. Let me know what you wish to vacuum and I'll see to do it . Ciao. Marco |
|
|
|
|
Logged
|
"If you want to get what you want
you need to get rid of the need."
|
|
|
|
Massimo Tessitori
|
|
« Reply #236 on: November 18, 2014, 06:05:57 AM » |
|
Hi Marco,
it looks really you're building a prototype, not a model! I'm impressed for your methods.
About vacuforming: I was thinking to canopies, and maybe to a copy of the spinner of a good Il-2 (Tamiya or Eduard) to improve kits as Academy and AM. I've still to check if aftermarket sets exist and would be cheaper, though.
Regards
Massimo
|
|
|
|
|
Logged
|
|
|
|
|
Markino
|
|
« Reply #237 on: November 18, 2014, 07:00:50 PM » |
|
Hi Massimo, for canopies I agree with you, next time, I hope non veeery next time, I will make the canopy for the LaGG, to realize by vacuum technique. For the spinner I think vacuum method is not a good way. Is not very easy to hit the correct shape and mainly the correct dimension. Keep in mind that details as lines, plates, rivets, bolts and so on are not easy to reproduce by vacuum; probably you should to make they in a second time. If I were to reproduce it, I do that on a lathe machine. By a CNC lathe and a bit of manuality you could get it perfect. Then, with this master, you should make a mold for resin reproducing. When I worked as die maker (or mold maker, "stampista" in Italian but I don't know the correct translating, I apologise  ) I realized for myself several parts, as oxygen bottles, landing gear struts, fuel tank (this last by EDM machine..). Do you have some metalworker friend? Would be very simple, with a template to check the profile is not hard to reproduce a correct shape... Have you take in count this? : http://www.ultracast.ca/products/Vector/48%20Scale/VDS48-026/default.htmYes, I know, it is Vector made but maybe not all Vector's production are as my LaGG. Maybe it should to have a Vector's IL-2 spinner to measure it and decide if it is adequate. If you have some master for canopies let me know and we will see to do that! I am glad to help you or some mates. Ciao. Marco |
|
|
|
|
Logged
|
"If you want to get what you want
you need to get rid of the need."
|
|
|
|
learstang
|
|
« Reply #238 on: November 18, 2014, 10:54:18 PM » |
|
The Vector Il-2 spinner is definitely superior to the Accurate Miniatures example and appears to be accurate in shape. The AM spinner is much too rounded.
Regards,
Jason
|
|
|
|
|
Logged
|
"I'll sleep when I'm dead."
- Warren William Zevon
|
|
|
|
Markino
|
|
« Reply #239 on: November 19, 2014, 07:00:25 PM » |
|
Hi Jason, yes, you're right. For a good job it should be measured, but it seem very nice.
Ciao.
Marco
|
|
|
|
|
Logged
|
"If you want to get what you want
you need to get rid of the need."
|
|
|
|


