Thanks for the responses and images.
Now that I've seen them, I seem to recall that the white aircraft was described as having green wings some place or other. It is hard to say whether this was painted (or un-painted) in such a way, or that is simply wear from crews walking on the wing servicing the aircraft. Perhaps even advanced wear from the abrasive properties of snow being blown by the prop. Would be nice to see the whole wing. It was very rude of the pilot to stand in the way like that!

In any case, I think to do a generic non-winter scheme for this first one. I prefer Leningrad units as I lived there for some months. So really, the only personal preferences for this build are that it represent a northern unit, and not be a winter scheme. As I haven't any actual decals for these, I was thinking to use red stars and whatever acceptable Russian-style bort number I could find in my decal library. The question I had for the Leningrad planes was which summer scheme would be under the white? (Red codes would revert to white, I assume.) I guess the answer depends on where the Soviets got them from. As hinted here, the RAF style camo seen on the P-40Es was to meet a requirement for export orders, mainly for the UK. Ones intended for US use were OD/NG. Export aircraft were not initially painted in actual RAF colors, but DuPont American approximations of those colors. Apparently it was also common for a batch of aircraft to be produced to meet an order, and then the aircraft be diverted to meet other needs (kept for US use, etc). For 96 and 32 here, I can't tell very well from the image, but are those all green? I suppose since I am open to building a "representative" aircraft, there would be no harm in doing it that way. I'm not quite ready to paint, so perhaps I will attempt to see if I can research how stocks of K models were distributed in an effort to determine where the Leningrad planes originated.
The upturned shark mouth on the rear aircraft is a distinctive British style. Every profile I have available to me that features a mouth arced in such a way was British. If those three are all single color camo, that makes the image more interesting.
For the cockpit I used basic US interior green. The enamel from Testors Model Master line seemed better to me, but I prefer now to use acrylic, which you see here. It is just a touch lighter, but looks fine I think.
As Massimo can tell you, I have some unusual luck with my kits. This AMT kit has been thrown away and rescued
three times over the last 4 years or so! Here is an image that will explain why:
But for some reason, I can't quite give up on a kit, and the idea that essentially a whole P-40 was in the recycling bugged me. The Hasegawa kit is not without difficulties, and those were intentionally engineered into it by Hasegawa. So the AMT joined the Hasegawa kit on the table and they proceeded together. Lots and lots of filling and sanding.
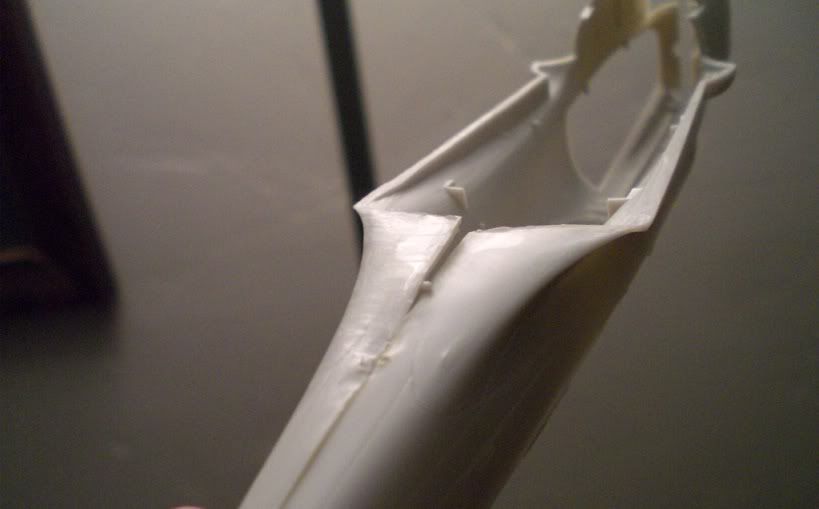
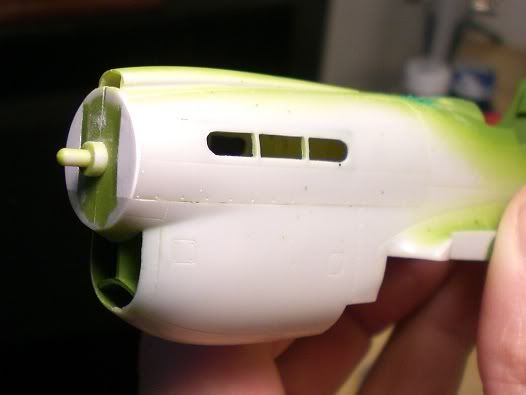
Here is another example. The fit of the parts was not good. Some of this was from warping, and some of it was just poor kit design. Notice that the bottom seam is nice and flush, but as you look up, the fit gets increasingly worse. Notice also that the side engine panels are not long enough and leave gaps at the spinner back plate.
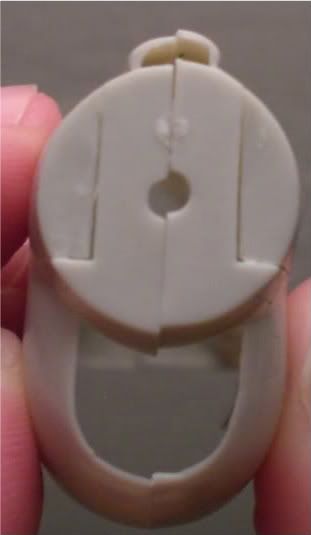
Here you can see where I put in plastic strips and then sanded them in to fill in the voids of the engine access panels. These are the white sections on either side of the prop pin.
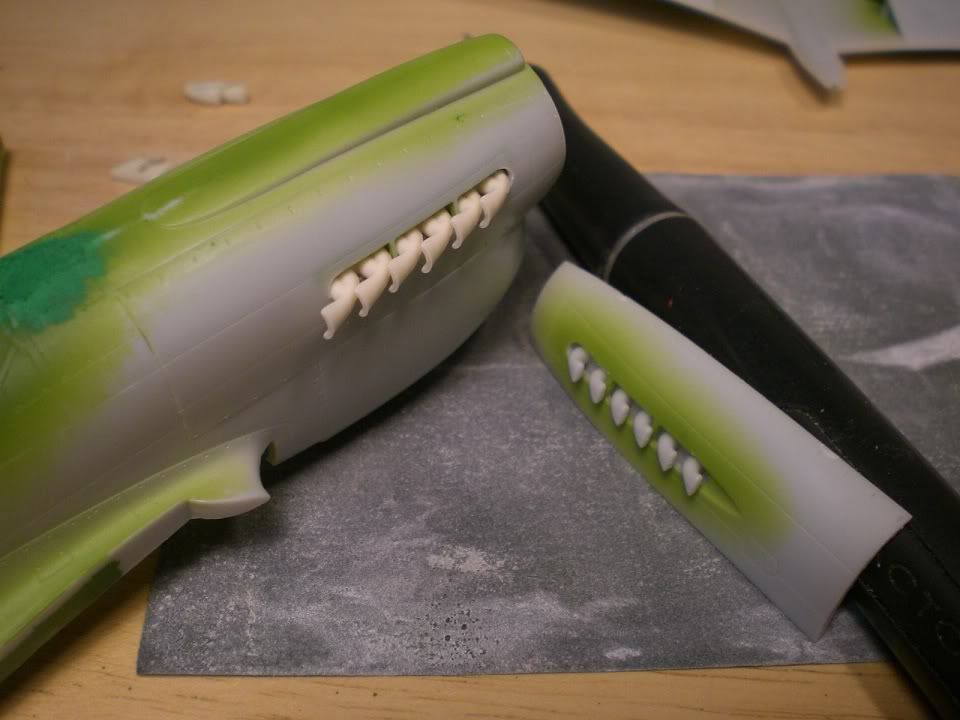
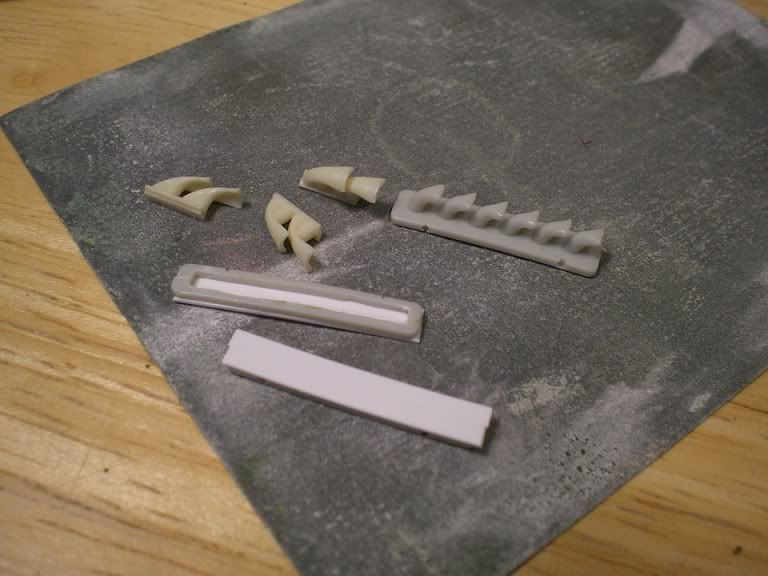
The exhausts on this kit are also poor. Interestingly, my hobby supplier did not list flared exhaust for the P-40, but did for the P-39. As they were both Allison engined aircraft, I compared photos and found them to be essentially the same. In any case, anything would be better than the kit parts, so I got them. They were designed to fit the Hasegawa kit, which uses a different method of attaching them. On the Hasegawa kit they drop into holes from outside so that you can paint and install them separate from the aircraft. Very smart move. AMT is designed so you have to put them in before you close up the fuselage, which forces you to paint the aircraft and exhausts after they are all together. Not so smart.
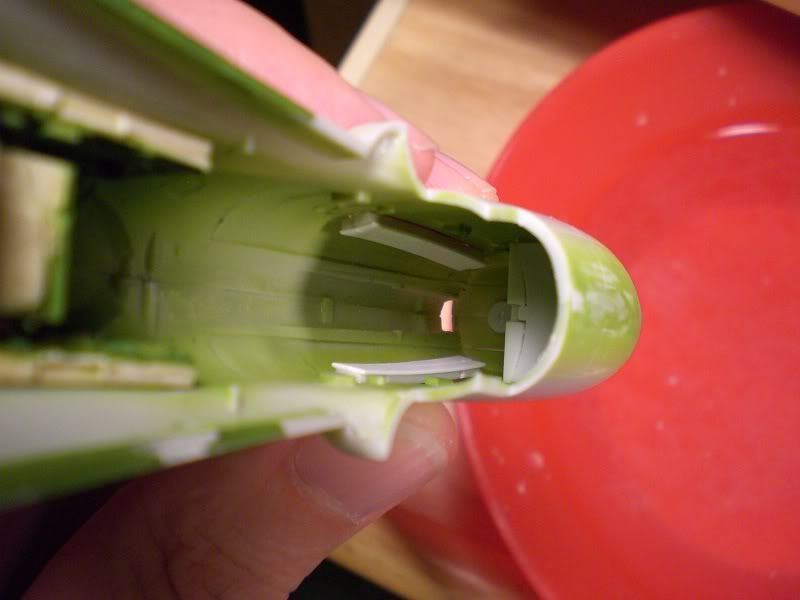
I used the kit exhausts to make a box for the resin ones. I cut off the pipes and hollowed out the strip, then installed plastic strip on the back.
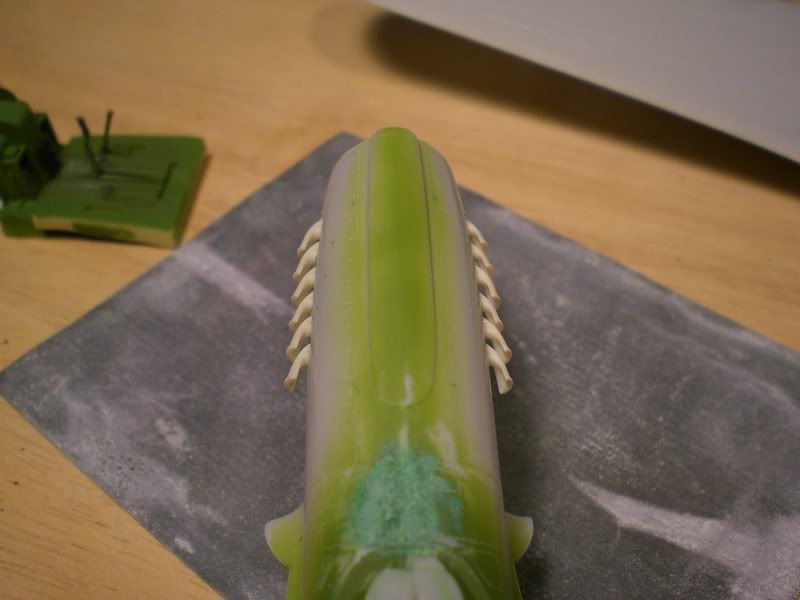
After that, these were simply glued inside the fuselage so that I could do the exhaust as Hasegawa designed - separate from the aircraft.
Here you can see the very obvious difference between the kit parts and the resin ones.