Hello everyone,
I continue the saga of the Polikarpov Ishaks with the first model produced in serie, the I-16 type 4.
The type 4 was only a transitional version between the last prototype and the the definitive fighter that Nikolai Polikarpov wanted. If the prototypes TsKB 12 and 12 bis were equipped during the first tests wtih the M22 engine, license of Bristol Jupiter of 480 hp, the TsKB 12 was re-engineered with a Wright cyclone F3 of 630 hp and equipped with a Watter cowling. This third prototype was very close to what will be the type 5. The Wright cyclone F3 was to be built under license by Shvetsov under the name M25, but the production was delayed, and the type 4 was launched in series in 1934 with the M22. It kept the general appearance of the TsKB 12bis, with a NACA cowling. The number produced is not known exactly, but would be 400 between 1934 and 35. There were still active in flying schools during the German invasion.
Type 4 exists at 1/72 in resin. It is a production of HR model
.

It is unfortunately derived from the mold of a type 10 because the housings of the fuselage machine guns are poorly hidden and the wing is the reinforced model that appeared on the second serie of type 5.
Despite these inacuracies , Jean Paul Bonnevile presents a nice diorama assembly here

There is also a resin transkit produced by Alexandre Kozyrev under the Kajuk brand to convert the T18-24-28 ICM.
Look here
http://scalemodels.ru/articles/5882-konversija-kajukICM-1-72-i-16-tip-4.htmlNothing in 1/48. Xan presented on Sovietwarplanes
http://massimotessitori.altervista.org/sovietwarplanes/board/index.php?topic=2348.msg20573#msg20573 the first type 4 out of the factory 39 obtainedwith the type 10 of Eduard and a transkit produced for him by Ricardo Rodriguez that I quoted in my first message
For met, the most fun part of model-making is partial scratch building more than the painting Tamigawa ready to assemble kits
I preferred to use the type 5 of Amodel and modify it a little. It exist under 3 boxing,
"Russian" box
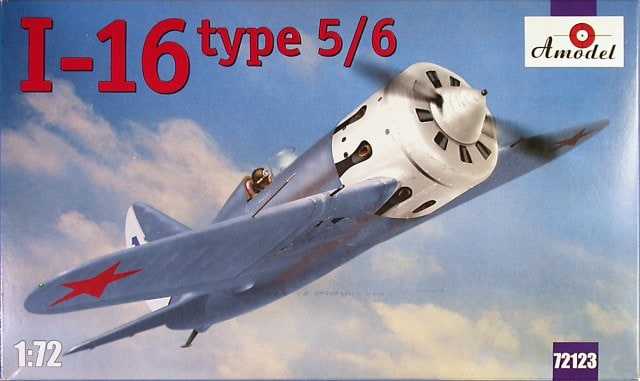
With Russian, Chinese, Finnish and Spanish Nationalist decals
Box "Spanish"
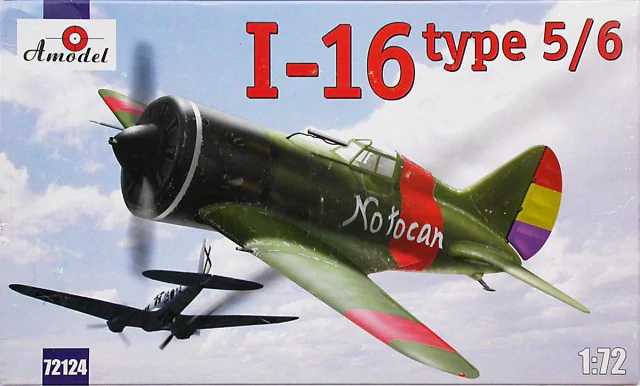
with Russian and Spanish Republican decals. Bizarre to have chosen the "No tocar" in flight for the boxing of a republican plane while he was
1-captured by the Nationalists
2- immobilized for repair, hence the inscription.
Box "Type -6 winter"
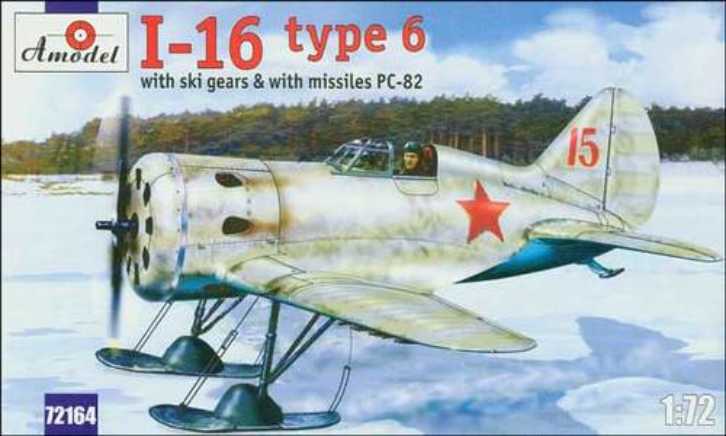
which has an additional sprue for the skis, the propeller without spinner, the RS 82 rockets and the intrados with protection plates against the flames of RS 82 ( to note for the next buildings, ther are 2 intrados in the box), Russian and Finnish decorations .
Here are the sprues including the extra one (light gray) of the"Type 6" on skis and some of the decals.
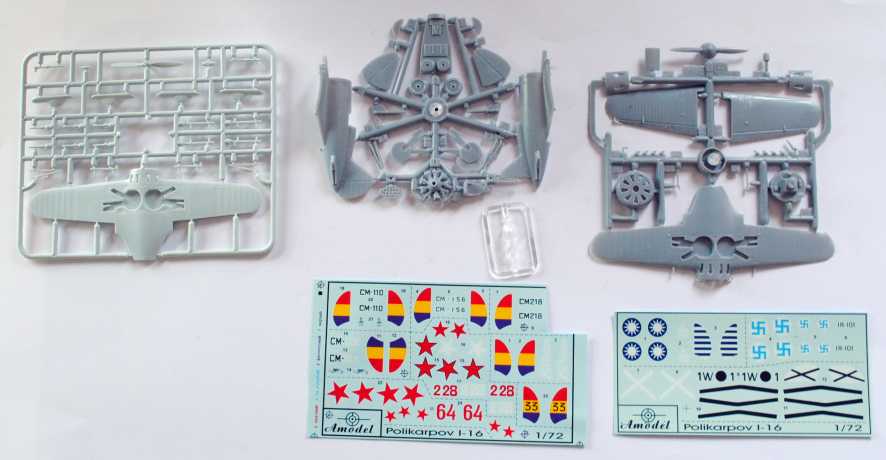
There are 2 canopies, closed type 4 and 5 and windshiel that can be found on all following types.
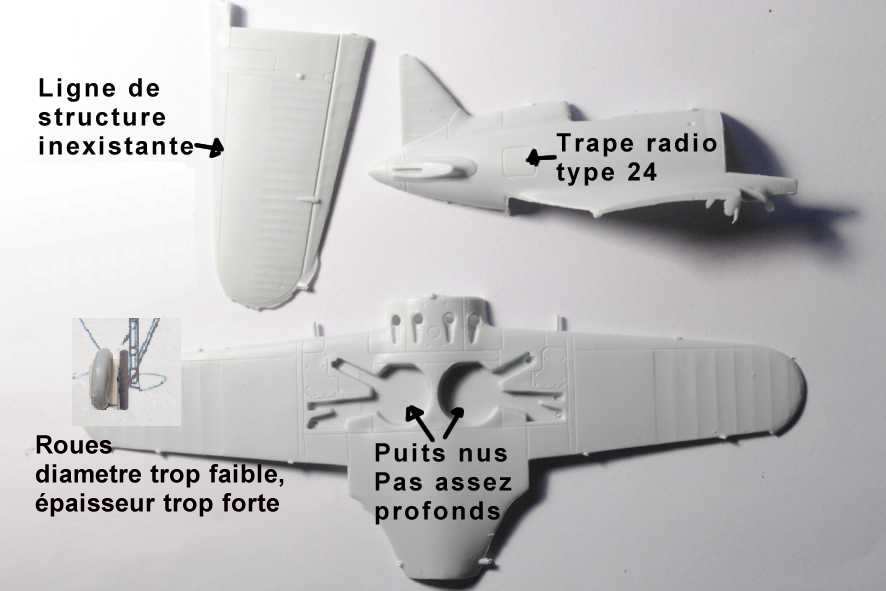
It is short run, . Once prepared, the pieces are very accurate in shape and the engraving is fine and fairly accurate.
There are still some flaws: Small: line of fanciful structure to fill on the extrados, and a radio hatch appeared on the type 24 . Wheel wells to improve. Coarse wheels of too small diameter
 Big:
Big: 1-the kinematics of the landing gear is completely wrong. Do not fix the struts where indicated and therefore those provided are unusable . They have to be redone,
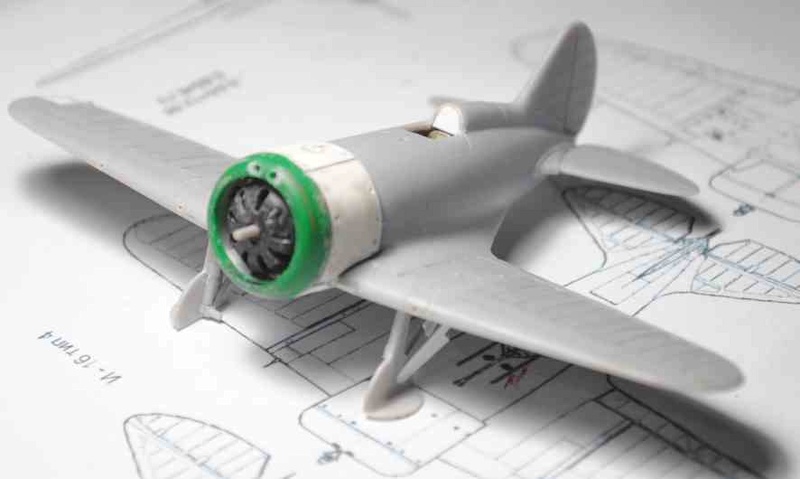
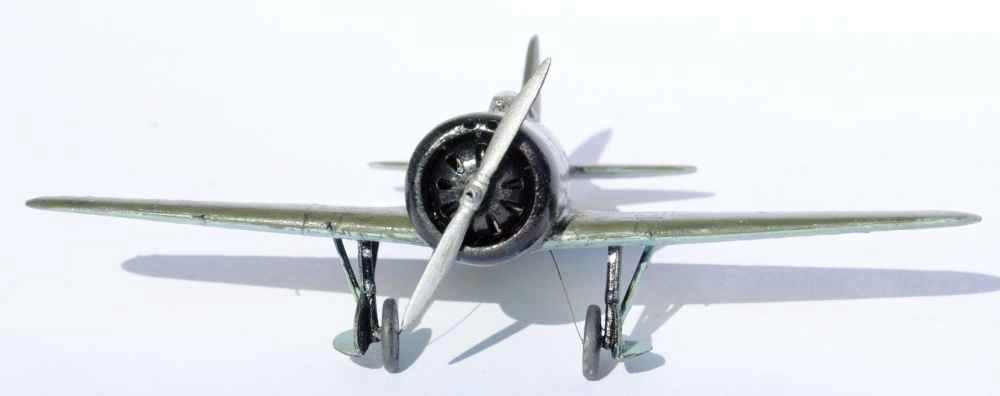
2- The front plate is too angular and the cooling vents very coarse. But it will not bother me for this type 4 since the Watter cowling has to be eliminated and a NACA cowling to be scratched.
Here are the different steps of the conversions With these plans, we see the main differences: the length and shape of the cowling, the wings.

[size=13]
1- Engine and its frontal fairing [/size]
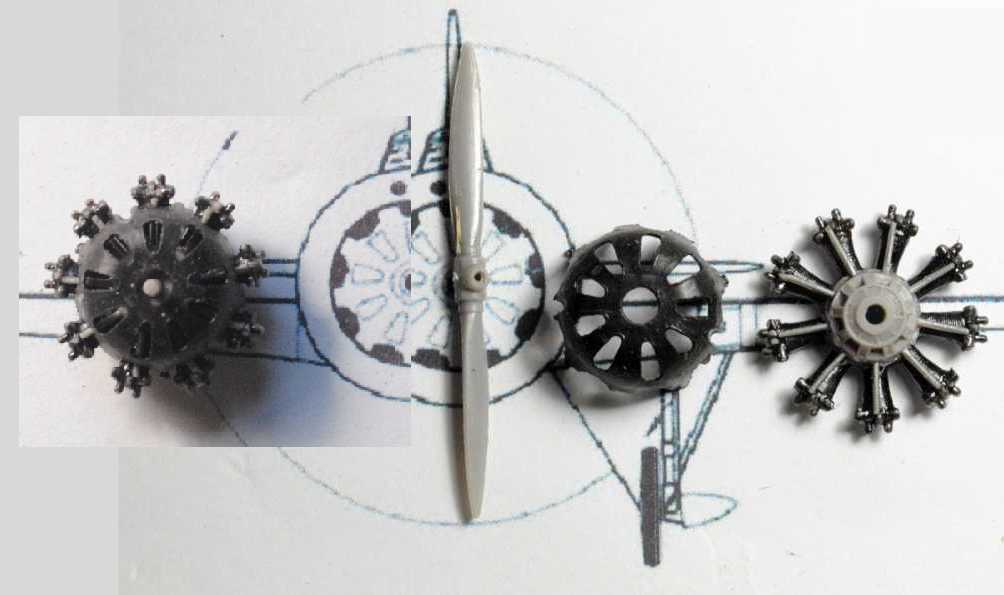
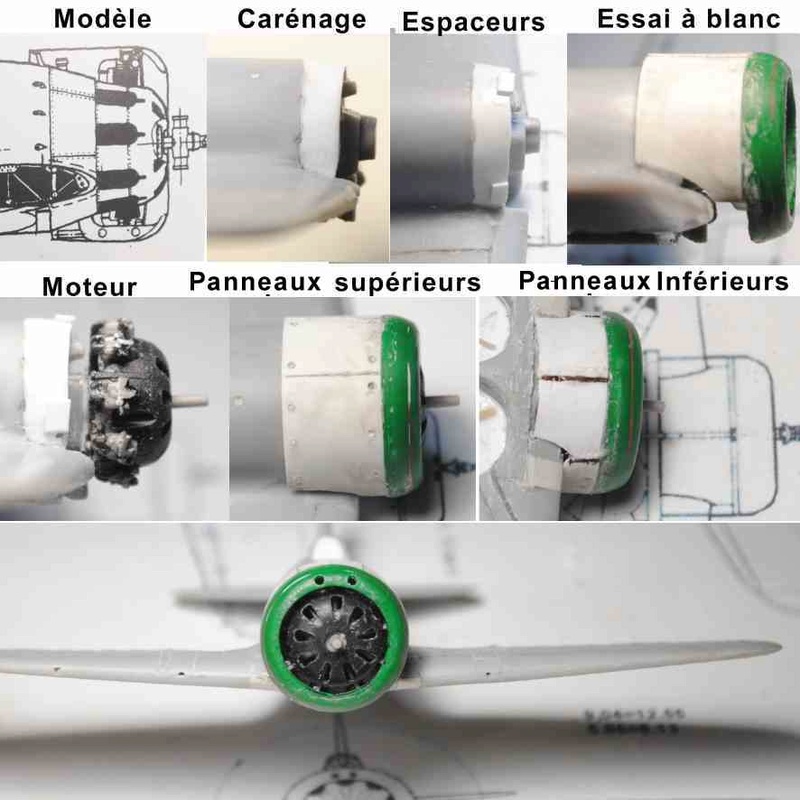
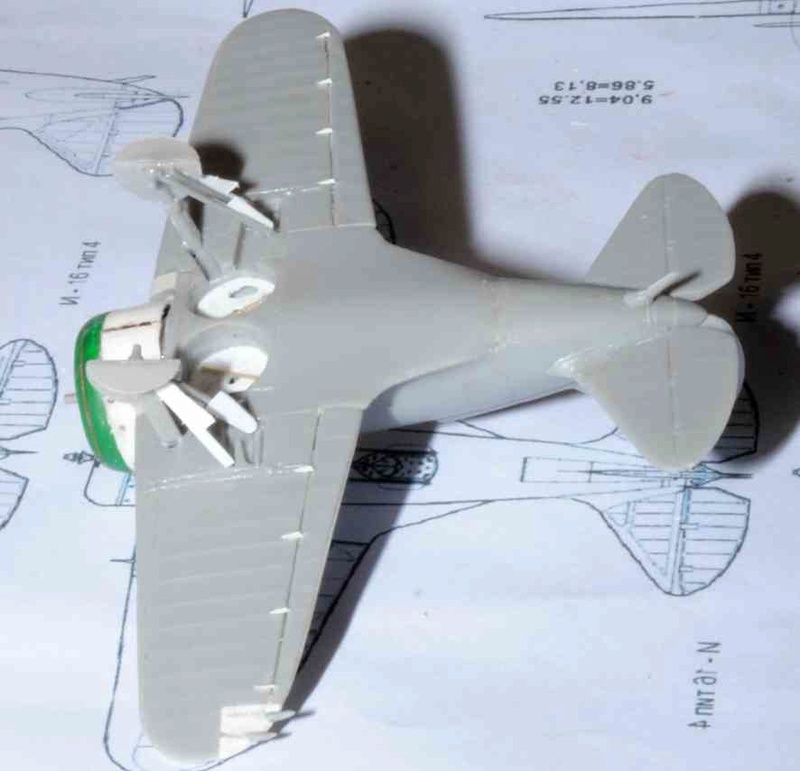
Type 4 had a prototype-style Naca cowling, but the engine fairing was the same as the Polikarpov's I-5 and I-15. So I cannibalized an I-5 from ICM
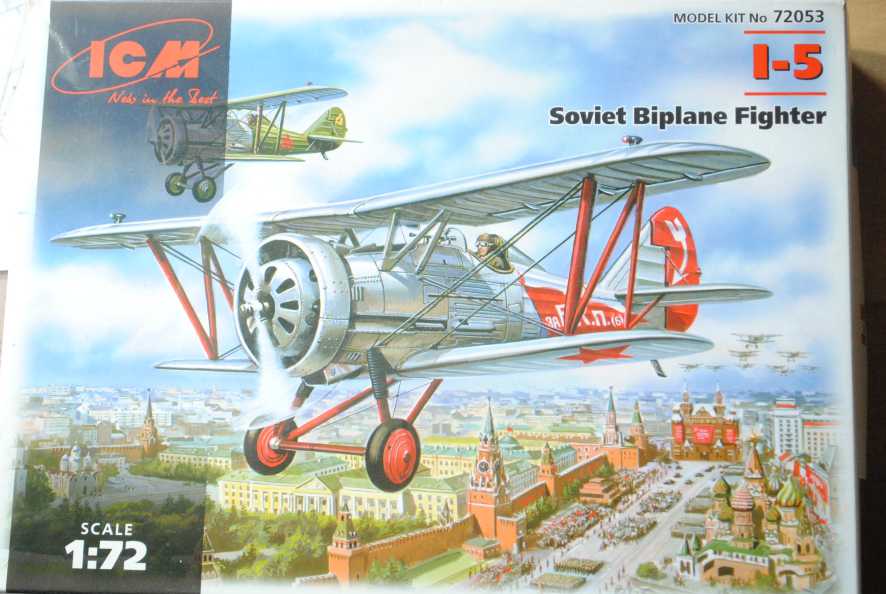
which gave me a very fine reproduction of the M 22 engine and its front cowling, the two-blades propeller that rotates in the opposite direction of the following types M 25 and then M62-63.
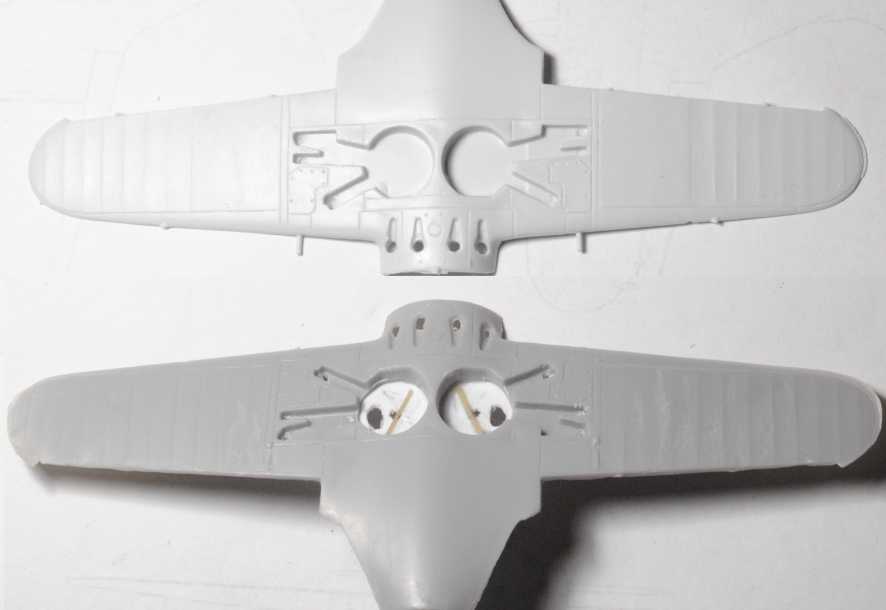
 2- The fabric cover of the upper surface of the wing is of late type 5.
 For a type 4 or early 5, the spacing between the ribs of the upper surface is wider and identical to that of the intrados. This is explained by the addition of inter-ribs to the extrados of the "reinforced" wing which appeared on Type 5 during the Spanish War and will be kept on all following types
I transfered the drawing of the plans on the wings and widened inter-rib spaces with a grinder
It will need smoothing the surface with Surfacer to reduce the scratch of the grinding. After other experiences, I think it is not the best solution, but the result is acceptable.

[size=13]
3- the wheel wells. [/size]
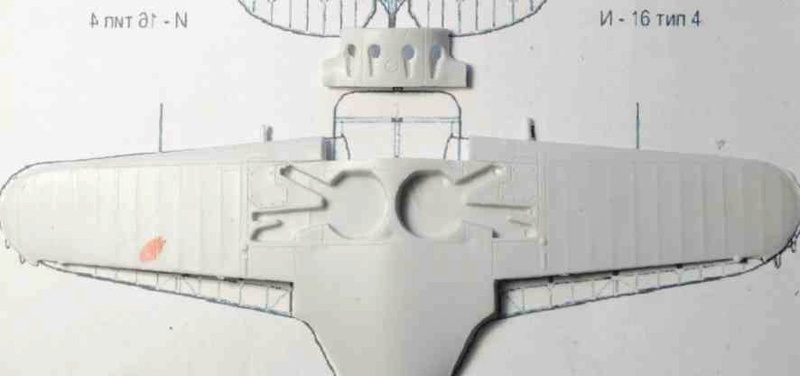
The I 16s had a retraction system with a hand operated cable, with a central hole in the wells and visual control windows whose shape varied. From type 4 to 18, they have beans shape , There is a rectangular window in the wall of the right well only.
Neither the Amodel kit nor the ICM reproduce them.
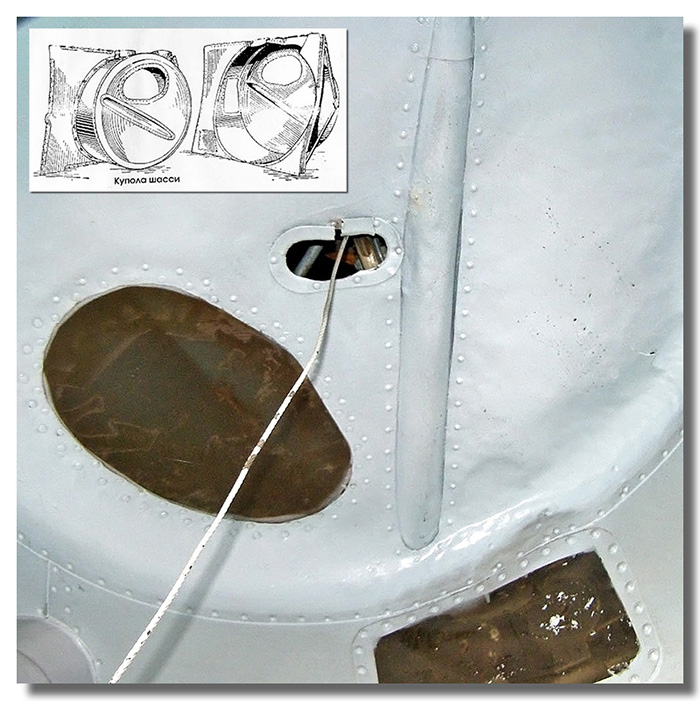
I deepened the wells by drilling the bottom and glued a new PC bottom reproducing the windows and the opening of the retraction cable. A small bit of stretched sprue figure the reinforcement.
[size=13]
4- the NACA cowling [/size]
This is the most different part of type 5, to be scratched
The first step is to remove the parts intended to receive the type-5 cowling panels
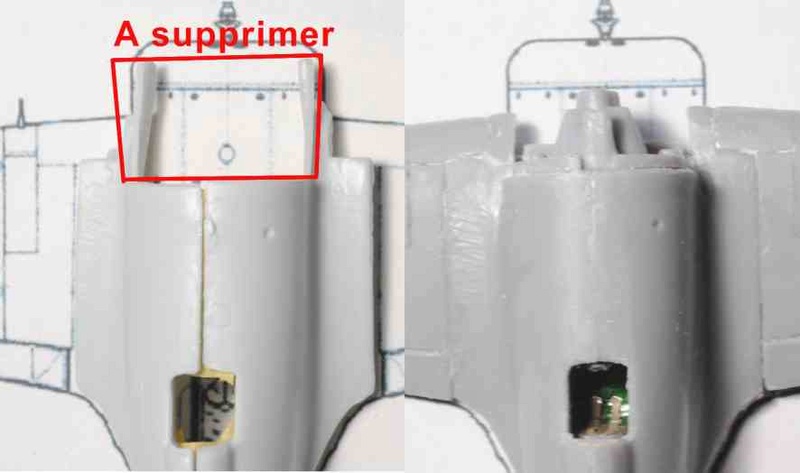
The section of the underside that represents the lower bonnet with 4 exhaust is to cut (and keep it carefully to make a Type-5 or a T-10 from the 18 ICM)
Then you have to find or build the cowling. I found in thethe spare box a cowling whose front had the right diameter and an acceptable profile. Given the beautiful green, I think it comes from a Matchbox, without further clarification. Then I cut a PC ribbon on which I marked the panels and screws.
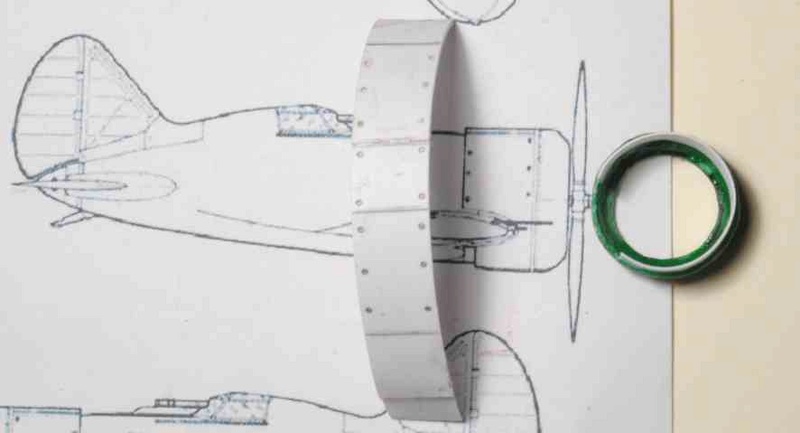
The cowling of the type 4 arrives exactly where Amodel stops the fuselage So, I had to extend it to avoid having a gap and also to be able to fix the cowling. I partially reproduced the front profile type 4 by gluing a tapered PC fairing on which I glued pieces of PC as spacers, the actual cowling being well separated from the fuselage. It is on these spacers that I fixed it. After a blank test, I centered and fixed the I-5 engine with its cowling. Then glued the upper and lower panels. Initially I thought of making a cowling in one piece, but to adjust the passage of the wings, it was easier to separate the panels, as in reality.
[size=13]
5-Wing Specificities [/size]
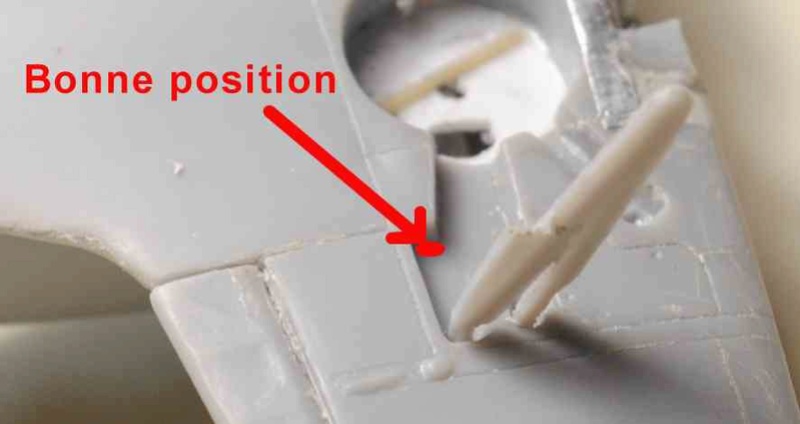
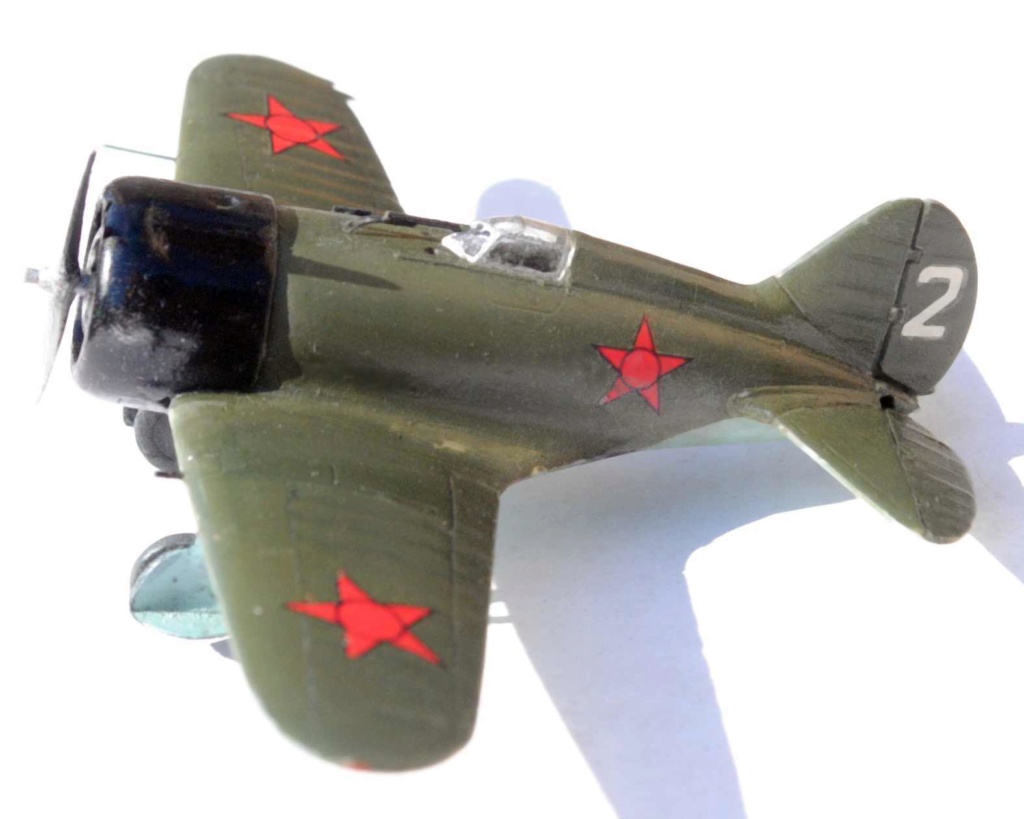
Compared to Type 5, there are 4 ailerons hinges and 2 flare torches for landing at the wing tip like on the TsKB-12. I use the plan to mark the exact location of the horns and flashlights followed by a bit of scratch.
Extrados side, I removed the aileron command which appeared on the following types

[size=13]
6- The landing gear [/size]
One of the important defects of the kit, Amodel designers did not understood the cinematic. They fixed the 2 struts in the same plane while there is one in the plane of the main leg and the other spread to form a trihedron
New struts hace to be made . To compare , I show the ICM parts that are accurate.

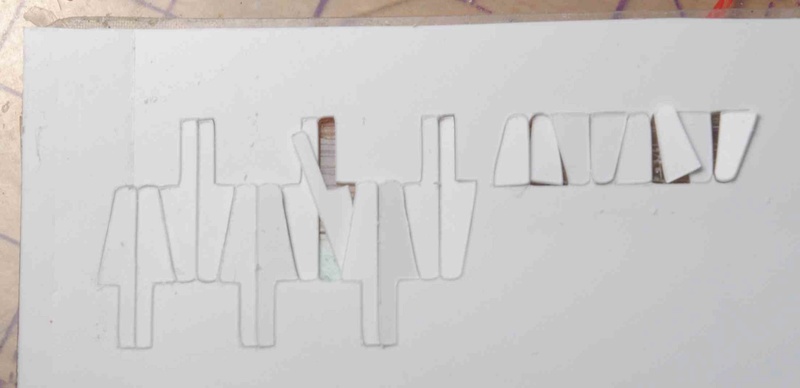
I preferred to make all these covers with 0,25 PC cut with a Silhouette plotter.
With 4 Amodel to built, I have 16 covers to make, It is profitable to spend a little time drawing the templates. See the result in the PC 0.25. Much faster and more satisfying than cutting and thinning Amodel traps. I have enough to make types 5 and UTI.
I kept the Amodel main leg after thinning its cover and created the cstruts in stretched sprue . The rear strut had to slide between its out and in positions.

Amodel wheels are really rough. So I decided to use ICM wheels, well detailed and almost exact in diameter. I made a silicone mold for casting the wheels for several type-5 coming.

The original type 4 and early 5 wheels were 750x100. They grow to 750x150 during the Spanish war, to facilitate use on poorly prepared grounds. ICM wheels represent this model. To get 750x100 wheels, I cut the wheels in two with a Tiger saw and glued them. The kerf was enough to get the right section

Here is the main finished
I've complicated the end of the work a little bit. I realized that the opening for the connection between the elevators is welle visibel. I cut these control surfaces to be able to pierce the fuselage and I glued them "to dive "
[/url]
Then, port and starboard navigation lights
] 
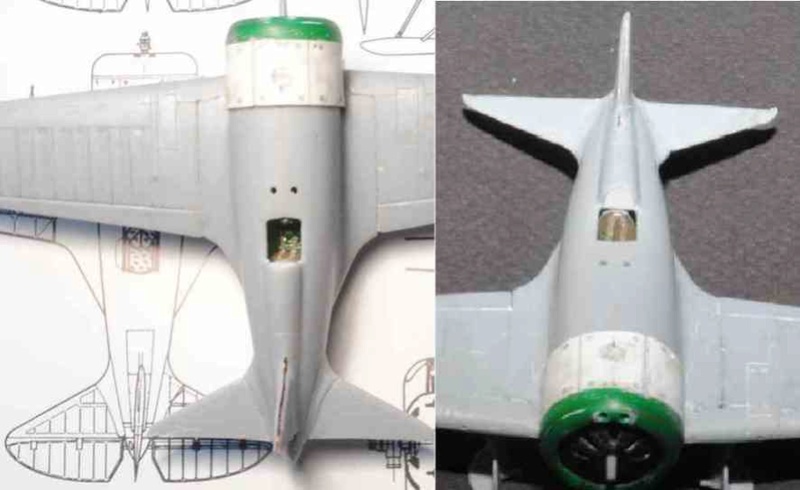
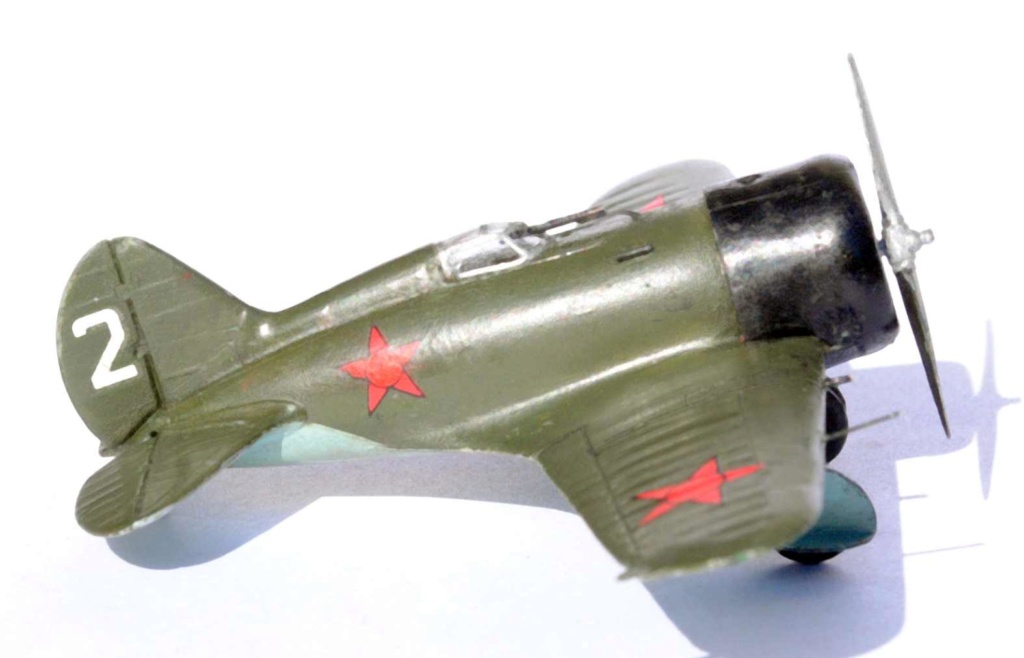
And finally, 2 small bosses, probably protecting horns, at the rear cone that were present on the TsKB and type 4, canopy rails, venturi, machine guns and Pitot tube made with hypodermic needles. The canopy is the duplicate of the TsKB P & J kit. The OP-1 will be attached at the same time as the canopy after painting.

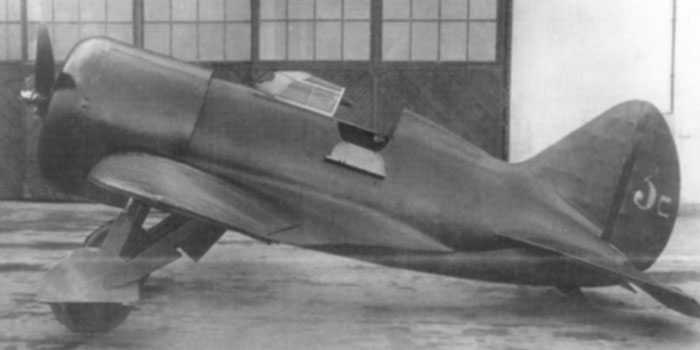
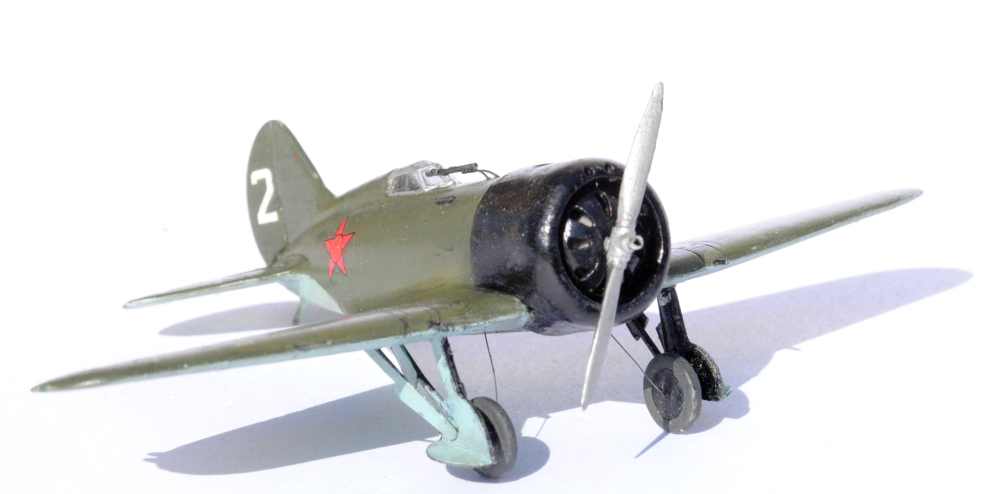
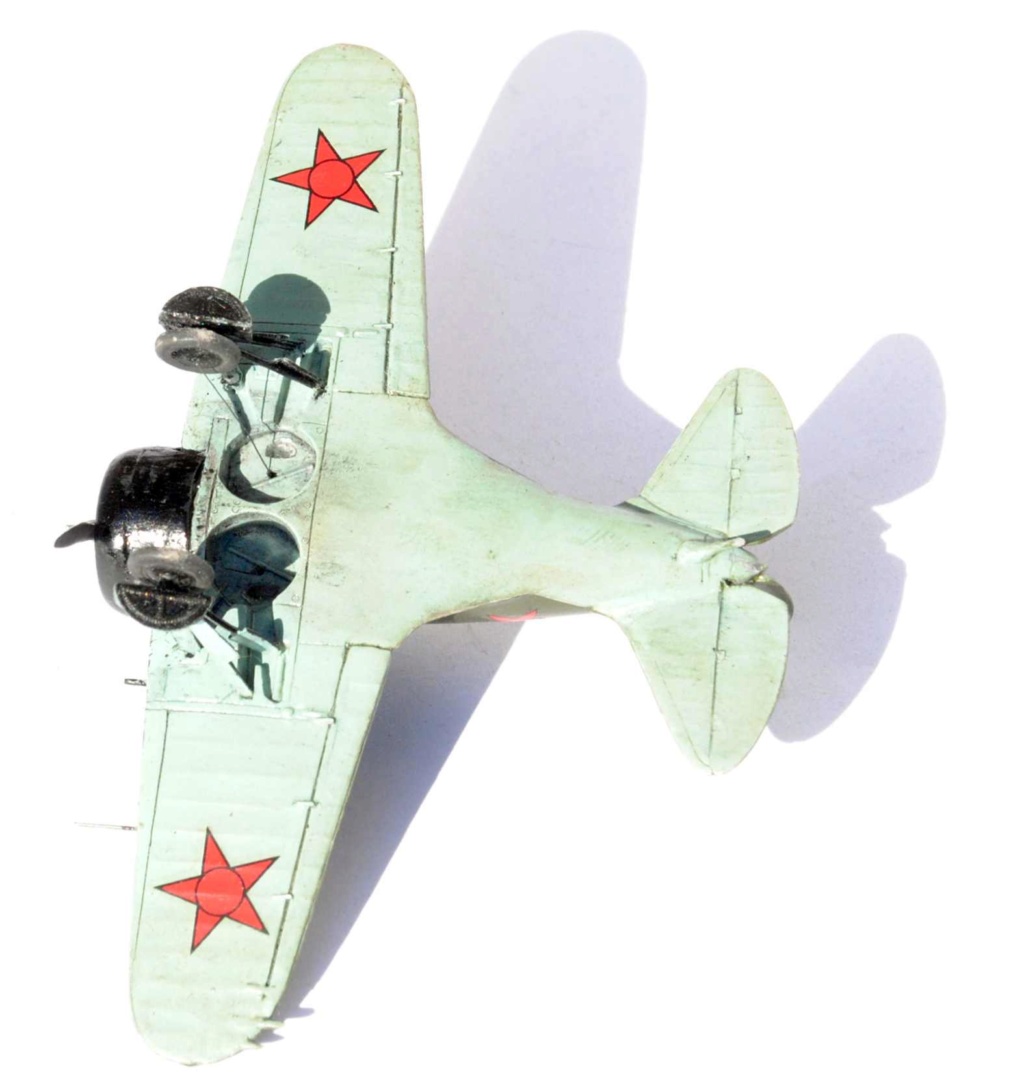
For decoration, there are not many photos of Type 4. The best is the first one built, the 3c that Xan represented. Another very famous photo shows a well damaged T-4 in a flying school , with a white top vertical stabilizer and small star,
I chose a generic aspect. No pictures, but respect of the standards of the time. Black cowling, dark green topclose to khaki, light blue underside, tactical code on the rudder. Xan's search gives a slightly lighter green than the AII z and a blue near the RLM65.
I took the humbrol 86 as green. and the H65 as blue. The decals come from the I-5 use to get the M22 engine
Here is the result.
Cheers
Bernard


