|
Massimo Tessitori
|
 |
« Reply #30 on: October 02, 2018, 07:44:25 AM » |
|
Hi Bernard,
shiny or dull silver...I think that it depends on the age and state of paint. I would go with an half way.
About vacuform canopies, I see you have made a vacuum table. What do you use as an heat source, an hair dryer?
Regards
Massimo
|
|
|
|
|
 Logged
|
|
|
|
|
BLG
|
|
« Reply #31 on: October 02, 2018, 09:55:08 AM » |
|
Hi Massimo, I use a thermal paint stripper whose temperature can be adjusted precisely. I make assays with the material and note the temperature. For instance for the PVC sheet I'm using now , the ideal T° is 230°, soft enougth to reproduce the master and no risk to melt . It's far more comfortable than a tool with fixed temperature where the sole way to adjust the temperature is to play with distance of blowing. https://media.castorama.fr/is/content/Castorama/5052931316892_DECAPEUR_THERM_MEHG2000_MAC2. Regards Bernard |
|
|
|
|
Logged
|
|
|
|
|
Massimo Tessitori
|
|
« Reply #32 on: October 04, 2018, 06:58:06 AM » |
|
Hi Bernard,
so, you fix a piece of pvc in a frame, put it over the master on a vacu table, swich on the vacuum, then heat until it takes the shape?
Regards
Massimo
|
|
|
|
|
Logged
|
|
|
|
|
BLG
|
|
« Reply #33 on: October 04, 2018, 10:48:44 AM » |
|
Hi Massimo, The upper plate of the box is drilled with many holes 4 mm in diameter. A thin metal grid allows a better circulation of the air, but is not essential. All around the grid, a flexible seal, (rubber, silicone, etc.). is used for future sealing. I place the masters on the grid, then the PVC sheet, which overflows the flexible joint. The whole thing is covered by a plate the size of the box with a hole just big enough for the size of the canopies to do. I clamp this plate with clips to the upper part of the box (this part protudes from the box) . Then I begin heating and plug the vaccuum cleaner on, and continue to blow hot air until I'm satisfied. 10-30s depending of the number and size of masters and the type and thickness of the sheet. It's longer to explain than to do  Here are canopies for a UTI-2 that I have recently posted here: http://fighters.forumactif.com/t88113-polikarpov-i-16-du-proto-au-i-185-pj-amodel-icm-artmodel-1-72#1753401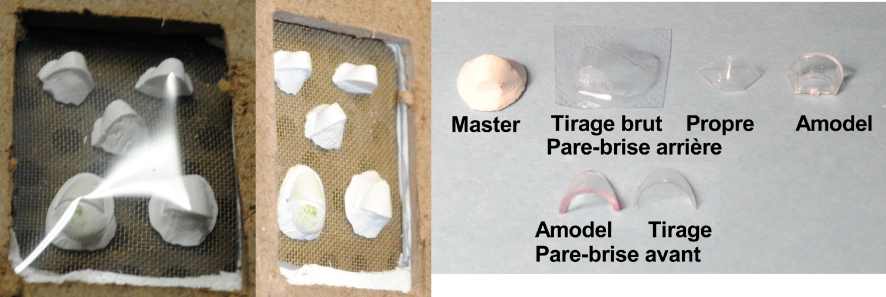 On this picture, you can see the clips and the hose of the vacuum cleaner for a better understanding  It's the canopy of this Type 5  If you type "vacuum box canopy " on Google or You tube, you will find many exemples. One close to mine: https://www.youtube.com/watch?v=Nrfh9NBdx-oBest regards Bernard |
|
|
|
« Last Edit: October 04, 2018, 11:33:22 AM by BLG »
|
Logged
|
|
|
|
|
Massimo Tessitori
|
|
« Reply #34 on: October 04, 2018, 08:45:42 PM » |
|
Hi Bernard,
your description is very clear.
If I don't miss, there is also a technique with negative moulds. Do you know how to do?
Regards
Massimo
|
|
|
|
|
Logged
|
|
|
|
|
BLG
|
|
« Reply #35 on: October 04, 2018, 11:56:35 PM » |
|
Hi Massimo,
I know one I tested before building my box. You dont need vacuum. You fix the sheet on a plate with a hole about the size of the master. You fix the master on a rod, or better you include the rod in the plaster before it hardens . You heat the sheet then you push by hand the master again the softened sheet. It's not easy nor precise. I often made 5 or 10 trials before a success. The main difference with a box is that you stop heating before molding the sheet, and the sheet is either to hard or melted. And you have to push enough but not too. Furthermore, for a good result , you have to pepare a new plate with the hole adapted to the master each time you change the master.
If you have only one canopy to prepare, it's usable. But to make a box take one hour if you have the right tools, and after you need a few seconds to prepare several perfect canopies.
Regards
Bernard
|
|
|
|
|
Logged
|
|
|
|
|
Massimo Tessitori
|
|
« Reply #36 on: October 05, 2018, 07:32:21 AM » |
|
Hi Bernard,
I've utilized this method sometimes, but it would be a big regress compared to the vacuum.
I was thinking to the method used to prepare many commercial vacuform kits: a negative resin mould with some tiny holes to aspire air, so the outer side of the kit touchs the mold. It should give better outer details, but can leave traces of the aspiration channels. Anyway it is harder to do.
Regards
Massimo
|
|
|
|
|
Logged
|
|
|
|
|
BLG
|
|
« Reply #37 on: October 05, 2018, 11:04:08 AM » |
|
Hi Massimo, the results I obtain are suffisant for me. The finely engraved frames of the Prop&jet canopy have been reproduced by the I-gum mold, then by the plaster and finally I can see them on the PVC canopy. Do you need better quality? Rather than painting them, I have used sticking aluminium foil cut with my Silhouette plotter to reproduce these frames.  Back to the Khalkin-Gol camo. I have finally found a good PDF of Voennaya Letopis. All the pictures are printed with a coarse screen which is obvious on the picture I post. Furthermore, the picture of types 5 was of bad quality compared the numerous pictures of tanks and guns in the magazine. No hope to have a better result if we could find a printed issue.  Best regards Bernard |
|
|
|
« Last Edit: October 05, 2018, 09:49:45 PM by BLG »
|
Logged
|
|
|
|
|
Massimo Tessitori
|
|
« Reply #38 on: October 05, 2018, 09:40:58 PM » |
|
Hi Bernard,
the frame made with aluminum cutten by a plotter give an excellent result. You are very well equipped. I'll have to find another way, maybe hand cutten paper.
About that photo of I-16, I think that we have reached satisfying conclusions, I can't hope to find a better version of the photo within a reasonable time.
Regards
Massimo
|
|
|
|
|
Logged
|
|
|
|
|
BLG
|
|
« Reply #39 on: October 16, 2018, 10:33:42 PM » |
|
Hi everybody, Here are the results of my reflections (wild imagination   ) , with the advices of Massimo and AlexGRD . I have used also these profiles of Type-10 to guide me. 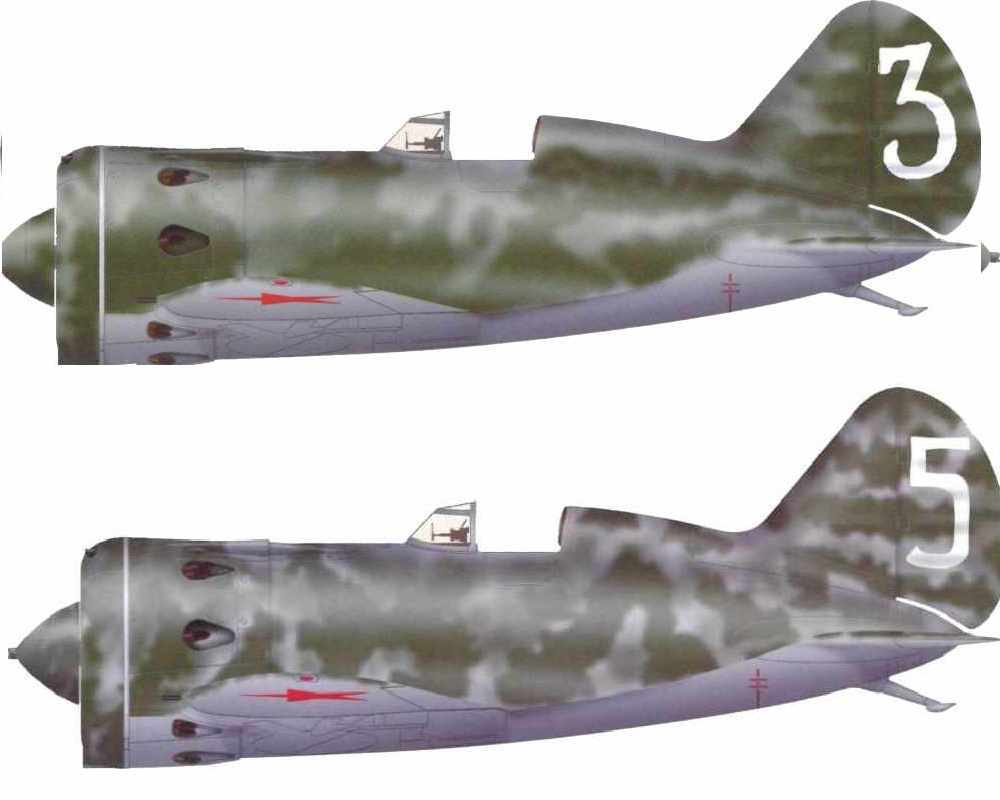 . My guess was that the Type-5 which were in Mongolia before the beginning of the Khalkin-gol battle were paint upper AIIz, and bottom, Ae8/AII All. There are pictures to confirm. Like other aircrafts, SB-2,I-15bis, I-153, DC-3 , they were camouflaged in the field at the beginning of the conflict. I suppose they were hanbrushed, I have decided to use the same grey that the metallic parts of the bottom. I have airbrushed the AII Z and hand brushed the grey I used for the Ae8. I have used numerous coat of very diluted paint to try to obtain the image seen on the profiles 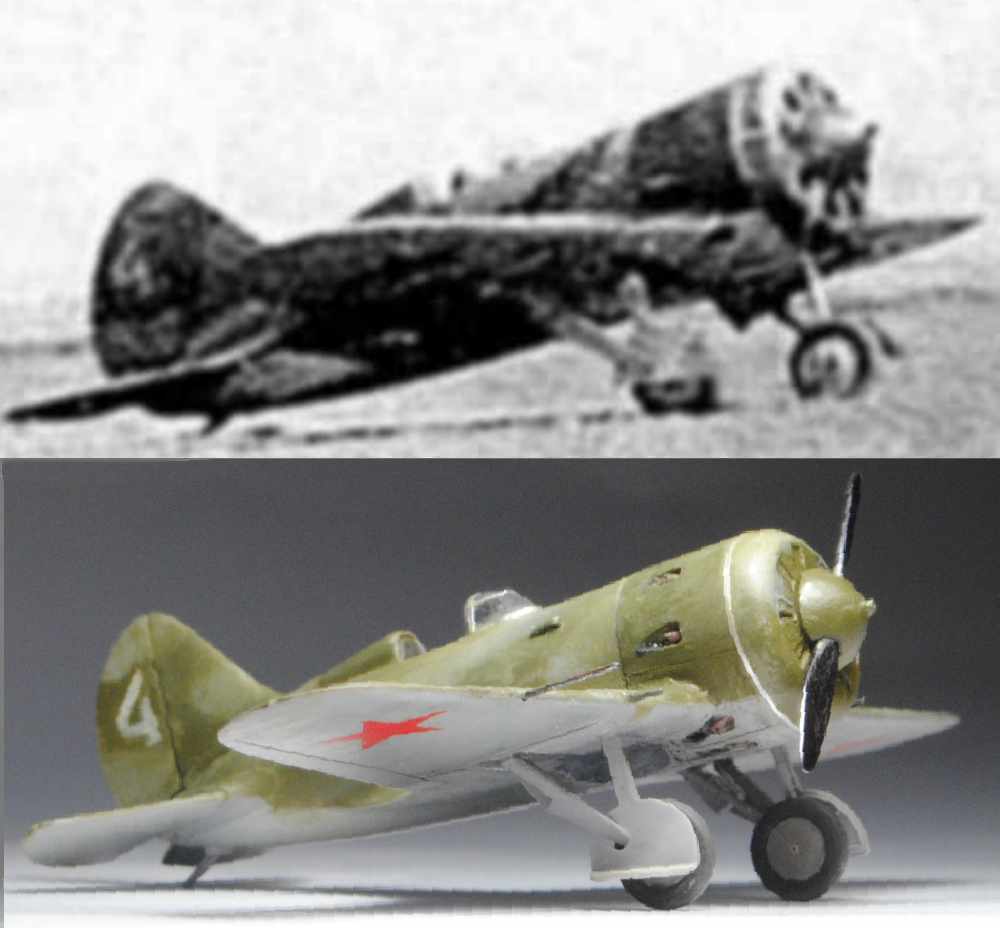  All comments are welcome, however I will not repaint it Regards Bernard |
|
|
|
« Last Edit: October 27, 2018, 11:41:55 AM by BLG »
|
Logged
|
|
|
|
|
Massimo Tessitori
|
|
« Reply #40 on: October 17, 2018, 08:55:52 AM » |
|
Hi Bernard,
the model is nice and the interpretation of the painting is credible.
What plane will you built next?
Regards
Massimo
|
|
|
|
|
Logged
|
|
|
|
|
BLG
|
|
« Reply #41 on: October 24, 2018, 10:41:15 AM » |
|
the model is nice and the interpretation of the painting is credible. Thanks Massimo, but I'll try to improve it, . The way I paint it give the impression there are 3 tones. What plane will you built next? The 5th and last type 5 will be one of these . 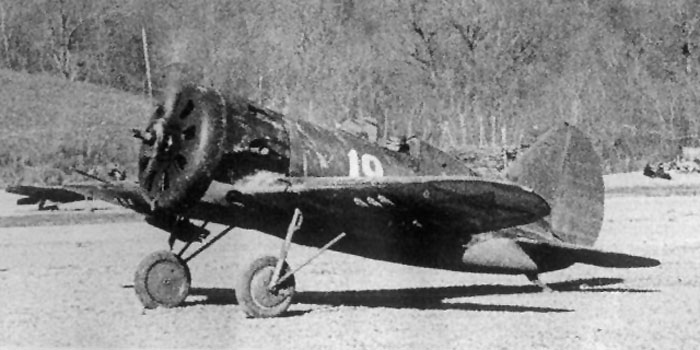 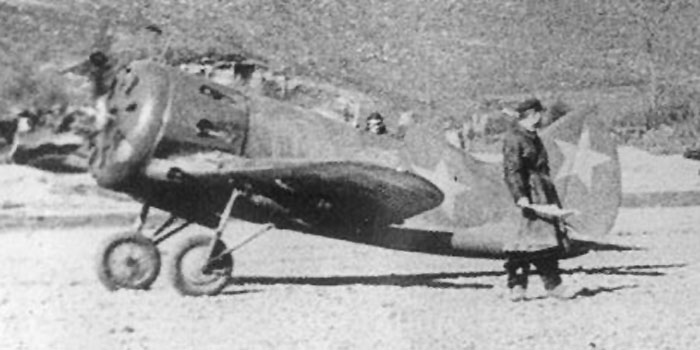 Apparently , they were equiped with a M25V, as the air intake of the oil radiator is visible . May be the last batches of type 5 were built like that, as there is the exemple of the famous grey-N°1 which is comparabel. Another hypothsis, as the pictures were taken in 1943, is that they were overhauled. 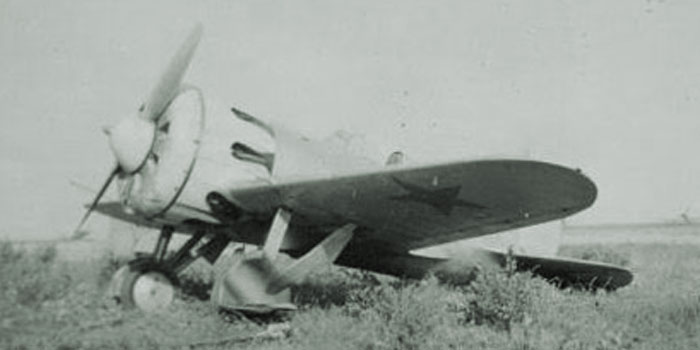 My question is: are the cowlings black or the difference of shades is due to the the way paint age on metal and tissue surfaces? I think the second hypothesis is better as the black cowlings were not painted since 1938. Regards Bernard |
|
|
|
|
Logged
|
|
|
|
|
Massimo Tessitori
|
|
« Reply #42 on: October 24, 2018, 06:40:35 PM » |
|
Hi,
the plane of the first photo looks to have a black cowling indeed, while the second one looks green.
The grey plane is appealling, the livery is rare for an I-16.
Regards
Massimo
|
|
|
|
|
Logged
|
|
|
|
|
BLG
|
|
« Reply #43 on: October 24, 2018, 07:02:32 PM » |
|
Hi Massimo,
Thank you for your advice.
I will do the green one. I have already five I-16 with black cowlings and none with a star on the rudder. According to the authors, the gray 1 is described as a demonstration plane or the plane of a high rank officer. I prefer a plane which is a good representation of what the VVS used, as they were obliged to scrape the last penny. Rather strange that the Type-5 with black cowling was not repainted in 1943. Maybe , it was out of use in 1938 , stored as is, and overhauled in 1943.
Regards
Bernard
|
|
|
|
|
Logged
|
|
|
|
|
Massimo Tessitori
|
|
« Reply #44 on: October 25, 2018, 09:38:28 PM » |
|
Hi Bernard,
yes, a livery of '30s with a large red star on the tail would be unusual. I wonder if the stars above the wings were still there.
Regards
Massimo
|
|
|
|
|
Logged
|
|
|
|
|


