|
Spitfire
|
 |
« Reply #15 on: March 06, 2015, 08:27:18 PM » |
|
And this is where we are now, as is my usual practice I have painted and detailed most of the parts prior to the start of construction, here are the parts with the AlleyCat build in a rather more advanced condition. 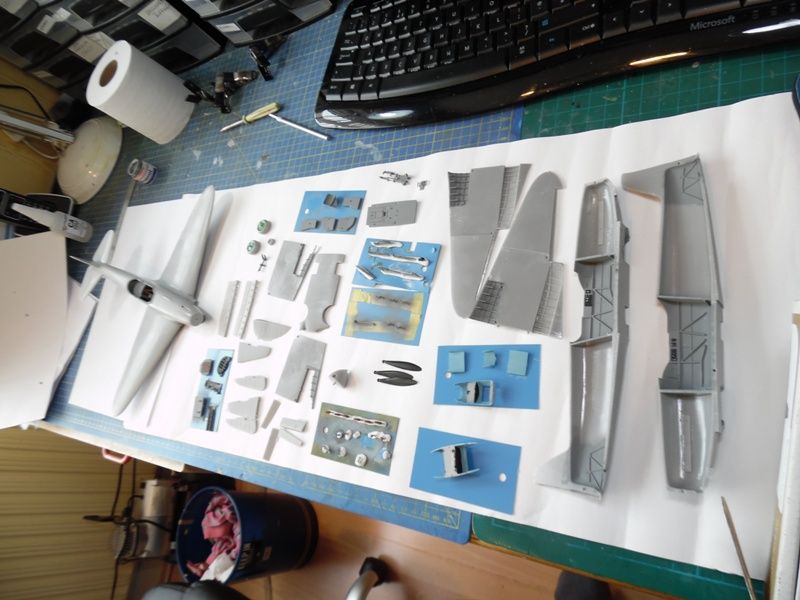 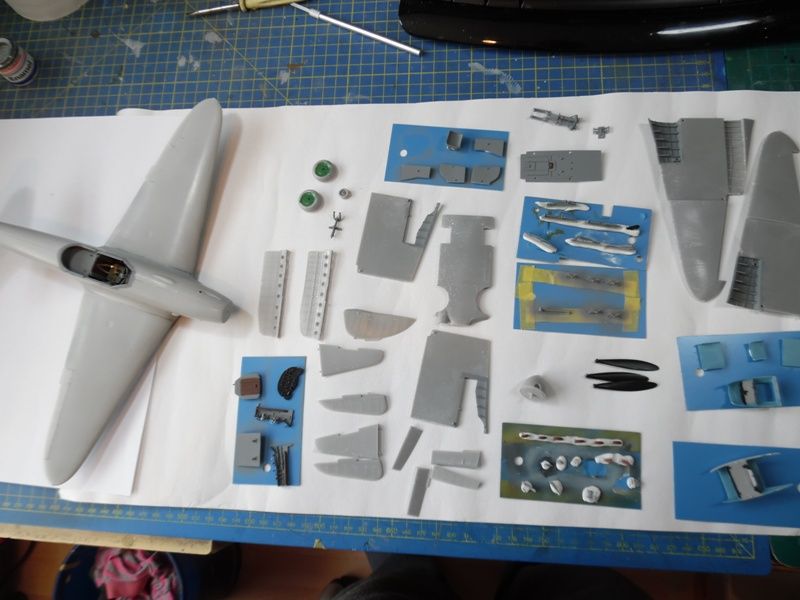 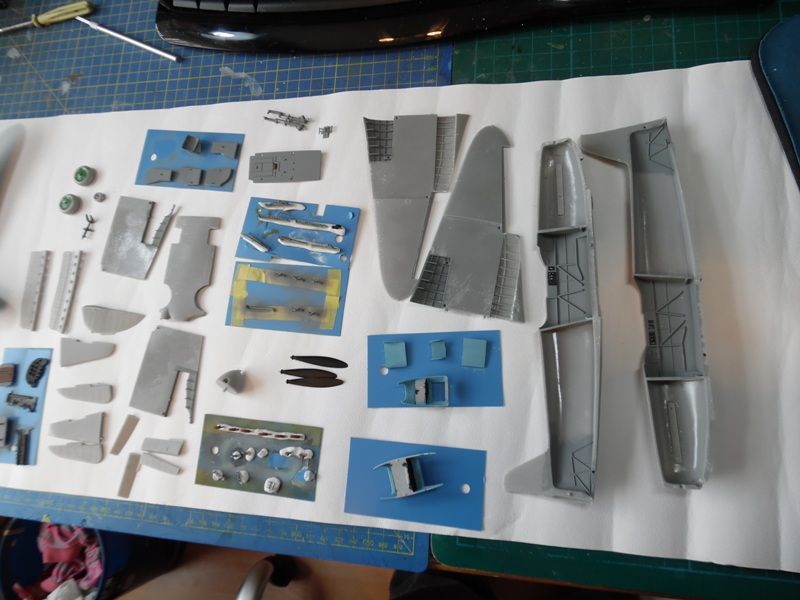 Cheers Dennis |
|
|
|
|
 Logged
|
|
|
|
|
Spitfire
|
|
« Reply #16 on: April 11, 2015, 08:18:41 PM » |
|
No I have not given up, I have been concentrating on the Montex kit, it is not as well finished as the AlleyCat kit and I have struggled with it, however I am now making good progress and both kits are now at the same level, the Montex kit's decals were missing but the new owner of Alleycat has found a set of decals for me so I will not have to resort to the spare decal file. Here's how we stand now. The Montex kit is on the Left  Montex kit 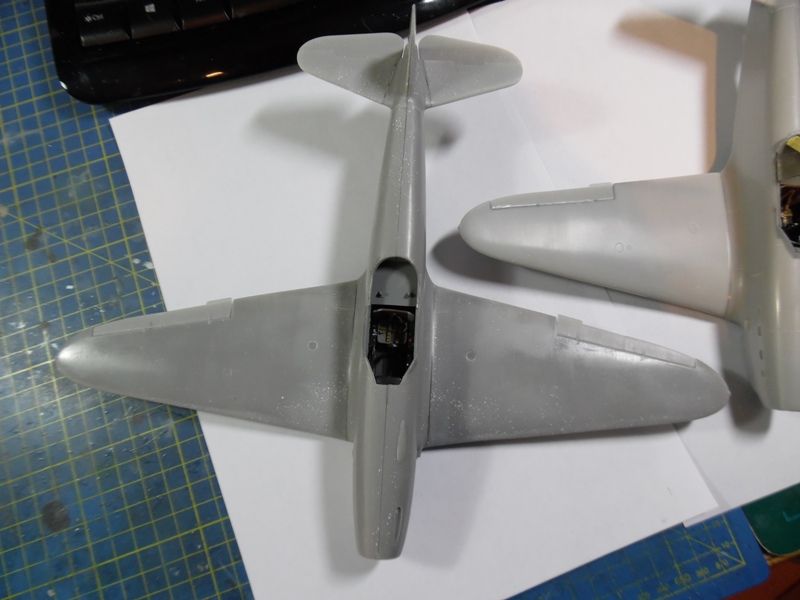 AlleyCat kit 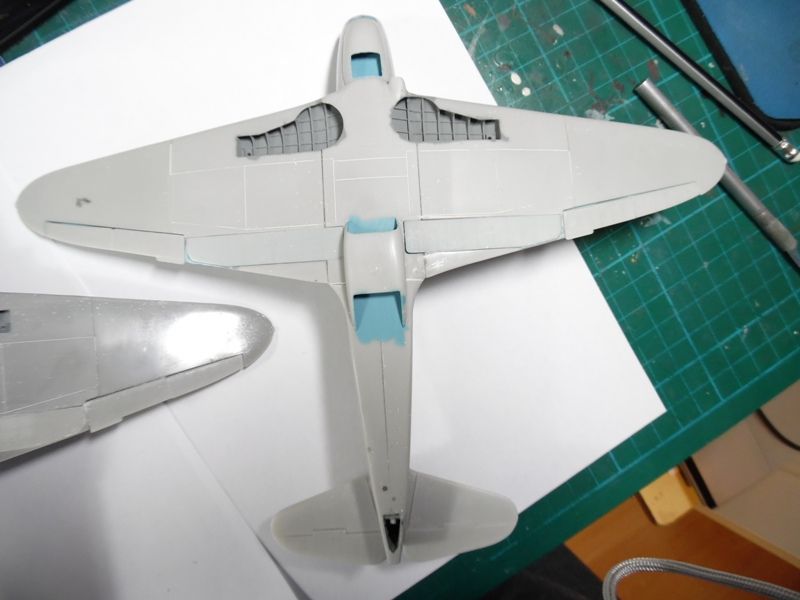 Montex kit 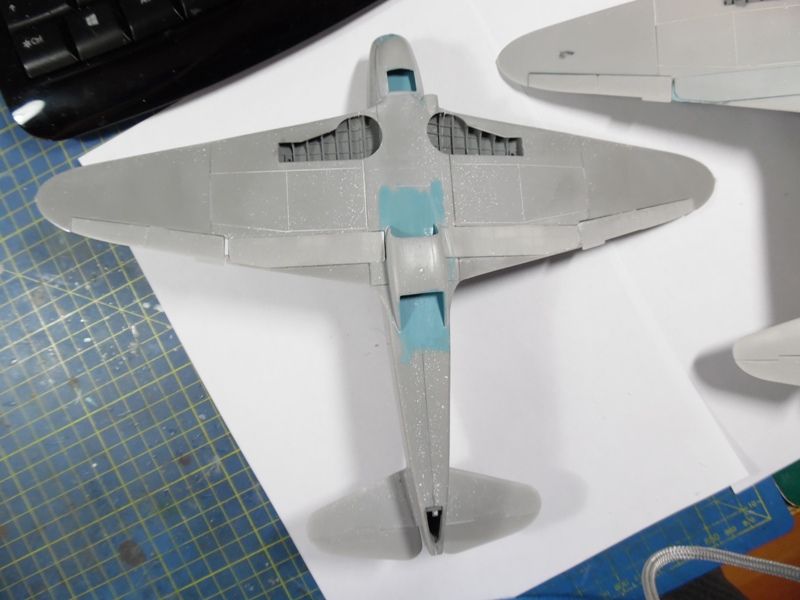 Cheers Dennis |
|
|
|
|
Logged
|
|
|
|
|
Massimo Tessitori
|
|
« Reply #17 on: April 11, 2015, 10:47:29 PM » |
|
Looks very good so far.
Just, the last photo seems to show some asymmetry in the cooler outlet. I don't know if it's a matter of perspective or a distortion due to the photo, but I would check it.
The owner of Alley Cat was very kind to supply the decals. Are there spare sheets for 1/32 Yaks on the aftermarket?
Regards
Massimo
|
|
|
|
« Last Edit: April 12, 2015, 06:58:12 AM by Massimo Tessitori »
|
Logged
|
|
|
|
|
Spitfire
|
|
« Reply #18 on: April 13, 2015, 05:28:14 PM » |
|
Hi Massimo will check the cooler, it fits with two pins so I will be disappointed if it is not straight, I have never found any 1/32 scale aftermarket Yak markings, my back up plan was to use paint masks.
Cheers
Dennis
|
|
|
|
|
Logged
|
|
|
|
|
Spitfire
|
|
« Reply #19 on: May 19, 2015, 04:20:04 PM » |
|
Well they did not end up in the bin, the ill fitting clear parts did put me off continuing the build and slowed progress right down but I've been doing the odd bits and pieces to the kits, at the moment it is the slow filling/sanding game. The rear clear part on the Montex kit fitted better the one on the Alley Cat kit, but after some struggling they are both fitted along with the windscreens, the sliding part on both will not fit over the rear part so it will be a closed canopy on them both. The clear bullet proof glass behind the pilots head fitted great but was too tall to allow the rear part of the canopy to be fitted so I removed the locating parts and drilled and pinned them, I have since learned that the bullet proof glass was angled, hence why it did not fit, I will try to correct this when I have finished the paintwork. Below is the clear parts fitted to the Alley Cat kit, the masks do not fit the clear parts very well which is strange given what Montex's core business is  After a clean up both airframes were masked and fitted with a wire holder ready for a coat of Mr Surfacer. 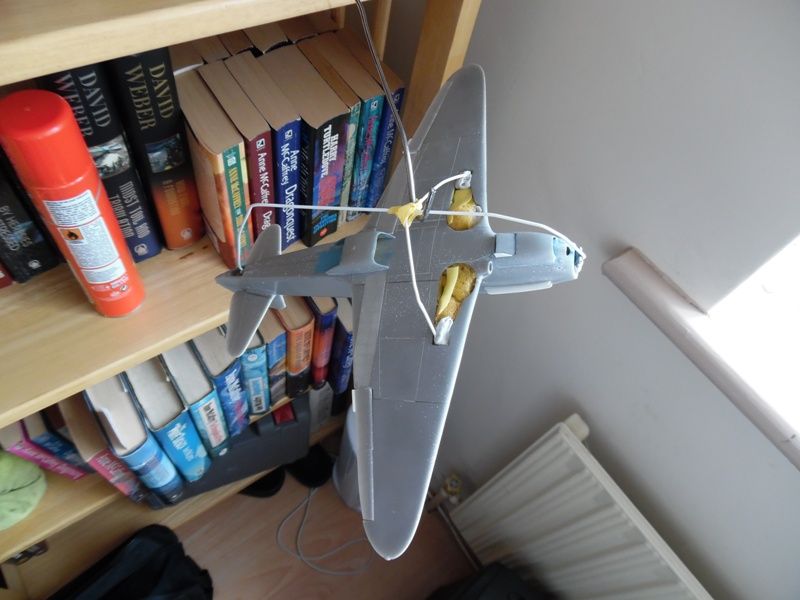 When the Mr Surfacer was dry it was time to clean up all the minor faults that the paint highlighted, and there were quite a few. 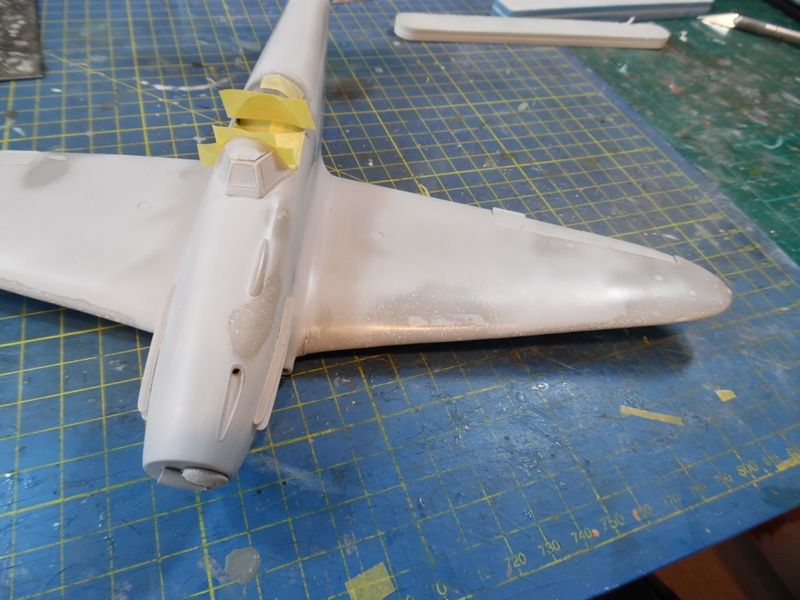 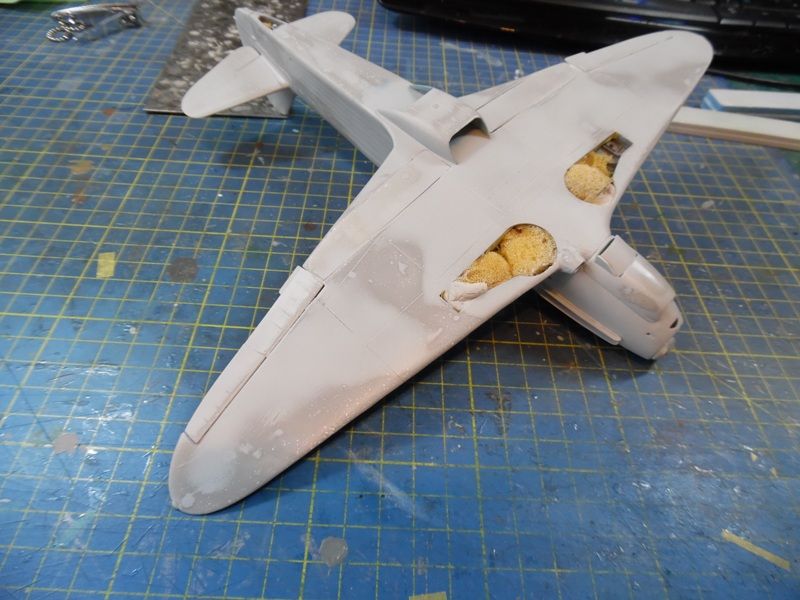 Once the filling and sanding was completed another coat of Mr Surfacer was applied and the filling and sanding process was started again. Cheers Dennis |
|
|
|
« Last Edit: May 19, 2015, 04:21:40 PM by Spitfire »
|
Logged
|
|
|
|
|
Spitfire
|
|
« Reply #20 on: May 19, 2015, 04:27:10 PM » |
|
And at last it is time to put on some paint, after buying lots of different paints and comparing them to the AKAN AMT-7 (enamel) I decided to paint the undersides with Humbrol H89, below is the Humbrol and AKAN paint chips. 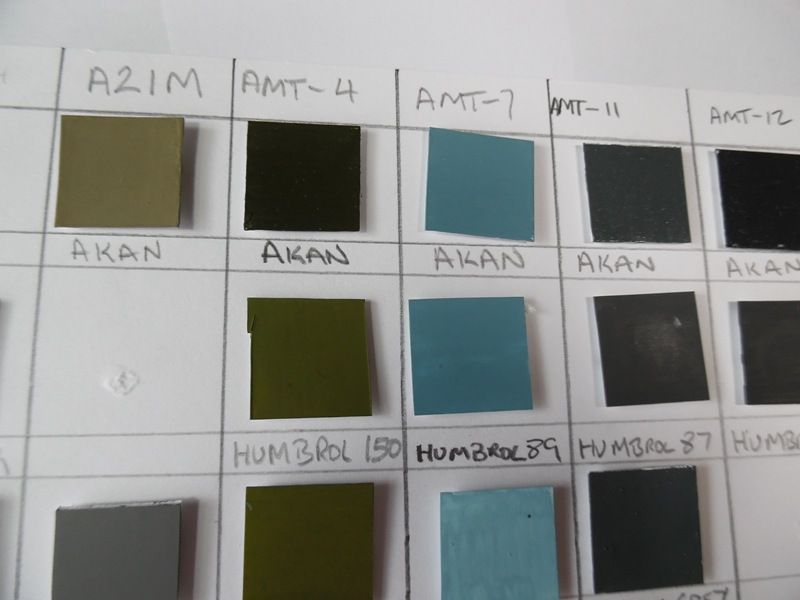 And here is the result, I nearly panicked and changed the colour when I saw how dark it was but it does match the AKAN chip so I left it alone, the photos show a dark colour and a light colour but in real life it is somewhere between the two of them. 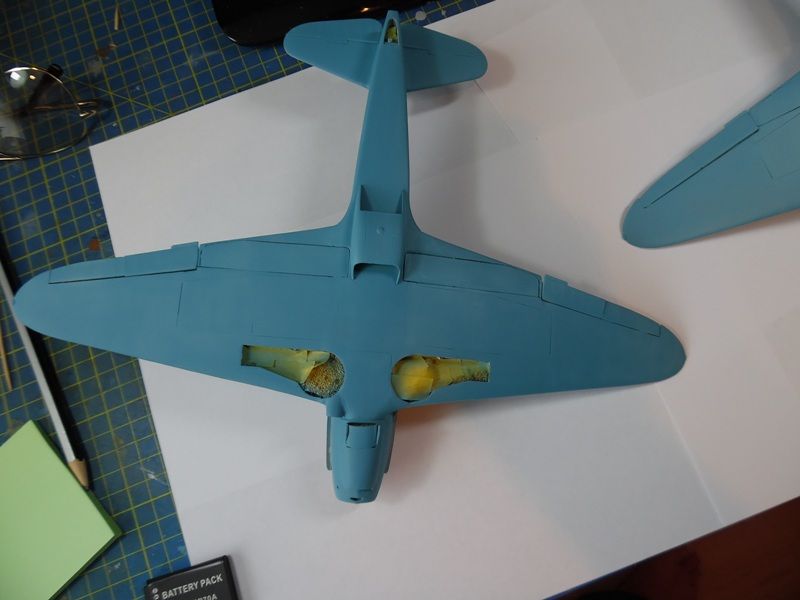  Cheers Dennis |
|
|
|
|
Logged
|
|
|
|
dancho
Newbie

Posts: 25
|
|
« Reply #21 on: May 19, 2015, 05:14:15 PM » |
|
Fascinating. The angle of the bullet-proof glass solves a puzzle for me, too.
|
|
|
|
|
Logged
|
|
|
|
|
learstang
|
|
« Reply #22 on: May 19, 2015, 06:36:22 PM » |
|
Interesting, Dennis - in that first photograph the AMT-7 does look a bit dark, but in the second one it looks about right, to me at least.
Regards,
Jason
|
|
|
|
|
Logged
|
"I'll sleep when I'm dead."
- Warren William Zevon
|
|
|
|
Spitfire
|
|
« Reply #23 on: May 20, 2015, 03:09:42 PM » |
|
Hi Jason, I have just airbrushed a lightened coat over the original, I usually do this anyway to break up the monotone finish, the result is rather nice and a shade lighter than the original, I used 2 parts H89 to 1 part H30 for the lightened coat.
Cheers
Dennis
|
|
|
|
|
Logged
|
|
|
|
|
learstang
|
|
« Reply #24 on: May 20, 2015, 05:48:36 PM » |
|
Good, Dennis. I look forward to seeing the grey on the topsides.
Regards,
Jason
|
|
|
|
|
Logged
|
"I'll sleep when I'm dead."
- Warren William Zevon
|
|
|
|
Spitfire
|
|
« Reply #25 on: May 24, 2015, 02:52:51 PM » |
|
Good, Dennis. I look forward to seeing the grey on the topsides.
Regards,
Jason
I'm a bit nervous about that, originally I thought to go down the Humbrol 106 Ocean Grey and the Humbrol 32 Dark Grey route, but painting out a chip using the 106 gives a grey without any blue in it, so I am now looking at another Ocean grey with a bit more blue (Xtracolor) Cheers Dennis |
|
|
|
« Last Edit: May 24, 2015, 09:00:15 PM by Spitfire »
|
Logged
|
|
|
|
|
learstang
|
|
« Reply #26 on: May 24, 2015, 06:07:21 PM » |
|
AMT-11 is a little tricky because you do want some blue in it. The Soviets even called it Grey-Blue, not even Blue-Grey, so there must have been some blue in it; as far as I know, the Soviets weren't colour-blind. The colour I used on my 1/72nd scale La-5F was MM Medium Gray, which has some blue in it, but I'm not sure how it would look on a 1/32nd scale aircraft. Probably too light and blue, I suspect. Despite the Russian name of Grey-Blue, AMT-11 seems to have been quite greyish.
Regards,
Jason
|
|
|
|
|
Logged
|
"I'll sleep when I'm dead."
- Warren William Zevon
|
|
|
|
Spitfire
|
|
« Reply #27 on: May 24, 2015, 09:01:31 PM » |
|
I'll just do a test on my F-14 tail plane and see what it looks like.
Cheers
Dennis
|
|
|
|
|
Logged
|
|
|
|
|
66misos
|
|
« Reply #28 on: May 25, 2015, 06:51:29 AM » |
|
Hi Dennis,
When lack of AMT-11 Soviets used 1:1 mix of AMT-7 light blue and black as acceptable substitution. So may be you could try it and check what color is the closest to it.
AMT-12 should be very dark, basicaly bleached black. Soviets found out that pure black does not exists in the nature, especially when viewed from a long distance, so black (from black-green schemes) was changed to dark grey.
Regards,
66misos
|
|
|
|
|
Logged
|
|
|
|
|
Spitfire
|
|
« Reply #29 on: June 09, 2015, 08:24:01 PM » |
|
Thank you for that 66misos, I did try that but failed completely, so I gave up, but here is my final test card selections for AMT-11 and 12, this is the best that I could photograph them, I rather like the slightly bluer colour rather than the more grey colour for AMT-11, the AMT-12 is the same on both cards. What do you guys think ?  Cheers Dennis |
|
|
|
|
Logged
|
|
|
|
|


