|
marluc
|
 |
« Reply #15 on: June 05, 2011, 02:07:33 PM » |
|
Hi John:
You need to be patience,I know that to improve the joint between plastic and resin parts (most of the times) is a time consuming job and could be very frustrating,but the end result really deserves it.Keep on the good work,greetings
Martin
|
|
|
|
|
 Logged
|
|
|
|
|
Apex1701
|
|
« Reply #16 on: June 05, 2011, 02:12:48 PM » |
|
Hi JP, Update! No pics. I am still sanding in the tail of this thing. Every time I think it's good, I hold it up to a bright light and find a bump, dip, line, etc. I hate filler! Anyway, almost done. My cat tried to help by stealing the clear parts, but I recovered them before he could chew on them. He got a slap on the back leg that quickly educated him on whether it was worth jumping up on the model table.  I did manage to put the AMT tail to Hasegawa fuselage. Quite an endeavour too! I used a medium thickness cyano to finish the work.  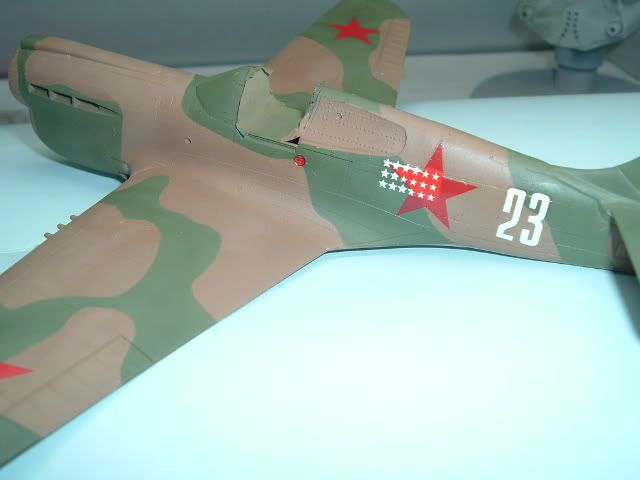 Jean |
|
|
|
|
Logged
|
|
|
|
|
Massimo Tessitori
|
|
« Reply #17 on: June 05, 2011, 03:28:14 PM » |
|
Hi Jean,
are you sure that the camouflage doesn't continue under the rear windows?
Regards
Massimo
|
|
|
|
|
Logged
|
|
|
|
|
John Thompson
|
|
« Reply #18 on: June 05, 2011, 10:48:19 PM » |
|
Hey, JP - looking good! I missed this thread somehow. I wish I could say it's because I'm spending so much time building my own models, but that'd be untrue. Anyway, the P-40 is looking very good indeed, especially considering what kind of fit problems you're having to deal with. The cockpit looks great! And yeah - pets and modelbuilding don't mix. Our three bloody cats are permanently banned from the basement under the threat of a blast from the plant spray bottle, but they're pretty stupid - it's very difficult to train cats to do much more than eat and sleep...  John |
|
|
|
|
Logged
|
|
|
|
|
JP
|
|
« Reply #19 on: June 05, 2011, 11:53:57 PM » |
|
I tried to get the resin to go on my Hasegawa kit, believe me. However on mine at least, the panel lines did not line up between the resin tail and the Hasegawa fuselage. Also, with the tail fitted, these non-matching panel lines angled downward on the tail at the seam. So I elected to deal with the AMT kit problems as easier than trying to make all that line up on the Hasegawa kit. Regarding the camouflage - I think consensus is that exterior camo on the P-40 did continue in those side windows. As for the cat - he hasn't even tried to get on the hobby table since our previous incident. I guess it's good that my cat is at least this much trainable.  To help him, I leave the tips of brushes hanging from the side of the table to make him unsure if he can get up there. I also put the parts I care about away when I'm done. He's just a cat after all. |
|
|
|
|
Logged
|
|
|
|
|
John Thompson
|
|
« Reply #20 on: June 06, 2011, 12:59:16 AM » |
|
Yes, well, ours would just see things hanging off the edge of the table as a challenge, not an obstacle! I keep telling them if they'd bothered to evolve opposable thumbs to work a can opener, they could open their own bloody cat food.
John
|
|
|
|
|
Logged
|
|
|
|
|
JP
|
|
« Reply #21 on: June 06, 2011, 01:48:15 AM » |
|
Sanding is complete! I can find no trace of a seam and no more filler bumps! Time to close up the cockpit and prep for painting. After re-scribing all the crap I sanded away . . .
|
|
|
|
« Last Edit: June 06, 2011, 01:59:23 AM by JP »
|
Logged
|
|
|
|
|
JP
|
|
« Reply #22 on: June 06, 2011, 03:56:49 AM » |
|
These will need cleaned up a little, but after a doubtful start, I think the lines are going back in rather well. It's interesting trying to scribe a line in two different materials and have it come out the same. Can't wait to see some paint on it! 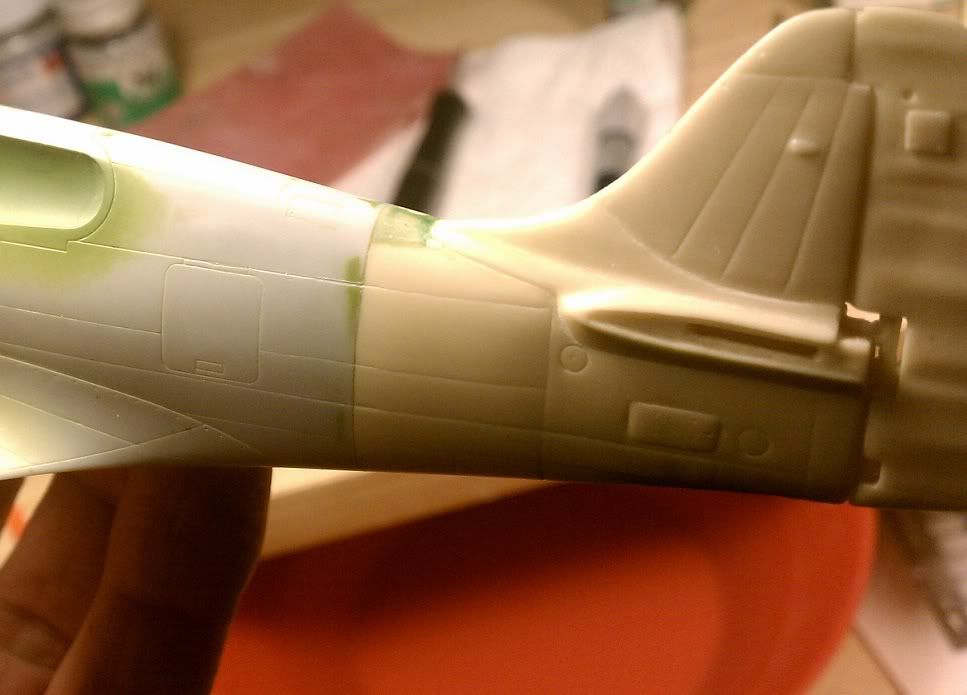 |
|
|
|
|
Logged
|
|
|
|
|
Apex1701
|
|
« Reply #23 on: June 06, 2011, 03:59:36 AM » |
|
JP and Massimo, These will need cleaned up a little, but after a doubtful start, I think the lines are going back in rather well. It's interesting trying to scribe a line in two different materials and have it come out the same. Can't wait to see some paint on it!
Way to go JP :-)) Regarding the camouflage - I think consensus is that exterior camo on the P-40 did continue in those side windows.
Maybe there's a consensus on this but some P-40 did not have camo on the inside of the side windows. 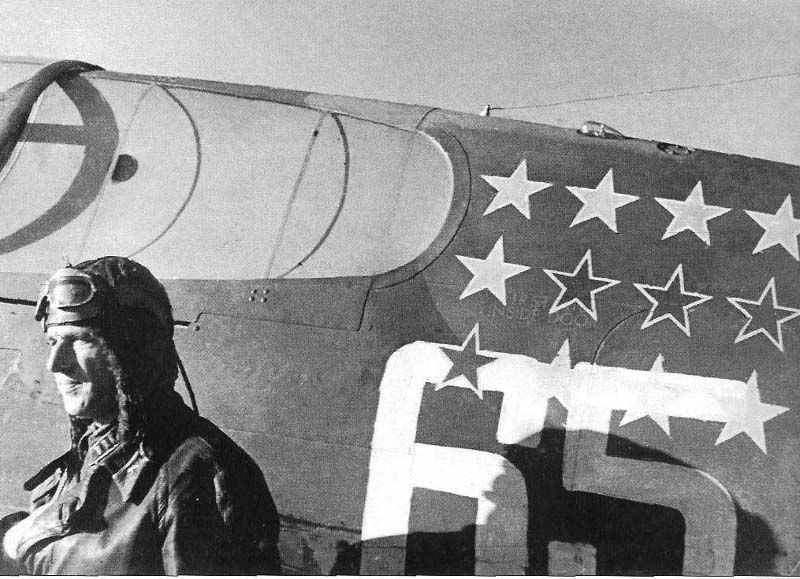  I choose to do my K without the camo. I will open a thread with my finished P-40K soon. Jean |
|
|
|
|
Logged
|
|
|
|
|
JP
|
|
« Reply #24 on: June 06, 2011, 04:31:31 AM » |
|
You have a point there. There does not appear to be camo under the windows. However, that color doesn't appear to match the two colors outside, and I've seen this discussed many times. Your theory is as good as any I suppose. What matters is that you are satisfied with it.  |
|
|
|
|
Logged
|
|
|
|
|
learstang
|
|
« Reply #25 on: June 06, 2011, 05:48:33 AM » |
|
Where it's clearly not the camouflage colour under the glass, I'm going with interior green. At least that's how I plan to do my Soviet P-40's if I ever get back to them. By the way, nice work Jean and JP - you'll no doubt have your "Kurtisses" done long before I do.
Regards,
Jason
|
|
|
|
|
Logged
|
"I'll sleep when I'm dead."
- Warren William Zevon
|
|
|
|
JP
|
|
« Reply #26 on: June 06, 2011, 07:10:52 PM » |
|
Damn. While scribing the panel lines back in, I detected two little seam lines at the tail joint. Back to the sanding . . .
|
|
|
|
« Last Edit: June 07, 2011, 02:23:17 AM by JP »
|
Logged
|
|
|
|
|
marluc
|
|
« Reply #27 on: June 06, 2011, 09:59:17 PM » |
|
It looks like filling and sanding never ends.You?ve done a nice work on those panel lines,greetings.
Martin
|
|
|
|
|
Logged
|
|
|
|
|
JP
|
|
« Reply #28 on: June 08, 2011, 07:12:38 PM » |
|
Hey Apex, do you have the rest of that article? Here are the lines scribed in on the other side. And I am finally satisfied with the joint of the tail. Being a perfectionist has it's down sides, mainly that it kills production. But my goal was to be unable to detect in any way where this new tail was attached - no seam, line, bump, bulge, change in shape, etc. The only way I can spot it now is from the two different colored materials. (This personality trait bodes not so well for the Hasegawa kit and the ridiculous number of fuselage plugs they opted for, presumably to make the kit easier for them to make, but no cheaper than any of their other kits.) 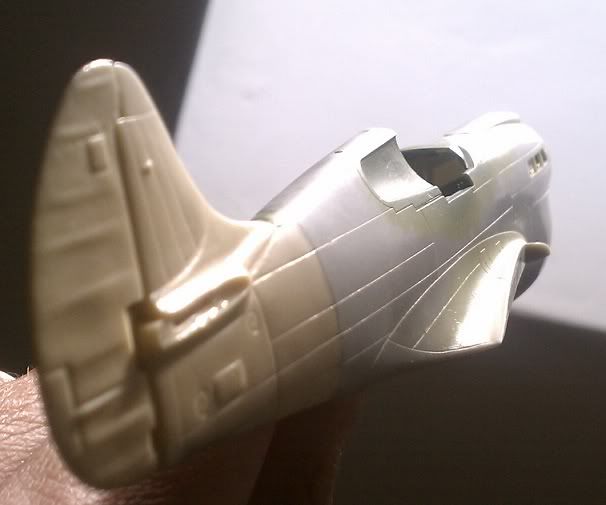 So now it's time to decide on the paint scheme. As I said, I want to do a Leningrad area P-40K in summer scheme. Outside of those preferences, I don't care, so you can all help guide me in the painting. Now I have some questions on those damn back windows. I think it's fair to say it should be in the British temperate land scheme. I'll read back through the thread here and look for ideas. Also will go through the decals and see what I have for bort numbers. |
|
|
|
« Last Edit: June 08, 2011, 07:49:53 PM by JP »
|
Logged
|
|
|
|
|
marluc
|
|
« Reply #29 on: June 08, 2011, 09:52:49 PM » |
|
Well done John,the panel lines look very good.Greetings.
Martin
|
|
|
|
|
Logged
|
|
|
|
|


