|
Model by Massimo Tessitori |
|
|
|
This model was obtained by the ICM kit, 1/72; this is a small but highly
accurate model.
Looking at the pieces, one can have the impression to have an Amodel
short-run kit between his hands: small, accurate pieces of white plastic,
with a bit of flash and few holes for pins.
The building of the model is a bit difficult because of the absence
of pins; this creates difficulties for tail horizontal plans, for wings
and struts, and for landing gear whose legs are frail too.
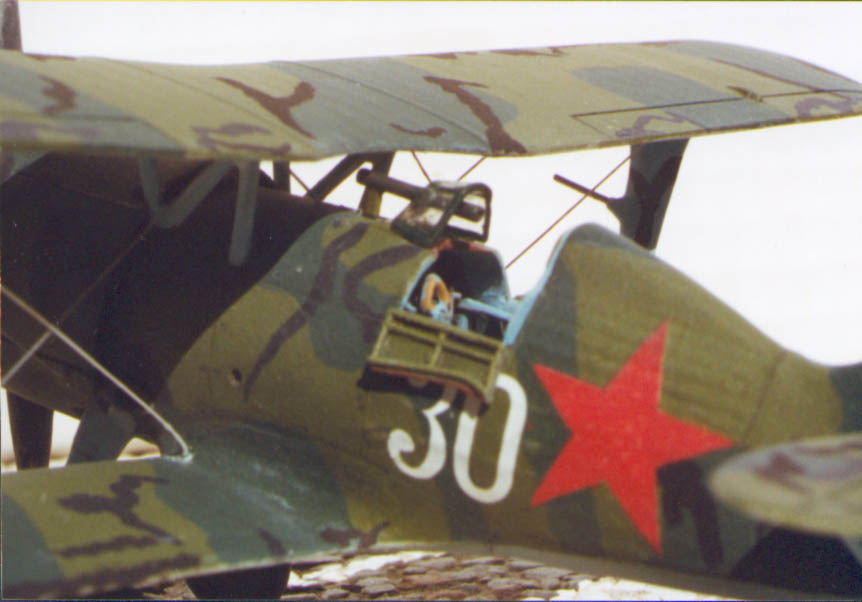
| The cockpit is fairly well visible, and can be improved.
I have removed and rebuilt the pilot doors to make them in open position; this requires to thin a bit the walls, possibly without deleting the details. Note that both doors were openable, but they were different: the left one was composed by two hinged pieces; this was the side on which the pilot accessed the cockpit; the right door was auxiliary and made by one hinged piece only. There is something wrong about the plate behind the pilot's seat: from my drawings, it should stop under the pilot's shoulders, so I omitted the wall B24 and extended downward the headrest plate. The seat exists both in unarmoured version, as on the kit, and in armoured version; this should have an armoured plate that has to be rebuilt. Probably it wasn't fitted on all the I-15bis since the Spanish Civil War, but it was surely fitted on many aircraft of which I have photos related to the Great Patrioctic War. The floor B22 is too wide, it should be cut to the width of the pedals. We'll have to rebuild the tubes frame to extend it till below the floor; besides, the floor itself should be supported in some way. I preferred to avoid this work on my model, giving the idea of the gaps aside the floor by painting dark the sides of the pavement. A delicate point is to drill a thin hole on the windshield to let the OP-1 telescopic sight pass through. It's necessary to use thin drill tools rotated by hand; one should start with a very thin hole and enlarge it gradually until the sight passes through. |
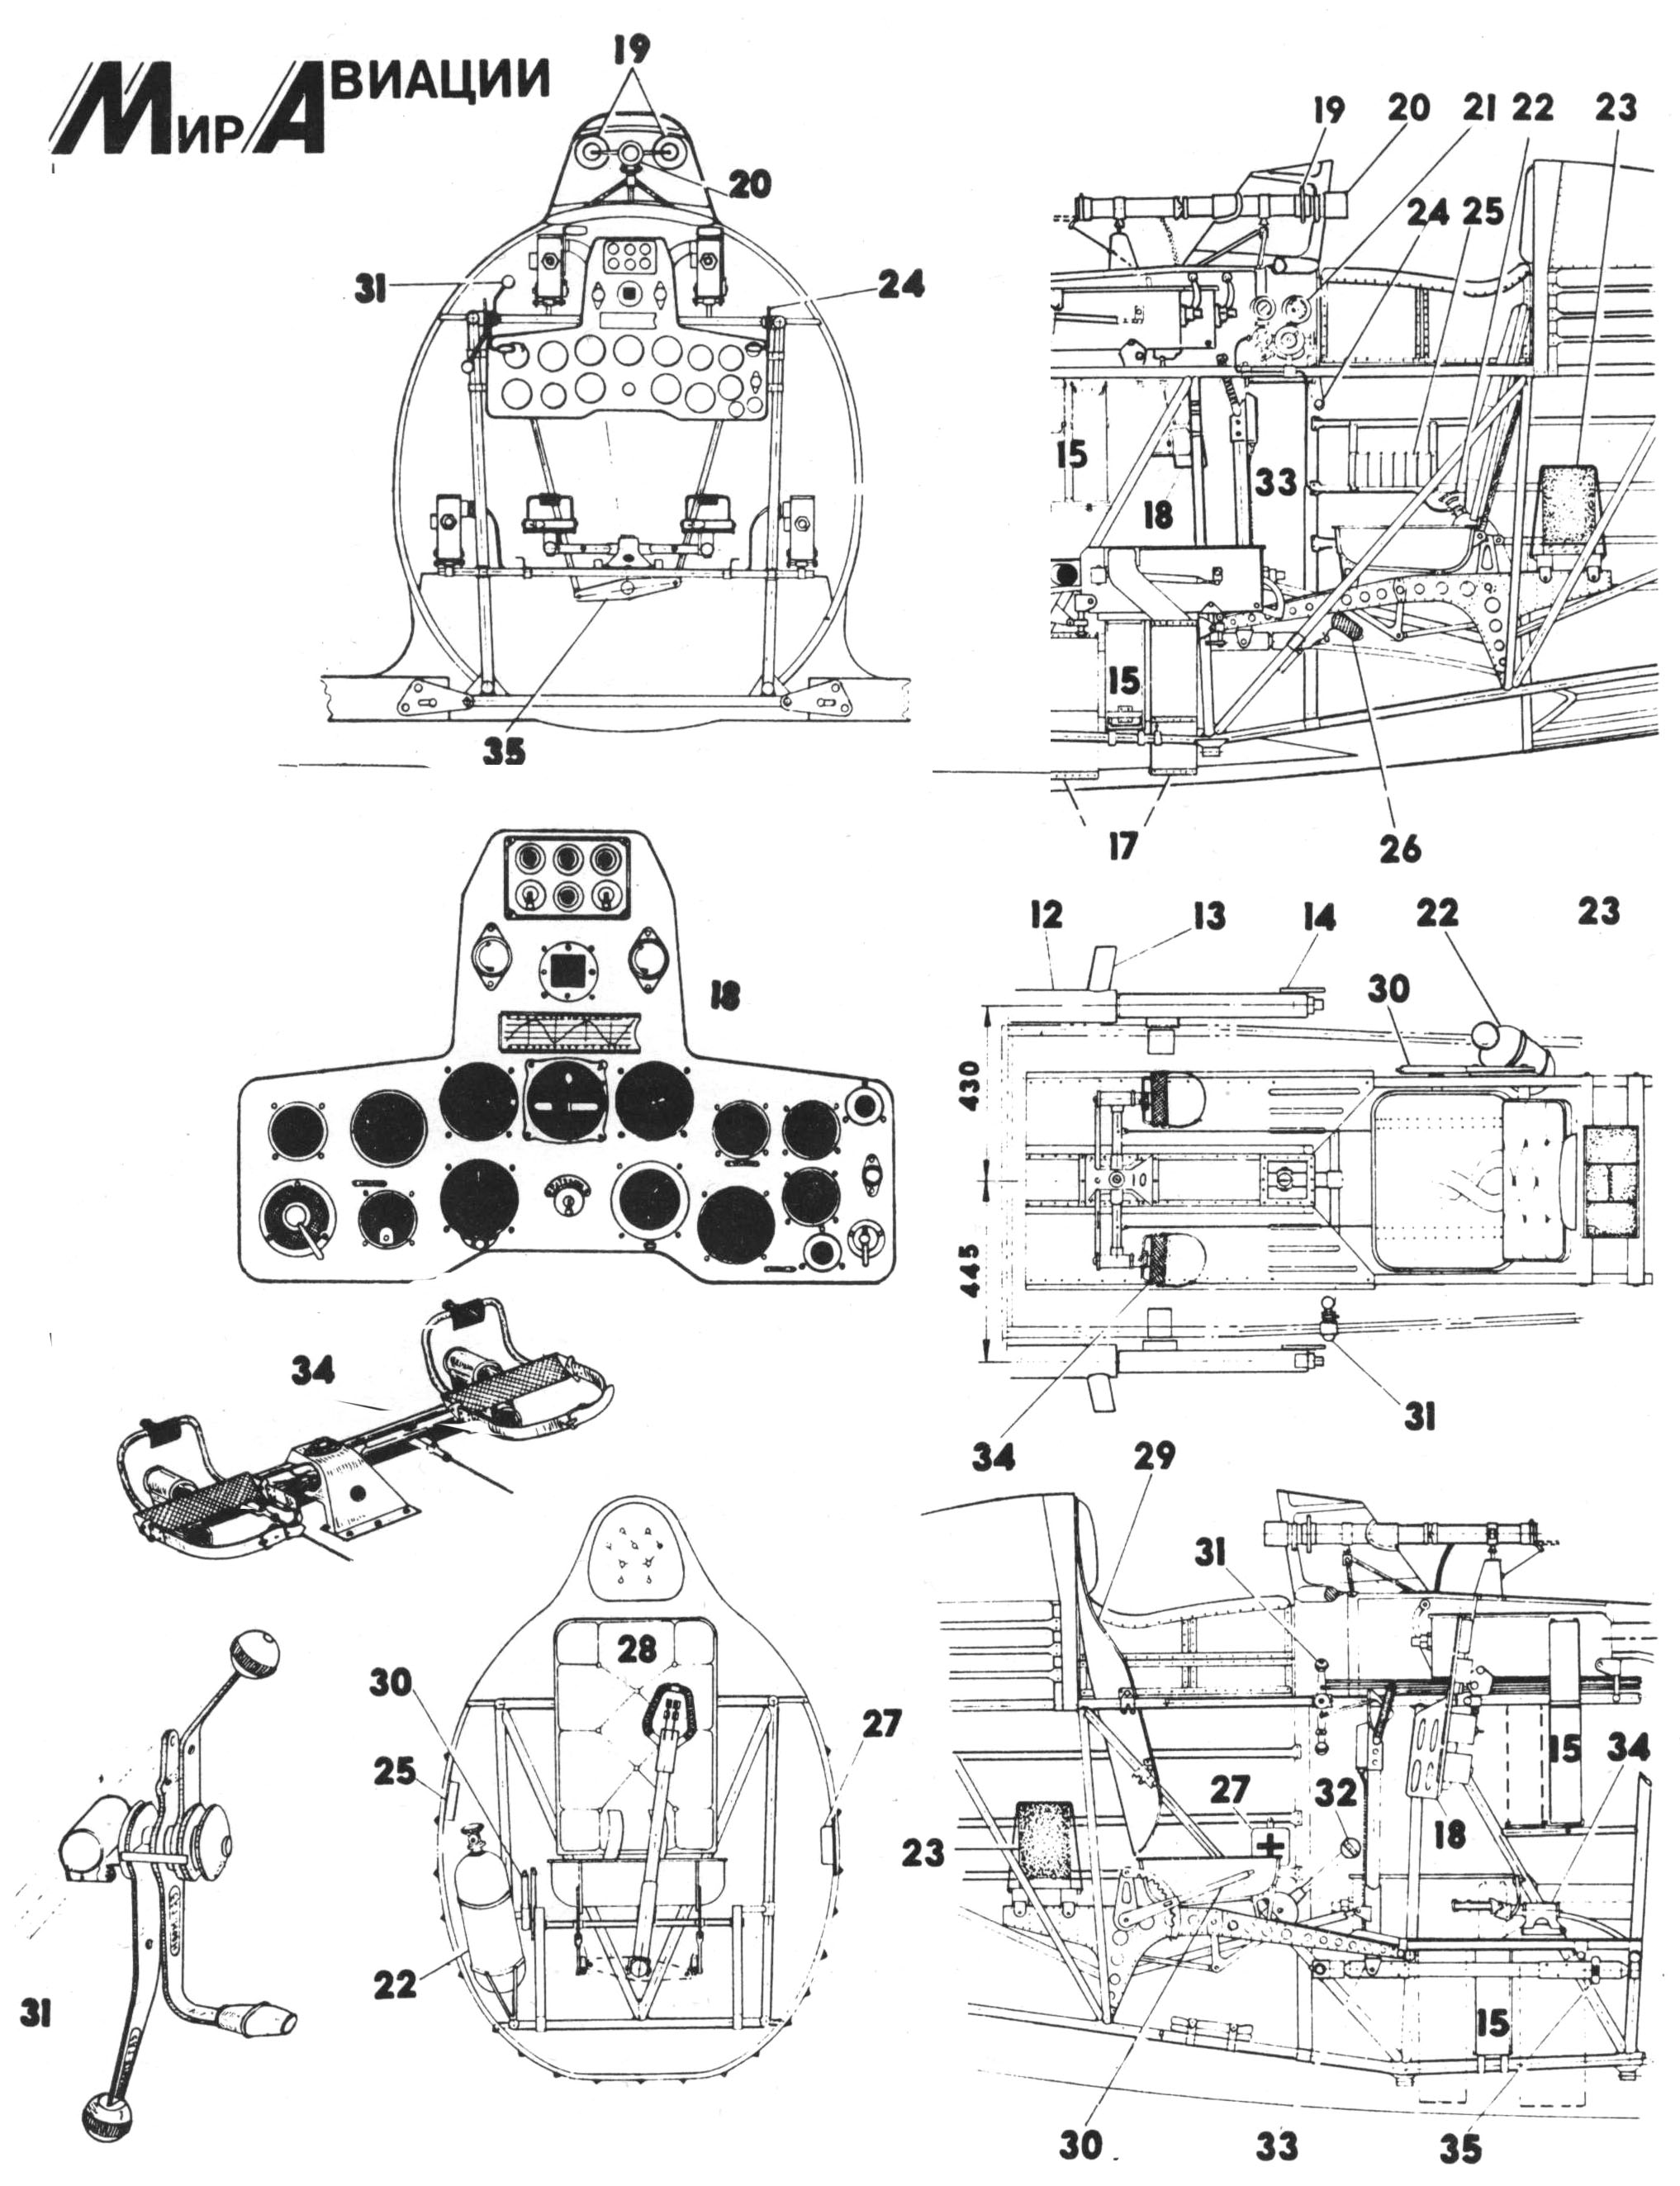 |
About the colors of the cockpit: we know for sure that the base color
was light, but not the exact shade.
I conformed to the rebuilt aircraft, showing a combination of light
blue (the same of undersurfaces), yellowish green and black (the instrument
panel and the guns).
Excellent bw photos of the original cockpit can be found in the Squadron/Signal
monograph.
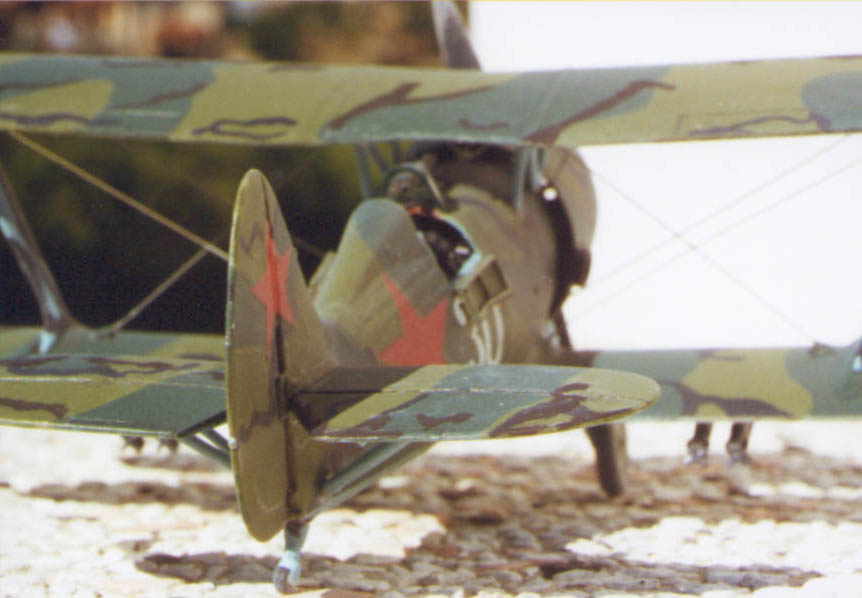
| Another characteristic that don't appear on any drawing nor on rebuilt
I-15bis, but is visible on photos, is that the engine cowling back end
was a bit shorter on the ventral part (between the landing gear legs) than
on side and upper part.
So I modified the cowling of my model. Exhaust stacks and gun barrels were drilled. Side gun barrels were added inside the engine cowling. |
 |
The building up of wings is a difficult matter: I have first glued the lower wings to the fuselage, then the upper wing with central N frames, then the external frames that had to be leghtened of about 1 mm. I have read of another modeler that preferred to glue first the upper wing to extenal struts, and then to separe the single rods from the N frame, to cut, adapt and glue each one separately. This second system is by sure easier, but I suspect that this lead to a too small gap between the fuselage and the upper wing: on the instruction sheet it is drawn 4 mm wide, on my model results of three...what if I shortened the struts?
The choice of versions given by the kit decals sheet is huge:
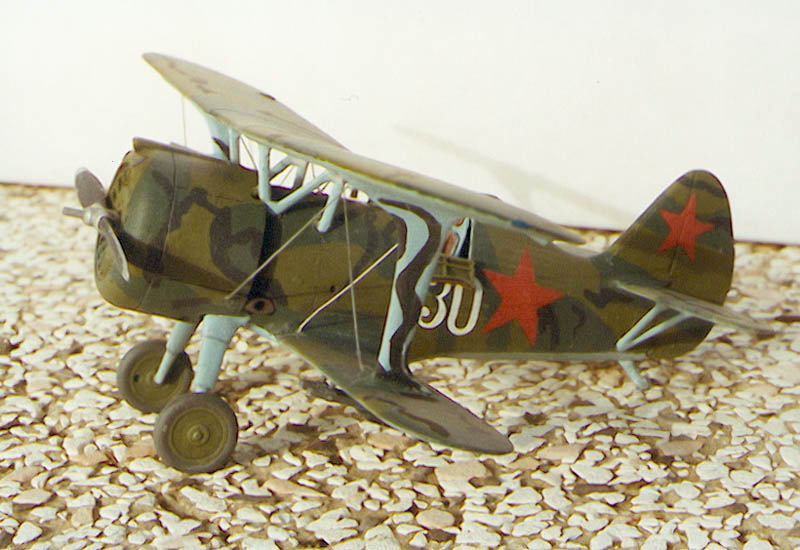
| My interest was captured by the aircraft n.30 of senior lt.V.F.Abramov of 11 IAP Baltic Sea Fleet, 1942, of which I found a photo and a profile on the monograph "Polikarpov fighters in action". This photo is bad, but it shows clearly an I-153 type tail wheel, that I obtained from a spare fuselage of an Heller kit. | 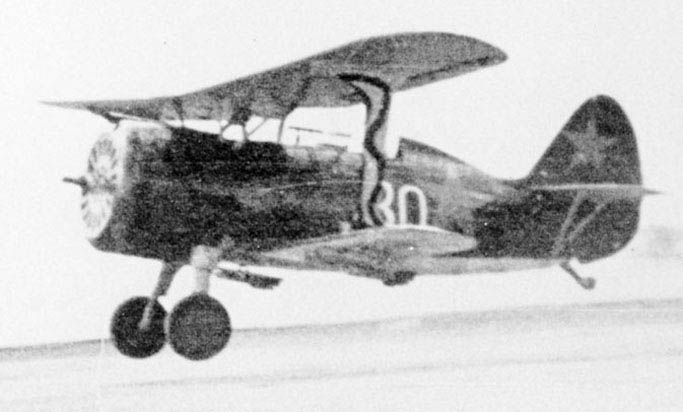 |
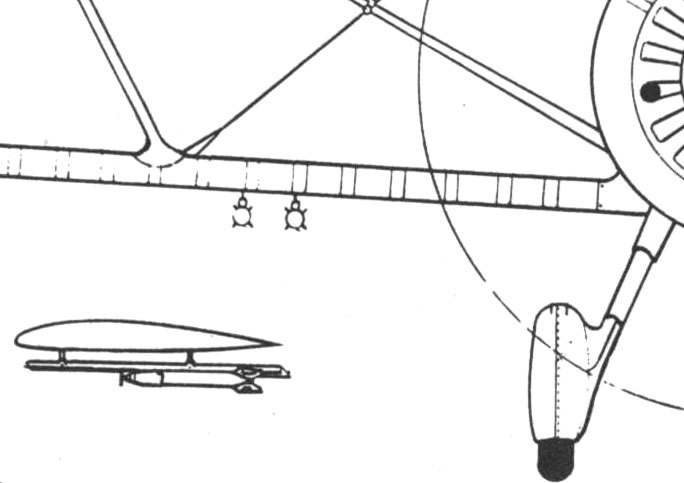
| Besides, the photo shows that the aircraft bore four RS-82 rockets
and relative rails. They are obtainable on Toko/Roden LaGG-3.
The drawing aside shows the exact positioning of rockets, that were not centered on the bomb attacks visible under the wings of the model. Note that they are a bit inclined upwards respect to the flight axis (this is visible on the photo, not on the drawing). |
 |
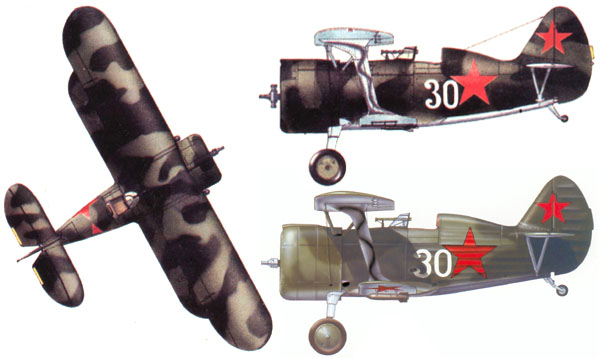
| The major mystery is that the camo scheme drawn on the instruction
sheet is completely different from that drawn on "in action".
The kit sheet was not drawn without documents: an identical color profile and upper view was published on Mir Aviacii. Here are Mir Aviacii profile (above) and In Action profile (below). Not a line is coincident in two profiles made by skilled artists. How is it possible? The photo looks unclear and can't confirm any of these interpretations. |
 |
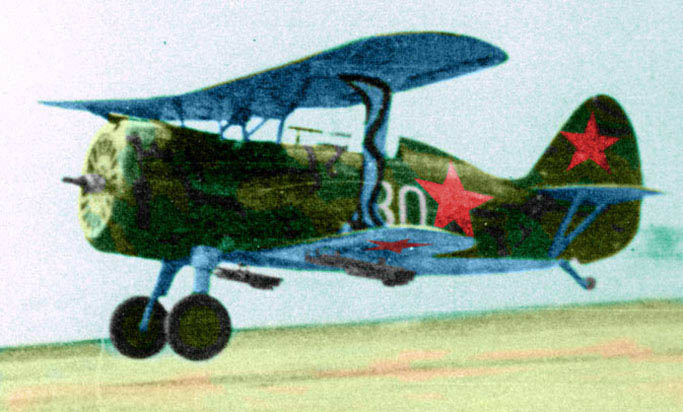
Probably there is one wrong presupposition in these profiles: in my
opinion, the image can't be interpreted as a two-shade camouflage, but
as a three-shade one.
In first place, the aircraft was fully repainted (probably after the
winter 1941), because we see that the demarcation line between camo and
light blue is not standard. So, the use of AII green as a base is likely,
instead of the darker green of standard I-15bis livery.
In second place, a black stripe is well visible on the wing strut,
on a light blue background. This stripe is surely darker than the dark
band visible on the cockpit side, that, as a consequence, can't be black.
Probably it's AII dark green.
At the end, some black stripes can be seen on the camo sceme, even
if they aren't so clear and well contrasted as the one on the strut, on
light blue background. Why shouldn't them be there? A man charged an air
brush with black paint, went to the aircraft ... and then? Did he paint
only one stripe?
| I tried to use Photoshop to rebult a possible camo scheme on the bw
scan. I painted the colors on a separate layer, leaving the original darkness;
this allowed me to switch off the colors to check the work when needed.
The colorized image is not a masterpiece, but it wasn't born for this, only as an help. In spite of the poor image, I am fairly sure that this interpretation is better than those suggested by the already mentioned sources. |
 |
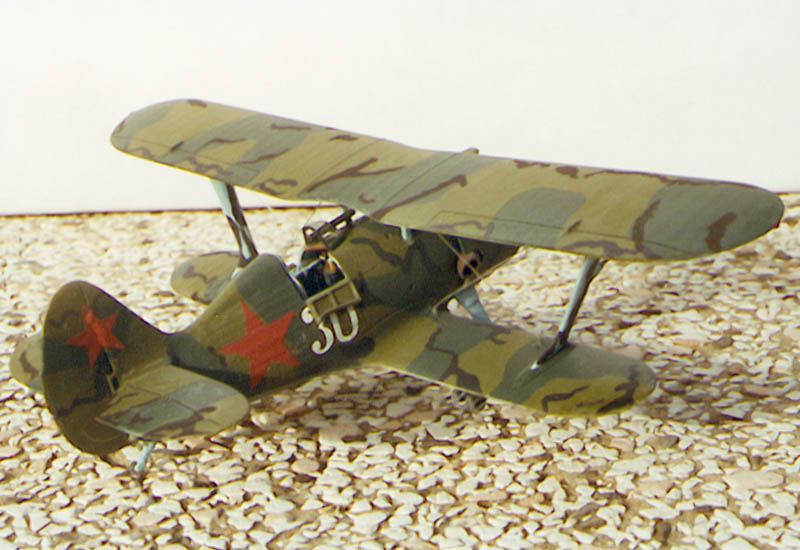
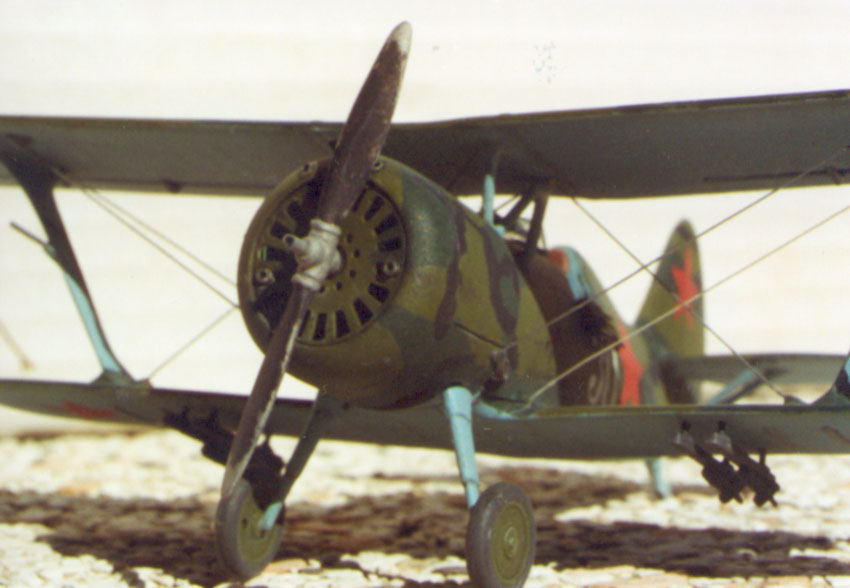
At the end, here are some photos of my model. It has not come out as
I wanted, but it has some points of interest all the same.
 |
 |
 |
 |
 |
 |
Main references for this model:
Polikarpov fighters in action pt.1 by Hans-Heiri Stapfer
Mir Aviacii
Polikarpov's biplane fighters of Yefim Gordon and Keith Dexter
Barbarossa Victims of Tomasz Kopanski
Soviet Air force Fighting Colors 1941-1945 of Erik Pilawskii
http://www.asahi-net.or.jp/~pc6m-wkn/Monino.htm
http://www.kiwiaircraftimages.com/aviation.html
http://www.aircraftresourcecenter.com/
http://www.paulnann.com/make/
http://vvs.hobbyvista.com/ModelGallery/poli_i15_72.php
http://vvs.hobbyvista.com/ModelReviews/Bittner/ICM_I152/index.php
http://www.airwar.ru/other/draw.html