Yak-3 VK-107A
Amodel kit 72105, 1/72
Updated on June 6, 2005
go to Yak-3 main page

 
Amodel has released a model kit of this good-looking fighter. 
Although the prototype of this aircraft flew in early 1944, its occasional use during the Second World War is uncertain, and it has to be considered a minor postwar type.
The boxart is highly accurate, and can be used as a reference.
Few photos of this version are available, but many details can be extrapolated from standard Yak-3 and Yak-9 U/P, that had very much in common.

 
This sprue includes fuselage halves and two alternative cowlings, with one gun (for silver/red test aircraft) and with two guns (for series aircrafts).
Two rudders are enclosed: fabric covered one and metal covered one. The instructions are unclear about which one should be used, but the difference is minimal. However, we should use the metallic one for the aircrafts considered on the decals sheet.
There is a dorsal hatch that has to be mounted closed; this small bother is due to commonality of pieces with Yak-9 P/U of the same firm; real Yak-3VK-107 should be 10 cm shorter than Yak-9U/P, but I think that we can tolerate this.

Two canopies are included: 

  • without armoured windshield;
  • with armoured windshield.

They both include a rear armoured glass, that has to be used for both versions. It should be painted with a slightly green/brownish clear shade; its contour frame should be painted grey.
 

The wings show overposition panelling and fine rivets. In fact, the wings of most Yak-3 VK-107A were metallic, instead than plywood covered as on usual Yak-3s.
A noticeable particularity of this kit is that surface details are well reproduced in scale, so we see few slightly recessed lines, some overposition joints and very fine rivets; fabric covered surfaces are recognizable only under particolar conditions of light.
This exceptional accuracy can create some unease for most modellers, accustomed to recessed panel lines and strongly marked fabric covered surfaces; in fact, many details should remain nearly unvisible when the aircraft is painted, and techniques to evidence them are still to be studied. 
On the other hand, panels on real aircraft are scarcely visible on photos.
Before being glued, the upper and lower halves of the wing should be carefully thinned on their junction surfaces, else the rear edge would be too thick, and an unpleasant step will appear near the wingtips. Sanding the junction surfaces carefully before gluing, no filler is needed, and the nice surface details remain unaltered.

(left)  The position lights at the wingtips are very small and a bit protruding; 
they can be made with a point of red/turquoise paint, plus a small drop of some vinyl glue.

I suggest to open the wingroot intakes by drilling; the tunnel should be bent inward and pass internally to the wheel wells.
It's necessary to add small plasticard walls inside the wingroot air intakes to divide the air flows to supercharger to those to the oil coolers.
Fine landing gear with thin doors, struts and actuators are included. 
Each wheel is divided into three pieces, a trick to allow it to rotate after gluing. 
It will be necessary to drill a deeper hole for the wheel pin.
The mechanism for closing the doors is lacking and should be added (it should resemble a sort of H of brass wire). Brake wires should be added.
The struts are reasonably well made (compare with the first image, the second one is a replica based on a Yak-11)
  . 
The wheel disks, gear legs, wheels and internal side of the doors should be medium grey A-14; they appear as dark in original photos, even if some replicas and aircrafts in museums show them in light blue.

 
The doors should be remade with thin plasticard. Small levers should be added to the doors. 
The tail wheel of the model could be modified as turned aside.
The tail wheel bay should be partially closed by a tissue cover, opened rearward to allow the wheel retraction. 
The trim actuators should be added on the undersurfaces of both elevators.
We have to drill an opening in the fuselage to pass the shaft actioning the elevators.
Note the position light on the rudder; on the kit, this detail is very thin, be careful to not take it for a flash and remove it. 
It should be painted silver plus a drop of some vinyl glue.
The sprue with the propeller looks common with Yak-9 P/U of the same firm.
Fine details of cockpit are included too.  Belts and some levers could be added by painted paper and vinilic glue.
A well made water cooler tunnel is included; only, the cooler plates are too flat, without the characteristic mesh; we could glue some pieces of meshed alluminium from some food packaging; when painted, they give a realistic and cheap cooler.
 

The propeller should be slightly thinned. The spinner should be drilled for the gun outlet.

Very few flash is visible, forthemost on the spinner.
The pitot probe is too frail and has to be rebuilt by metal.


Image from Lotnicze n.46.  Click on the image to enlarge.
Here is an image of the cockpit of standard Yak-3. It is supposed very similar to that of Yak-3 VK-107A.


standard Yak-3

Yak-3 VK-107A

Yak-9P

Note the rear armoured glass (slightly brownish),  a wire and knob to pull back the shield and the rails.
A metal frame passes around the bulletproof glass.

The canopy profile, the gunsight and radio arrangement looks slightly different than on the standard model.
Note the wire antenna passing through the rear clear panel.

The gunsight looks identical to that of Yak-3 VK-107A. 
Note the armoured windshield, common to series Yak-3 VK-107A.

 
The Amodel kit reproduces the oil coolers outlets more or less as those of standard Yak-3s, and this seems good for the prototypes, and for the first all-metal aircraft built in Tbilisi with silver-red livery (that had air intakes over the nose different from those included in the kit).
The oil coolers outlets can be improved by tooling, or at least with black paint. The front part should be rounded in section, and the slot between fixed part and movable shutters should be done.
Here are images from a real Yak-3, both in open and in closed position. 
Some replicas show slightly different shape.

 
While the prototypes had the oil cooler outlets as on standard Yak-3s, the photos of one of the silver-red aircraft built in Tbilisi show a different profile, deeper and without the undercut, identical to that of Yak-9P;
it' s likely that it was typical of series aircraft.
To reproduce this aircraft, the pieces of the kit have to be modified or rebuilt.
When fitted, the exhaust stacks of the kit  should be slightly (0,2 mm) protruding from the upper and lower lips (as visible from the shadow on the second image). 
Note that a cooling device is partially hidden behind the front lip, and resembles a stack more.
The fuselage is closed between a stack and another, and external color should be visible.
These photos are from a Yak-9P.

 
The decals sheet seems nice, and includes red stars, instrument panel, stenciling, fuel indicators for the wings and red stripes for the silver test aircraft.
The transparent film has to be removed from the slot for exhaust stacks on the red stripes; as an alternative, they could be used as a master for masking and painting the stripe itself.

 
The painting schemes enclosed are for:
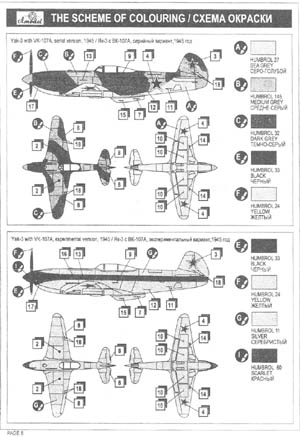
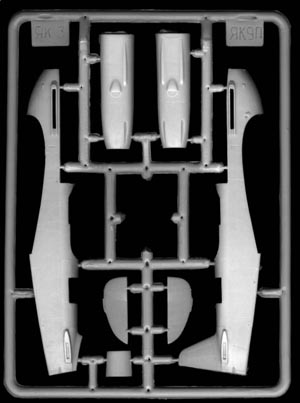
  • a series aircraft with light grey AMT-11/dark greyAMT-12/light blue AMT-7 camo scheme, without individual codes, with two synchronized weapons; I failed to find photos of these aircrafts, probably of Tbilisi production, but I consider the Amodel instructions as fairly reliable;
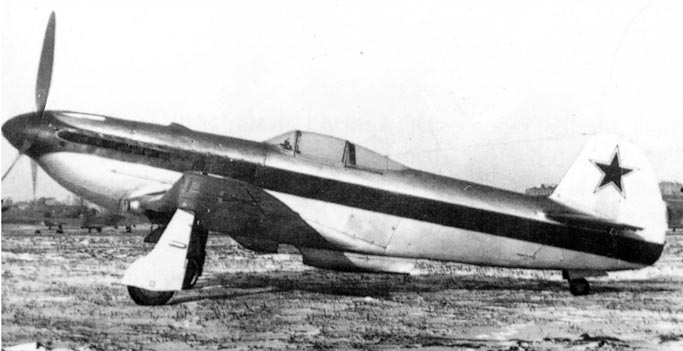
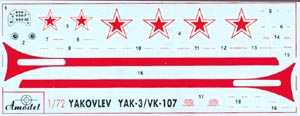
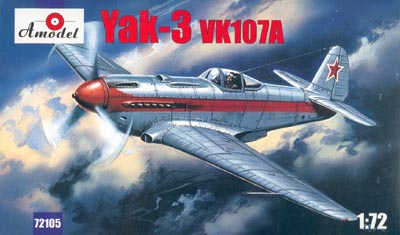
  • a silver/red "prototype" with one syncronized weapon; it should be the first all-metal aircraft built 
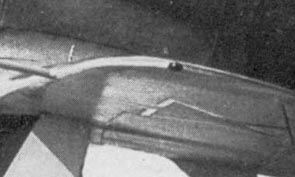
in Tbilisi and used for factory tests. Photos show that at least two different 
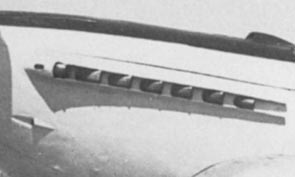
aircraft with silver/red livery did exist; the 
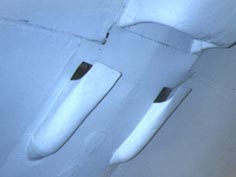
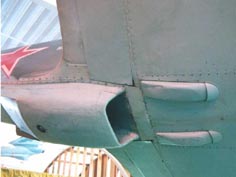
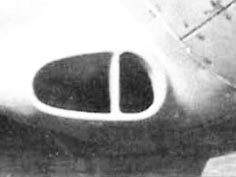
first requires modification of the nose top (identical to that of the prototype), while the second one requires modification of the oil coolers outlets (as on Yak-9P).     
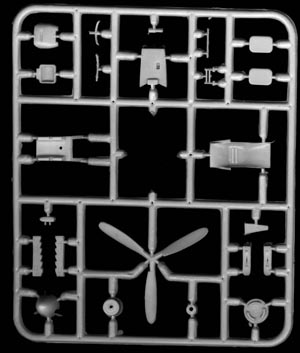
Note that its finish looks silver paint, not natural metal as one could think. The prop blades should be alluminium too, not black/yellow as reported on the instruction sheet.
If we want to extend this choice, we can consider some easy conversions:
  • the prototype built in 1943/1944, that had wooden wings and rear fuselage (requires the deleting of the panelling, and some modifications to the air inlets/outlets over the nose), two syncronized guns, unarmoured windshield and fabric-covered control surfaces;
  • yellow 32, an operative series aircraft used during the war by pilot P.P.Karavay, with AMT-11 grey /AMT-7light blue finish (but its identification is unconfirmed, it could easily be a misidentified Yak-9U);
  • the three production aircraft made in Saratov, that featured wooden rear fuselage and metallic wings, visible radio mast and all the uppersurfaces painted with AMT-11 grey on AMT-7 light blue undersurfaces;
  • the poswar replica of Garric, painted as a Normandie-Niemen aircraft; note that this unit never had this version; it should have more protruding exhaust stacks, no armoured glass and some small differences;
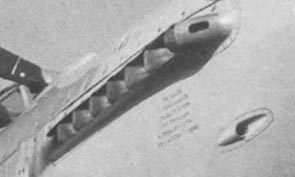
  • the Yak-3 VK-108 prototype, that had wooden wings and rear fuselage, fabric covered control surfaces, four lines of 6 exhaust stacks each, slightly smaller wingroot inlets, Spitfire-style supercharger inlet.

 
go to Yak-3 main page