Updated on May 31, 2012
|
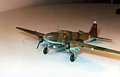
This model took the first place in the class
twin-engine propeller-driven aircraft in scale 1:72 at the regional competition
in Buffalo, USA in April 1999. The competition is held annually, it is attended
by about 800 modelers from all over the U.S. and Canada. |
I fell in love with this airplane as soon as I read about it in the first article
of Rodionov with beautiful drawings in "Modelist-Konstruktor" magazine.
Soon after the company VEB Plastikart announced the release of a model of this
aircraft in 1/72 scale. I started to look hard at this model. Years passed, but
nothing appeared on the store shelves, as well as in the Moscow club.However,
I remember seeing a model of IL-4 (according to rumors by Alpha), I even held
it in my hands, but it was already very expensive. What I remember is the fact
that the quality of castings was pointing at the recently released Yak-6.
It took another couple of years and I finally got the IL-4, but now in a beautiful
new box from Revell. My joy knew no bounds. But as they say, after the pleasure
comes grief. Due to design of the model (the fuselage consists of four parts)
the fuselage cross section was closer to a rectangle, and far from the oval.
It was impossible to fix this.
Some years after that a review of the alleged IL-4 by Alfa (I do not know what
I've seen at the Moscow club many years ago)., " appeared in the "Airplane”
magazine.
Soon after this the name began to appear in the catalogs (IL-4 from the "Zvezda"
and IL-4 from TOGO, not to be confused with TOKO!) By the way, after my model
was completed, I saw a TOGO kit in the store
for $ 40 and asked the seller to open the box. To my surprise, I saw the old
familiar "Zvezda / Alfa ', although the box, decal, and instructions were
quite a bit better than in my kit).
So, I decided (how was it possible not to especially after the publication of
new article with even better drawings in the "Aviation and Time" magazine.
I opened the package and looked inside the box. The plastic was dark gray, canopies
were thick and opaque, the panel lines were narrow and deep on the fuselage and
broad and shallow on the wings, cowlings did not even resemble thimbles. It certainly
did not look like "Alpha" kit from the old Moscow club.
But the fuselage was of an oval (hooray!!) cross-section.
I must say that I also had an assembled model of IL-4 by Revell as well as a
set of vacuformed clear parts from Falcon, New Zealand. This set includes the
canopies for Il-4 for Zvezda kit.
After comparing the two models by Zvezda and Revell, I decided to take the best
from each of them and try to do something decent.
The Fuselage
From the outset it was clear that the fuselage will be used from Zvezda as it
was at least similar to what it should be. Joining the two halves did not cause
any difficulties. I decided to detail the cockpit. The cockpit floor in Zvezda
kit is quite primitive, so I took the
appropriate item from Revell. A small adjustment and it's done. Looking at the
drawings, I saw that the pilot's seat from Zvezda has a better shape but still
had to be adjusted a little. I had to check alignment of the pilot’s seat
so that it will not stick out of the cockpit too much as the floor from Revell
sits higher than the native part from Zvezda. From the leftovers of photo-etch
frets from the other models I made side panels. Also, the compass had been added
(it is quite large and should be visible), oxygen bottles on the floor, and control
column were mounted. Navigator’s seat is better in Revell kit and I installed
it. Seatbelts were added to both seats. Then, both halves of the fuselage were
glued together. I recommend that at this stage the halves of the fuselage in
the top front area should not be glued.
I also made the rail antenna. I got the required number of thin plastic bars,
drilled holes in each of them and inserted them into the fuselage so that they
bulged slightly outwards. Thin steel wire was inserted in the holes of these
bars. The result fully satisfied me, you just have to be careful that the bars
with holes are lined-up properly.
I also cut small windows on both sides of the fuselage near radio operator compartment.
These windows were simply marked as panel lines and one should check references
to make them properly.
Center section
Due to design features of the Revell kit it was impossible to use its center
section, so I had to use this section from Zvezda model. I had to live with uncorrectable
error - sloping surface in this section (they must be straight). I must say that
when the
center section was docked with the fuselage, I was terrified. Gaps were not just
big, they were huge! But educated in the traditions of modeling in the absence
of decent models, I overcame fear and stocked up putty. The size of the gaps
was such that any filler will crack, and if will not crack, it will sag. The
problem was solved by inserting pieces of stretched sprue and abundant lubrication
by glue. The sprue inserts become soft and can be gently pushed in the gap. This
procedure also serves as reinforcement for the subsequent application of putty.
When the glue had dried, the joint area was sanded and checked for cavities (an
inevitable process.) Smaller gaps were just treated with putty. Sanding process
was repeated again. A thin layer of paint in the center section and fuselage
joints revealed minor defects. The problem was solved by using superglue which
covers minor irregularities and roughness. Actually, I use cyanoacrylates in
the construction of models quite intensively.
Wings
As I mentioned at the beginning, I really did not like the wings of the kit of
Zvezda, especially the nacelle cowls. This is especially noticeable when compared
with Revell kit. Dry-fitting a wing section from Revell kit, and they come with
engine gondolas, to the center section from Zvezdas, I realized that they can
be easily mated to each other.
The upper halves of the Revell wing are molded together with the center-part
and the lower consoles are separate. I sawed off the "extra" piece
on the upper halves of the wing. I recommend leaving a bit more than it should
be cut down, and then carefully adjusting until the fit is achieved.
Although the center section of Zvezda kit is criticized for its sloping surface
from the fuselage to the nacelles, the slope is even worse in Revell kit.
The joint between the consoles and the center plane is just on the inside border
of the engine nacelles. When the consoles were glued together and glued to the
center section, I realized that the idea I had did work. The joint was covered
with a thin plastic strip, which simulates the original steel fixing strap. I
made landing light from a piece of Plexiglas, and opened oil cooler intakes.
Stabilizers
Again, because of the design features of different models, horizontal stabilizers
of Revell kit did not fit to the fuselage of Zvezda. The Zvezda made the stabilizers
divided into two halves - top and bottom. Do not rush to glue them together!
Putting two halves together and trying to fit them to the fuselage mating position
revealed that the stabilizers were almost twice as thick compared to the profile
on the fuselage. Grinding off the inner surface of the stabilizer halves took
a very long time. Once again I used putty and cyanoacrylates to cover gaps between
the fuselage and stabilizers. Again, a thin layer of paint was applied to test
the joint for imperfactions.
Canopies
At first I tried to fit canopies from Zvezda. They were some kind of yellowish
(in my set, the later release of clear parts have a bluish tint) and quite thick.
It's not the main problem, however. Navigator’s access hatch and the astro-hatch
of the navigator’s canopy were given as separate part. To leave them open
would mean that excessive thickness of the clear parts will be too prominent.
Closing them proved to be impossible as they did not fit at all. I had to take
a risk and I decided to use the clear parts from the Falcon set. Previously,
I had to deal with vacuformed canopies of rather small size (for the Yak-1, La-5,
LaGG-3). It was no problem to deal with the pilot’s canopy. But the navigator’s
canopy is large.
I carefully cut off the two halves from the Falkon sheet and sanded the edges
of the cut. I put them together and test-fitted to the fuselage. At this point,
I realized that this was a way to go. Gluing together the two halves of this
canopy, and this should be done with superglue, utmost care was taken not to
get the infamous fog inside the clear part. I gave it time to dry and then gently
sanded along the joints. Then the canopy was carefully mounted on the fuselage
(the joint of the upper fuselage near the navigator's canopy was not glued).
It turned out that the fit was nearly achieved and playing with the fuselage
halves perfect seamless fit between the navigator’s canopy and the fuselage
was achieved.
Engines
Since the nacelles are casted together with the Revell wing, then clearly the
cowlings were also used from Revell. Engine cooling flaps in the Revell kit are
provided as separate parts and are given in open position. Cowlings are also
much better in Revell kit. According to my references, cooling flaps should be
in closed position when the louvers are installed and the louvers were installed
for winter operations. When louvers were not installed, flaps could be in any
position. Since Revell cooloing flaps were provided open, I had to remove the
louvers molded with cowlings. The engines were installed. At the time the model
was built, the only choice I had was to use M-88B engines by Engines and Things.
Better alternatives exist today (Vector).
Paint and Decals
Prior to painting clear parts were masked with tape (I used a narrow Tamiya tape).
It took several hours, plus two or three X-Acto blades because they should be
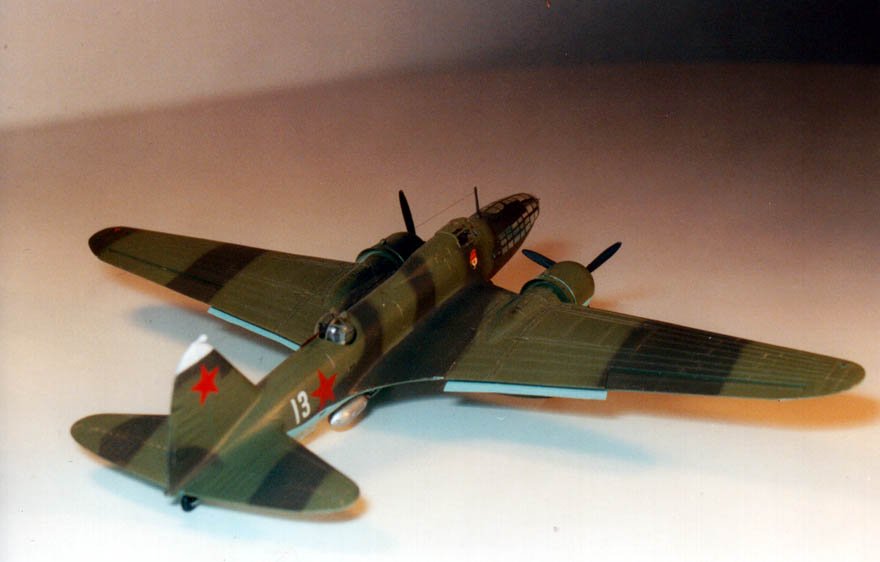
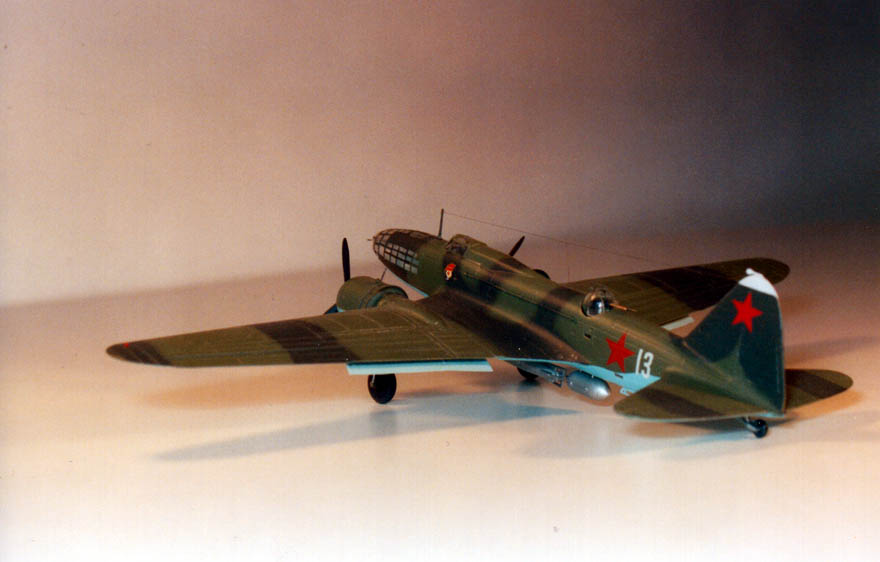
always sharp.. I used acrylic paints by Polyscale. I chose the color scheme of
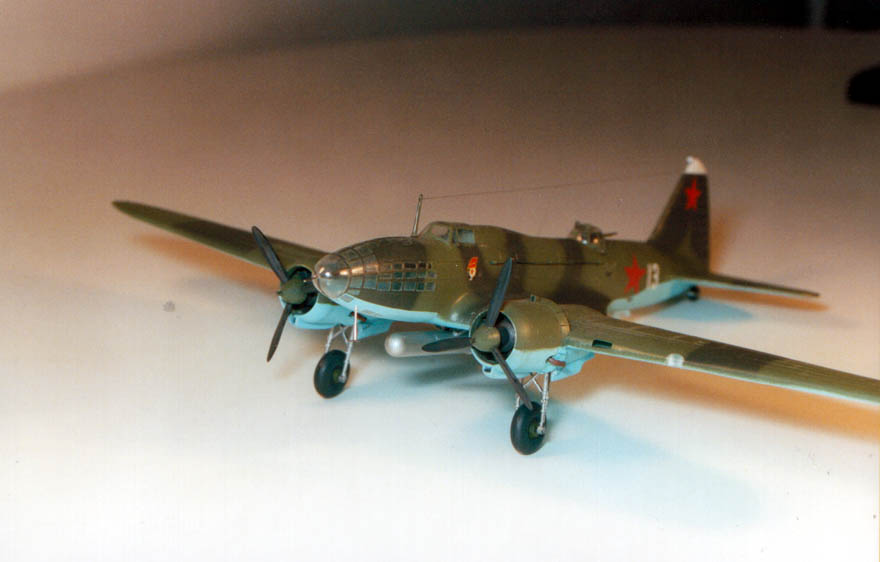
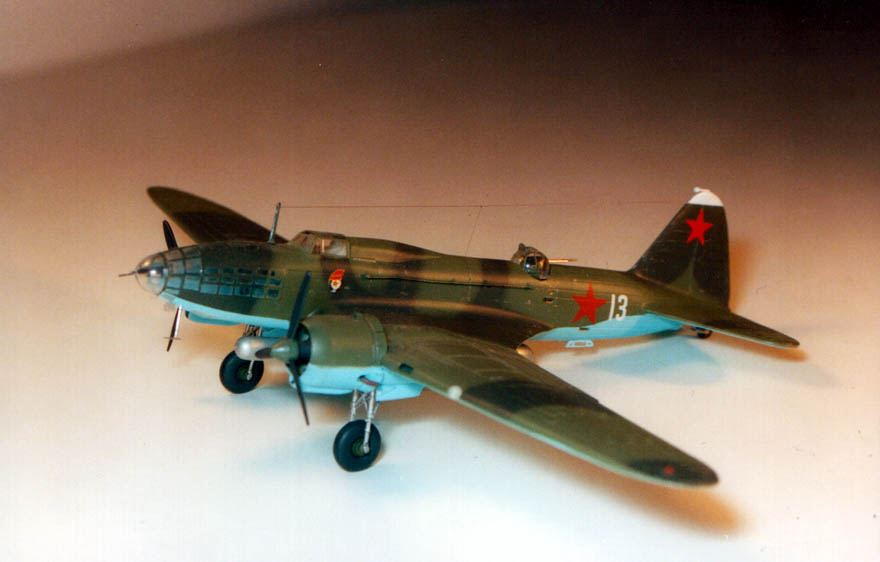
the IL-4 5 GvMTAP Black Sea Fleet. The aircraft was painted in green and black
on the top surfaces and blue on the bottom. A white stripe was added on the vertical
stabilizer. After drying, the model was covered with gloss varnish.
Decals were picked from spares and the flat coat was applied. Some weathering
was applied to replicate wear and tear especially along the walkways on the wing,
access hatches to the engines, and other equipment.
Detailing and Small Parts
The turret was taken from Revell kit. Machine gun barrel was made from needles
(better alternative is available today with UB series machine guns from Mini
World). Navigator’s machine gun (ShKAS) was used from Aeroclub (once again,
today Mini World is much better alternative).
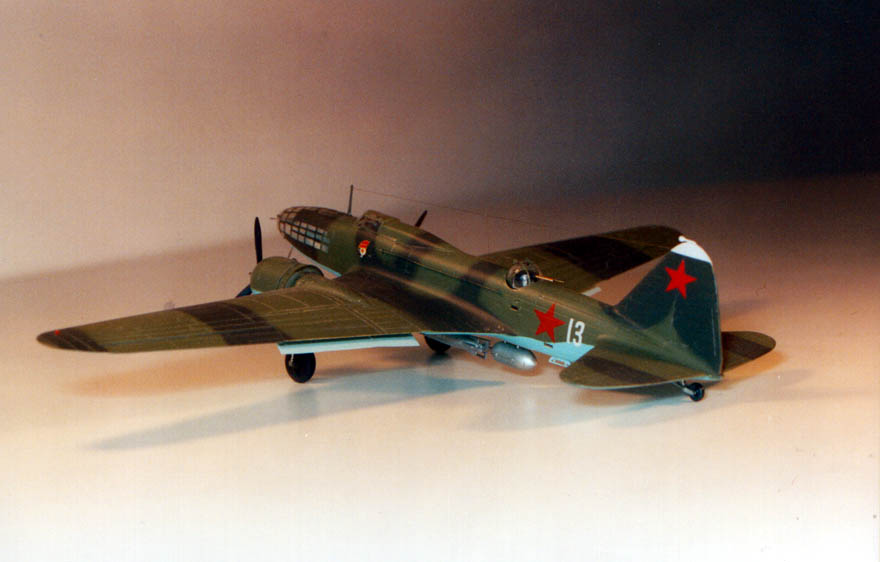
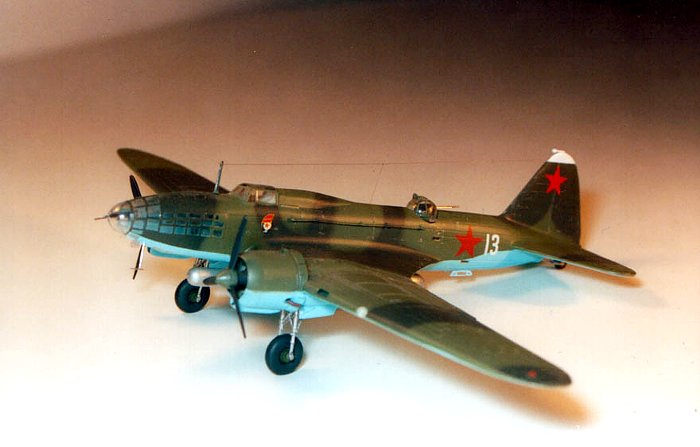
Torpedo was painted in silver and mounted on the bottom of the center section.
I took a torpedo from Revell (torpedo from Zvezda is good, but in my kit one
of the stabilizers was chipped). Container behind the torpedo was used from Zvezda
as it was better than Revell.
Radio-compass antenna was not installed on the bottom of the fuselage on torpedo
bombers as it will interfere with the torpedo. It should be installed either
above the navigator’s cockpit (never saw it in the photographs) or inside
the fairing behind the pilot’s cockpit, so it is not visible from the outside.
The pitot tubes were made from fine tubing.
Finally, antenna mast was installed and antenna wire was suspended. Previously
cut windows in the gunner’s compartment were filled with Crystal Clear
to simulate glazing.
Conclusions
To date there is no accurate model of DB-3F/Il-4. In my opinion the best combination
of solutions proposed by Zvezda (the fuselage) and Revell (wings, nacelles, motor
cowlings) with vacuformed canopies by Falcon allowed to make quite a decent model.
It is not without shortcomings but nevertheless better than each of these models
separately and certainly better than nothing at all. What would I do differently
over time and experience? I would not have moved in a hurry and would sand raised
panel lines on the wings and make recessed ones. l would better detail navigator’s
cockpit providing details for ammunition.
Gallery