|
by Massimo Tessitori |
|
|
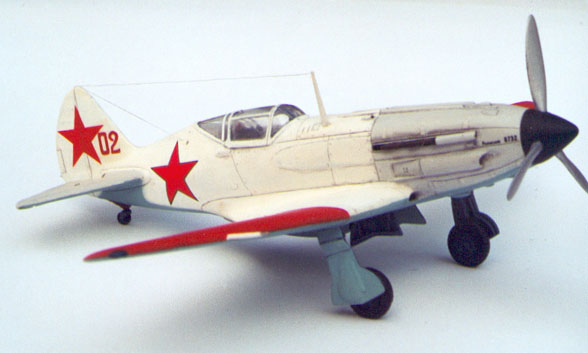
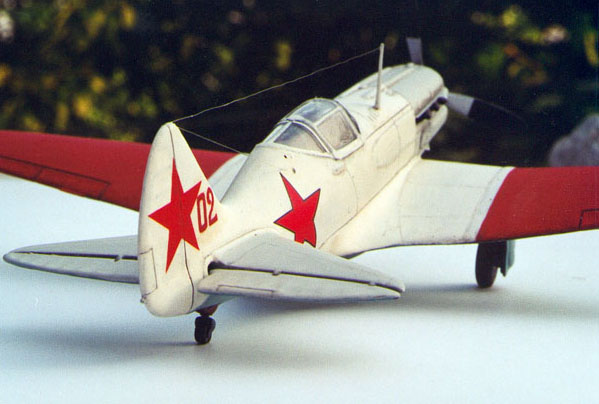
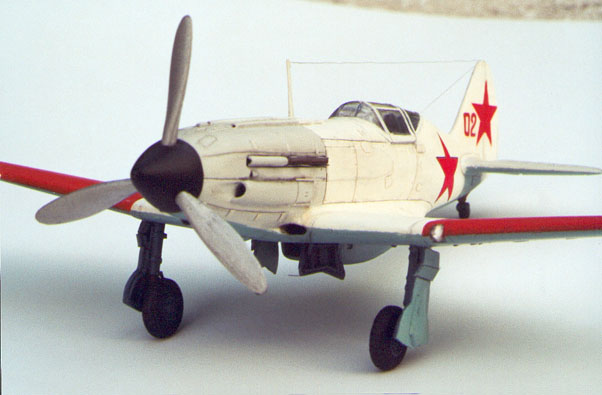
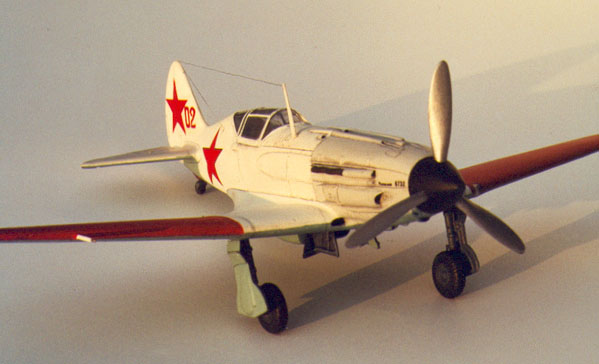
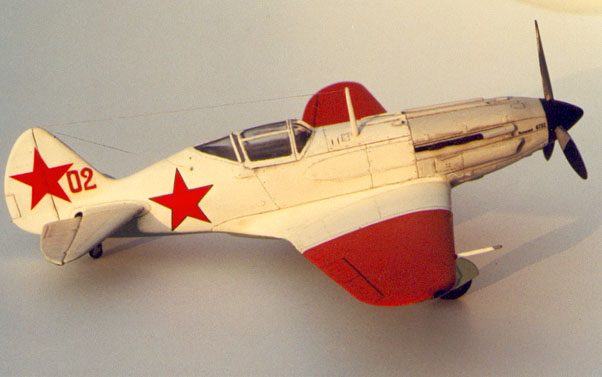
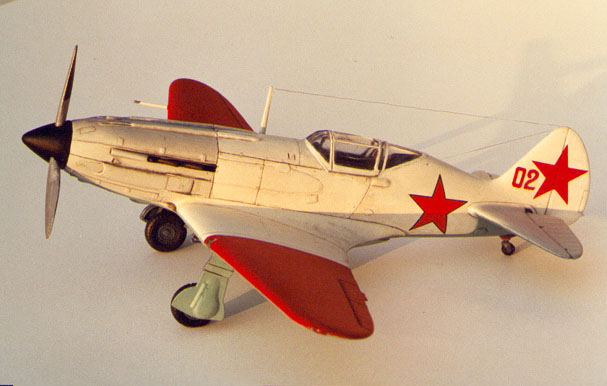
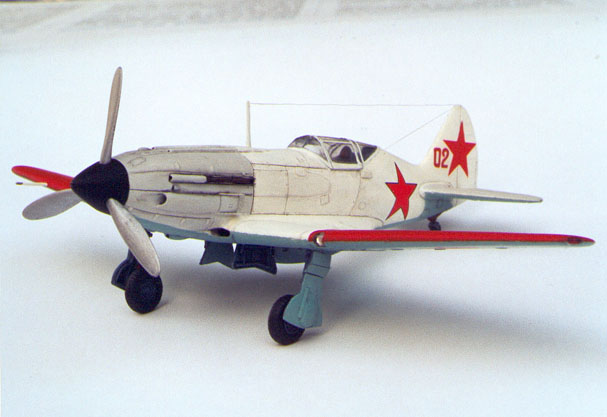
| The model is inspired by the most famous photo of MiG-3s; in this respect,
it is not very original.
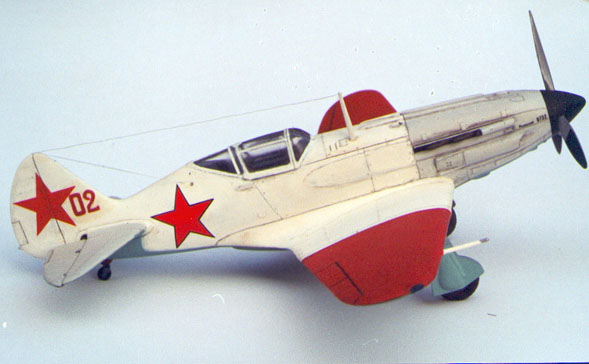
I have painted the wings as represented in traditional bibliography, ie red, even if I consider green wings as more likely now. |
 |
The cockpit was put in place with ClearFix, and the junctions were filled
with vinyl glue and retouched with white paint (on the front and rear part
only, not near the sliding part). This was more difficult than I had thought
it would be, because I understimated the step between the rear canopy and
fuselage. Besides, the rear junction between the canopy and fuselage is
too sharp in profile, it has to be well joined. I noticed this only when
the model was finished, and I left it as is.
Being the canopy too wide, it could be better to replace it wuth a
vacuforme one, as that produced by Falcon.
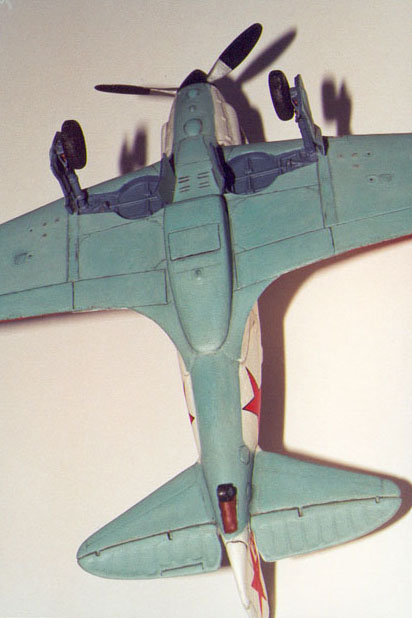
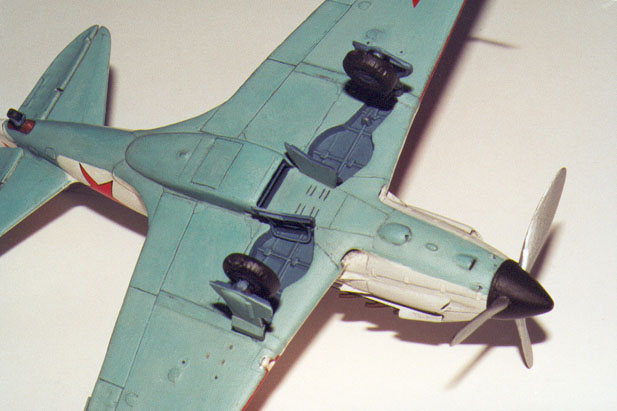
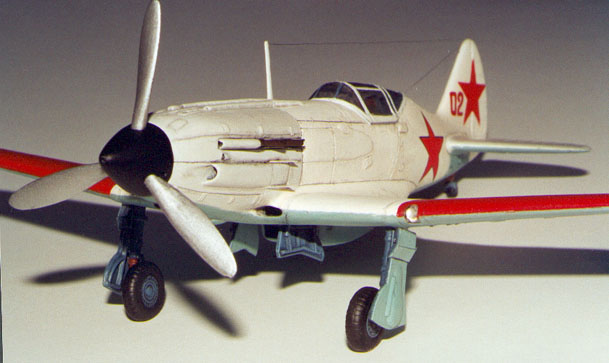
The undercarriage bays and cockpit interior were painted blue-grey and then drybrushed with lighter shades to enhance the details. More recent researches suggest that the most of MiG-3 had their landing gear painted light blue as the undersurfaces, with green wheel disks.
The panel lines were re-scribed with a sharp point after painting; this makes extremely neat recessed lines, giving a realistic result particularly on a model made with dark grey plastic. If one makes a mistake, he can easily remedy it by retouching the paint. The screw heads on the side panels were scribed, too.
After the re-scribing, I used Tamiya acrilic black, not mixed (giving a substance of thinner and a little black pigment) to pass over the recessed lines. If used in excess, this can be cleaned with alchool and cotton-swabs without deleting the Humbrol paint. This dark coat has the effect to enhance the lines, the recessed details and, at the same time, to give a slighty dirty and used look to the model.
I have added some small elliptical and rectangular panels made with painted paper and glued with little vinyl glue on the already painted surface; the original panels were not acceptably sharp. 16 engine cowling locks were made with small paper rectangles, too, but it would be better to engrave them.
After masking the clear parts and spraying gloss Gunze paint, I put the decals on. The red stars are from an ICM Yak-9, 1/72; the fuselage stars have a width of 13 mm and a black outline, while the tail and underwing stars have a width of 12 mm without any outline. Since some stars were damaged, I used some stars from the Maquette kit, and the color is identical. The code on the nose is from the Red Stars decal sheet, and so was the red 02; these were modified to correct the shape and the too dark shade of red.
Decals for this example were on the Encore decals sheet too, but I didn't use them because of many errors: they're of different size, with black 02 being the wrong color and shape and without the nose code.
The wire is from a nylon stocking shrivelled by sun rays; it's extremely thin. It was glued with the usual polystirene cement, and then painted steel.
Even if the real red 02 features underwing rockets in the only known photo of it, I have preferred to omit this detail because the model's structure has become too frail after being thinned.
I then applied a coat of Humbrol matt coat; the aircraft should be semi-gloss, but I have preferred the matt finish.
Removing the Maskol, I have cut away some matt coat particles from the clear pieces, then I passed a bit of thinner with a thin brush on the border to soften the clear layer.
Some words on the photos: they're shot with a Nikon F-601 with 35-70 mm zoom, provided with 18 mm prolongation tube between the objective and the camera body.
I've used three kinds of light: indirect sun light, direct sun light
at the sunset, and flash.
 |
 |
 |
 |
 |
 |
 |
 |
 |
|
|
 |
|
|